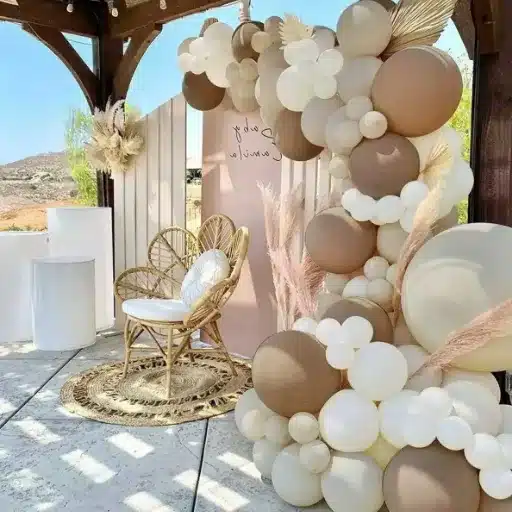
You can make a balloon garland without a strip using clear fishing line, hand-tied clusters joined with 260 balloons, or simple twine — and each method creates a fuller, more organic look than the plastic arch tape most tutorials use. This guide walks through all three approaches, with balloon counts, time estimates, and the pro techniques that separate a beginner garland from a professional one.
That is the short answer. But if you have ever opened a balloon garland kit, unrolled the plastic strip, and felt your heart sink at the fiddly holes and slippery knots, you’re not alone.
Priya felt exactly that way the night before her daughter’s seventh birthday party. The theme was “space explorer.” The walls were bare. And the balloon tape she ordered had been delivered to the wrong address.
Priya improvised with a spool of fishing line from the garage, a hand pump, and a box of latex balloons in five colors. Ninety minutes later, she had a four-foot garland draped across the fireplace that looked like it came from a party studio. She snapped a photo for the family group chat before bed, and three relatives asked for the “tutorial” the next morning.
You can get the same result without buying a single extra tool. A balloon garland without a strip takes slightly more hands-on work than the tape method, but it pays off with a softer, cloud-like silhouette that photographs beautifully from every angle. If you want to compare it with the classic approach, our complete balloon garland tutorial covers the strip method step by step.
Key Takeaways
- You can build a full garland with no strip at all: fishing line, hand-tied 260-balloon clusters, or twine all work
- A 6-foot no-strip garland takes about 60-90 minutes and costs 12−12−45 in quality latex balloons
- Plan 25 balloons per meter for a full organic look, and always buy 10-15% extra for pops
- The hand-tied cluster method is the best choice when you need to transport or reposition the garland
- Fishing line at 50-lb test disappears visually, so balloons appear to float together naturally
Why Make a Balloon Garland Without a Strip?
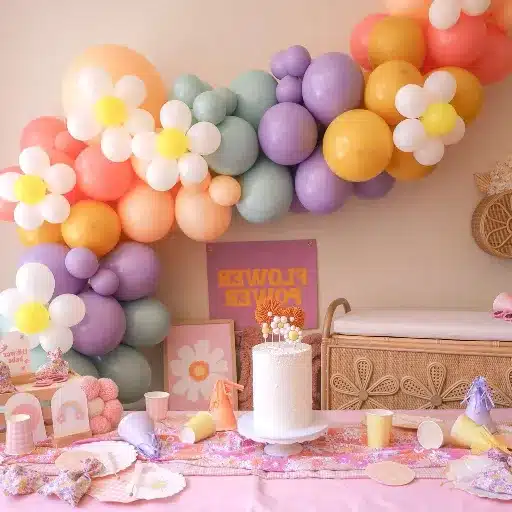
The decorating strip (also called arch tape or balloon tape) is the standard tool for garlands. It is a plastic band with pre-punched holes that you thread balloon knots through, and it works fine. But it is not the only option, and for many projects it is not the best one.
A no-strip garland gives you three clear advantages:
- A fuller, more organic silhouette. The strip forces balloons into a straight, evenly spaced line. Without it, you can cluster balloons unevenly, let the garland dip and rise, and build the cloud-like shape that dominates wedding and event trends.
- Zero plastic waste. Most balloon strips are single-use plastic. When you pair a strip-free method with biodegradable latex balloons, the entire garland breaks down naturally after the event.
- No extra equipment. You already own everything you need: scissors, string or twine, and a pump. The fishing line and 260-balloon methods require nothing you would not find in a hobby drawer.
Ready to build? Start with balloons you can rely on. Our biodegradable latex balloons are strong, vibrant, and made from natural rubber, so they hold up through setup, photos, and the whole party.
There is also an honest case for keeping the strip. It is faster for a uniform, symmetrical garland, and it is easier for absolute beginners who want a predictable result. Marcus, an event coordinator in Chicago, keeps strips on hand for corporate gigs where clients ask for clean, repeating color blocks. But for weddings, baby showers, and any project where he wants texture and movement, he drops the strip and builds by hand.
“When a bride asks for ‘organic but not messy,’ the strip fights you the whole way,” Marcus says. “Once I switched to clusters and fishing line, I could shape the garland to the space instead of fighting the tape.”
When a Strip Still Makes Sense
Stick with the strip method when you need speed, symmetry, or a very long uniform run such as a straight table edge. Choose a no-strip method when you want depth, organic shape, portability, or an eco-friendly build. Neither is wrong. The best decorators use both depending on the job.
Balloon Garland Without a Strip: Complete Supplies List
Gather everything before you inflate a single balloon. There is nothing worse than stopping mid-build to hunt for scissors.
Core Balloon Supplies
- Latex balloons in 3-4 colors and sizes: You need 5-inch, 11-inch, and 16-18 inch balloons for the classic mix. A 6-foot garland takes roughly 40-96 balloons depending on fullness. Order 10-15% extra.
- Electric balloon pump: A hand pump works for the first dozen balloons and exhausts you by the fortieth. An electric pump is the single best investment for this project and pays for itself by the second build.
- Fishing line OR twine OR 260 balloons: Your backbone, depending on which method you choose below.
Tools and Hardware
- 50-lb clear fishing line: For the fishing line method. Lighter line cuts your fingers and snaps under tension.
- 260 modeling balloons: Long, skinny balloons (the kind used for balloon animals). Uninflated, they act like strong rubber bands for joining clusters.
- Scissors: For trimming line, twine, and balloon tails.
- Glue dots or a low-temp glue gun: For tucking filler balloons into gaps. Never use a hot glue gun on latex; it pops on contact.
- Command hooks: Damage-free hanging on walls and doorways.
Eco-Friendly Upgrades
Swap standard latex for biodegradable latex balloons made from natural rubber. They decompose at roughly the same rate as an oak leaf, and because you are skipping the plastic strip, the whole project leaves a much smaller footprint. Reusable Command hooks and paper ribbon round out a sustainable build.
Method 1: The Fishing Line Method (Fullest Organic Look)
This is the technique professional decorators reach for when they want a lush, cloud-like garland. The fishing line disappears behind the balloons, so the clusters appear to float together.
Step 1: Inflate balloons to varied sizes. Don’t fill every balloon to maximum. Slightly under-inflate most balloons and vary the sizes across 5-inch, 11-inch, and 16-inch. Under-inflated balloons are rounder, easier to tie, and far less likely to pop when pressed together.
Step 2: Tie pairs, then twist into quads. Tie two balloons together by their necks to make a pair. Twist two pairs together into a quad (a cluster of four). Vary the colors and sizes within each quad so the garland reads as organic rather than striped.
Step 3: String the quads onto fishing line. Cut a length of 50-lb clear fishing line several feet longer than your target garland, leaving extra on each end for tying. Loop the line around one balloon in the first quad and tie it twice. Add each new quad by looping the line around a balloon and pushing the cluster tightly against the previous one. The tighter you pack them, the fuller the garland.
Step 4: Build an uneven shape on purpose. The fishing line method lets you add more balloons in some spots and fewer in others. Let the garland dip in the middle and rise at the ends. This irregular silhouette is the signature of a professional organic garland.
Step 5: Fill gaps after hanging. Once the garland is up, tuck small, under-inflated 5-inch balloons into gaps with glue dots. Do not overfill. A little negative space keeps the organic feel.
For a 6-foot garland, budget 60-90 minutes. The fishing line method takes slightly longer than the strip method, but the payoff is a fuller, more custom look. If you learn best by watching, this short video walks through the fishing line technique from start to finish.
Method 2: The Hand-Tied Cluster Method (No Fishing Line Either)

If you want a garland you can build in sections, transport, and rearrange, the hand-tied cluster method is the answer. It uses no strip and no fishing line, just balloons tied to each other.
Step 1: Build your quads. Same as above: inflate pairs, then twist two pairs into a quad. For a beefier cluster, twist three pairs into a six-balloon cluster. If the tying feels awkward, Purely Celebrations has a detailed guide on tying balloon pairs the right way.
Step 2: Connect clusters with uninflated 260 balloons. Knot one end of a flattened 260 balloon to a balloon in the first cluster. Thread it through the second cluster, stretch it slightly, and tie it back to the first. The tension holds the clusters together.
Step 3: Repeat to build the garland. Work cluster by cluster, varying the spacing so the garland curves naturally. You can connect two clusters tightly or leave a small gap and fill it later.
Step 4: Add mini clusters to fill gaps. Tie small clusters of three to five 5-inch balloons to the ends of 260 balloons and tuck them into thin spots.
Step 5: Hang with Command hooks and 260 loops. Tie a loop of 260 balloon to the back of a cluster and hook it to a Command hook. Because each cluster is independently attached, you can lift sections off to reposition without rebuilding the whole garland.
This is the method Marcus uses for venue installs. “If the client moves the backdrop table, I can pop two clusters off and relocate them in thirty seconds,” he says. “Try that with a strip garland and you are rethreading the whole thing.”
Method 3: The Twine Method (Simplest for Beginners)
The twine method is the most approachable, and it is perfect for quick projects like a front door garland or a small photo backdrop. It doesn’t produce the same lush cloud effect as fishing line or clusters, but it is nearly foolproof.
Step 1: Inflate and tie small twine pieces to each balloon. Cut 3-4 inch pieces of twine and tie one to the knot of each balloon.
Step 2: Tie each balloon to a main twine strand. Cut a long main piece of twine a few feet longer than your desired garland. Attach each balloon with a square knot, double-knotting for security.
Step 3: Slide balloons together to fill gaps. Before hanging, slide the balloons along the main strand and bunch them to eliminate empty spots.
Step 4: Hang by tying the strand ends to hooks. Use Command hooks, nails, or furniture. The twine is visible, so choose a color that blends with your balloons or plan to cover it with filler.
The twine method is ideal for kids’ parties, seasonal door decor, and any project where you want a quick result with minimal fuss. Expect about 45 minutes for a 4-foot garland.
How Many Balloons Do You Need Without a Strip?
No-strip garlands need more balloons than strip garlands because the clusters are packed tighter for fullness. Use this table as your starting point, then buy 10-15% extra for pops and mistakes.
| Garland Length | Standard Look | Full / Organic Look |
|---|---|---|
| 4 ft (1.2 m) | 24-32 balloons | 40-64 balloons |
| 6 ft (1.8 m) | 36-48 balloons | 60-96 balloons |
| 8 ft (2.4 m) | 48-64 balloons | 80-128 balloons |
| 10 ft (3 m) | 60-80 balloons | 100-160 balloons |
| 12 ft (3.6 m) | 72-96 balloons | 120-192 balloons |
Aim for a size mix of roughly 70% medium (11-inch), 25% small filler (5-inch), and 5% large statement balloons (16-18 inch). This ratio gives you the depth that makes a no-strip garland look expensive.
Need exact counts for a specific space? Our balloon quantity cheat sheet breaks down every garland length by style, and our team can help you size an order for weddings, showers, or corporate events.
How to Hang and Shape Your No-Strip Garland
Hanging is where beginners lose the most time, so follow this sequence.
Hang the base before filling gaps. Gravity changes how the garland drapes. Put the garland up first, then see where the real gaps are before you add filler balloons.
Use Command hooks for balloon garland installs on walls and doorways. Place hooks 18-24 inches apart along the path you want the garland to follow. For the fishing line method, tie the line ends to the hooks and let the garland drape naturally. For clusters, use 260 balloon loops.
Shape after hanging. Push clusters together or spread them apart, adjust the curve, and tuck filler balloons into any holes. Stand back every few minutes and check the silhouette from a guest’s eye level, not straight on.
Protect your surfaces. Wipe the wall where hooks will sit, press firmly for 30 seconds, and wait an hour before loading the hooks with the garland. This prevents the classic “garland fell off the wall” disaster.
Troubleshooting Common No-Strip Garland Problems
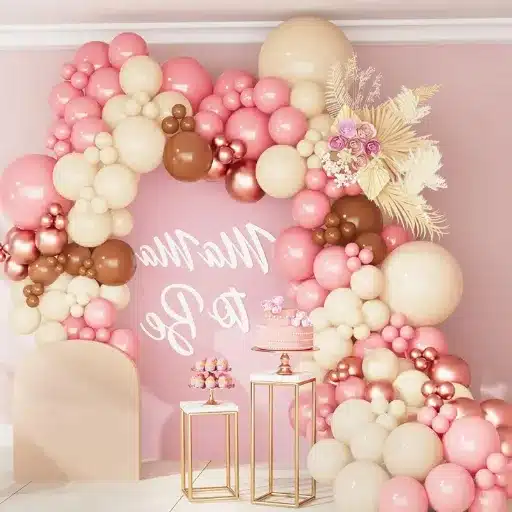
Even experienced decorators hit snags. Here is how to fix the most common ones.
Clusters separating or sagging. Your 260 balloon loops are too loose. Untie, stretch the 260 tighter, and retie. For fishing line garlands, re-tie the line around the balloon knot twice rather than once.
Visible fishing line or string. Tuck the line behind the balloon necks as you work, and fill over any exposed sections with 5-inch balloons or greenery.
Balloons popping. You’re over-inflating or pressing too hard. Inflate to 85% and give clusters room to breathe. Never use hot glue near latex.
Balloons deflating early. Air-filled latex garlands last days, but direct sunlight and heat speed up oxidation. Keep garlands out of sun and build them within a day or two of the event. If you see a cloudy sheen on the balloons, that is oxidation; there’s no fixing it, only prevention.
Transporting a pre-built garland. Carry the garland in sections. For cluster garlands, detach clusters and transport flat, then reattach on-site. For fishing line garlands, coil the line loosely and protect the balloons with a large garbage bag with the bottom cut out.
Balloon Garland Without a Strip: FAQs
Can you make a balloon garland without a strip?
Yes. You can build a complete balloon garland without a strip using clear fishing line, hand-tied clusters joined with 260 balloons, or twine. All three methods create a fuller, more organic look than plastic arch tape, and they require only materials you likely already own.
Can you make a balloon garland without tape or a strip?
Yes. You can build a balloon garland without tape or a strip using clear fishing line, twine, or uninflated 260 modeling balloons. Fishing line is the most popular alternative because it is strong, invisible, and gives a lush organic shape. Twine works for simple garlands. Uninflated 260 balloons work as connectors for hand-tied clusters. A metal hoop or mesh frame is another option for arches. For a visual walkthrough of these techniques, see wikiHow Fun’s guide to making balloon garlands.
Is a no-strip garland more expensive?
No. A 6-foot no-strip garland costs 12−12−45 in quality latex balloons, which matches what DIY tutorials such as The House of Hood Blog report for a comparable build. You save money because you skip the strip, and you can reuse the fishing line and hooks for future projects.
How long does a no-strip garland last?
Air-filled latex garlands last 5-7 days indoors when kept out of direct sunlight. Heat, humidity, and sun speed up deflation. Build the garland one to two days before the event for best results.
Do I need helium?
No. Balloon garlands use air only. Helium is only for floating balloons. Air-filled balloons are more stable, last longer, and are easier to shape into a garland.
Which Method Should You Choose?
Here is the quick decision guide:
- Choose the fishing line method for a lush, organic, professional look at a wedding, shower, or photo backdrop. It takes a little longer but delivers the fullest result.
- Choose the hand-tied cluster method if you need to transport the garland, build it in advance, or reposition sections on site.
- Choose the twine method for a fast, simple project like a front door or kids’ party, especially if this is your first garland.
For a 6-foot wedding or event garland, most people start with fishing line and never look back. For a portable event backdrop, clusters win every time.
Dana and her partner learned this lesson at their June wedding. They built one fishing-line garland for the ceremony and a second for the reception two miles away. The first one traveled flat and arrived perfect.
The second had to survive a car ride fully assembled, and two clusters came loose on the drive. Dana spent the trip with one hand holding the garland. On the day, she wished she had built both with the cluster method so they could travel in pieces and snap back together on site.
The Bottom Line
You don’t need a plastic strip to make a stunning balloon garland without strip. Fishing line delivers the lush organic look that defines modern event decor, hand-tied clusters give you portability and control, and twine offers a beginner-friendly shortcut for quick projects.
The key numbers to remember: 25 balloons per meter for a full look, 60-90 minutes for a 6-foot fishing line garland, and 10-15% extra balloons in your order for pops. Pair any of these methods with biodegradable latex balloons, and you get a decoration that is as kind to the planet as it is beautiful to look at.
Whether you are planning a wedding backdrop, a birthday wall, or a simple front door display, the no-strip approach opens up a whole range of designs you cannot get with a standard arch tape. Start with the fishing line method for your next project, and you’ll see why so many decorators have dropped the strip for good.
Ready to stock up for your next garland? Explore our biodegradable latex balloons and custom balloon solutions, or browse our step-by-step balloon garland tutorial for the strip method comparison. Contact us anytime for advice on sizing, colors, or bulk orders for event planners and retailers.