You can make a professional balloon garland with balloons, an electric pump, and one of three simple base methods: a decorating strip, fishing line, or uninflated 260 balloons. A six-foot garland takes roughly sixty to ninety minutes, costs 12–12–45 in supplies, and lasts three to five days indoors when built with quality latex balloons.
Sarah learned the hard way that balloon garland tutorials sometimes skip the details that matter most. She followed a viral video, bought forty balloons, and built her first garland the morning of her daughter’s party. By noon, it looked like a thin, lopsided tube with visible gaps. She had used only one size, inflated every balloon to the same roundness, and hung it in direct sunlight. The next year, she used seventy balloons in mixed sizes, built it the evening before, and placed it indoors. The difference was night and day.
This balloon garland tutorial will show you how to avoid Sarah’s mistakes. You will learn three construction methods, how many balloons you actually need, and the pro tips that turn a basic garland into a showpiece. Whether you are decorating a birthday party, wedding backdrop, or corporate event, this guide gives you the structure and confidence to build something beautiful. Looking for unique balloon decoration ideas that leave a lasting impression? Contact Trading Shanxi Co., Ltd. for customized products and professional support for your next event.
Key Takeaways
- A standard balloon garland needs 15–20 balloons per meter, or 25 per meter for an extra-full organic look.
- Three base methods exist: decorating strip (easiest for beginners), fishing line (best for organic fullness), and 260 balloons (most flexible for pros).
- Use 70% medium balloons, 30% small filler balloons, and optional 10% large statement balloons for balanced texture.
- Air-filled latex garlands last 3–5 days indoors; outdoor heat and sun reduce lifespan to 1–2 days.
- Under-inflating balloons slightly creates rounder shapes and reduces popping.
What Is a Balloon Garland?
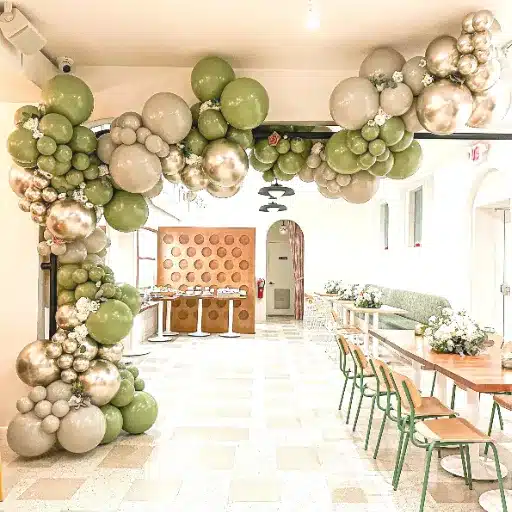
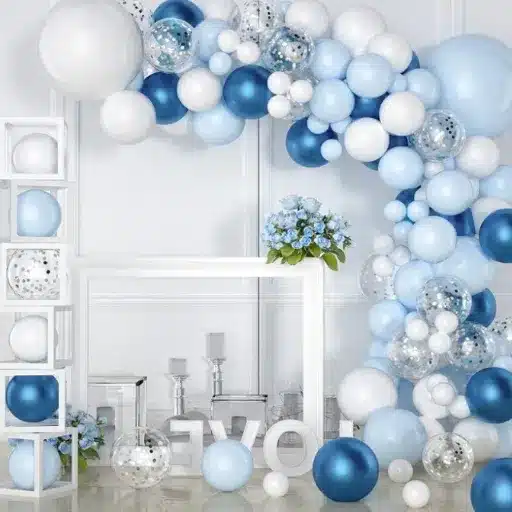
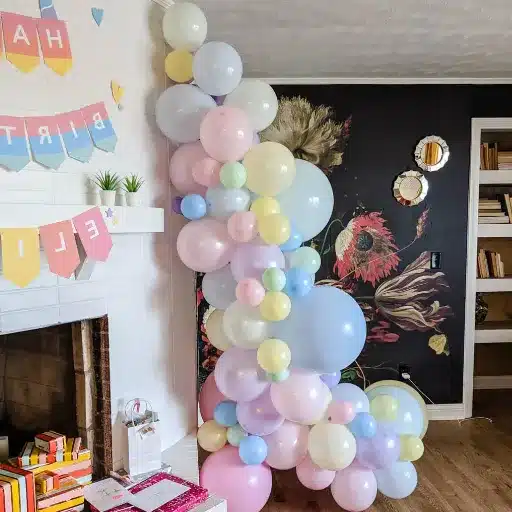
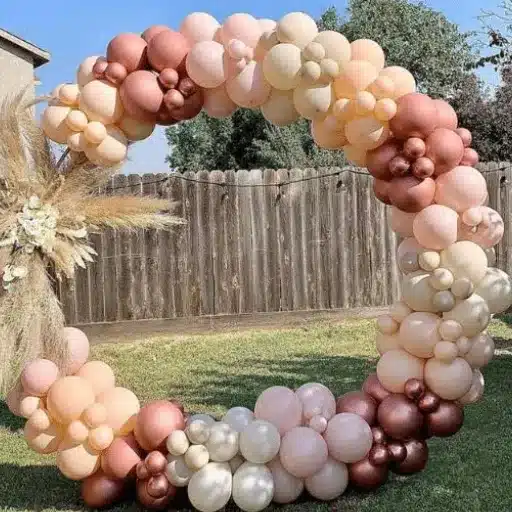
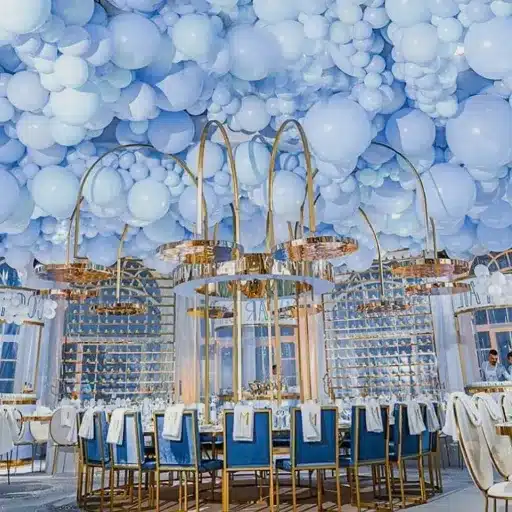
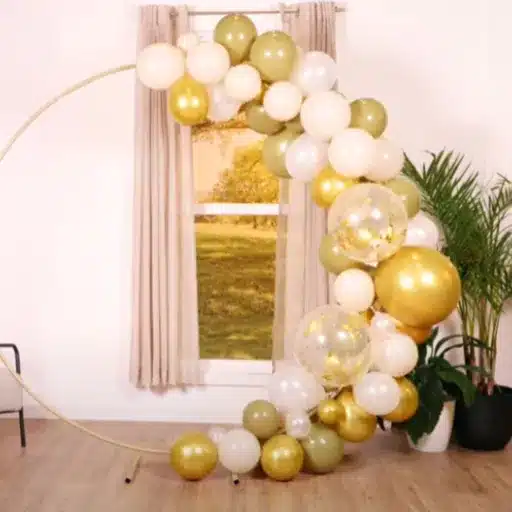
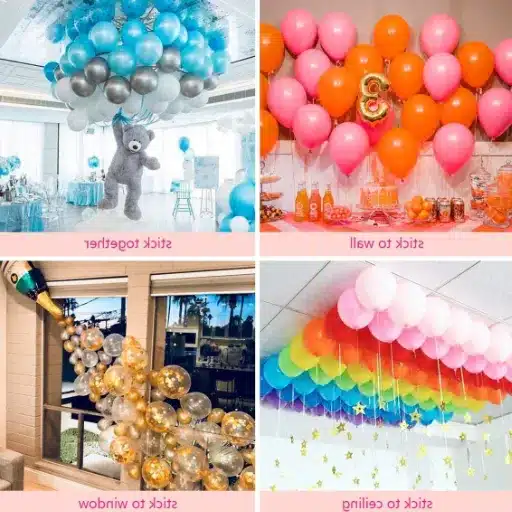
A balloon garland is a long strand of connected balloons used as a decorative element for events. Unlike a balloon arch, which typically forms a curved frame over an entrance, a garland can drape along walls, frame dessert tables, cascade from ceilings, or wrap around backdrops. It is usually built from air-filled latex balloons, which makes it far more durable and cost-effective than helium designs.
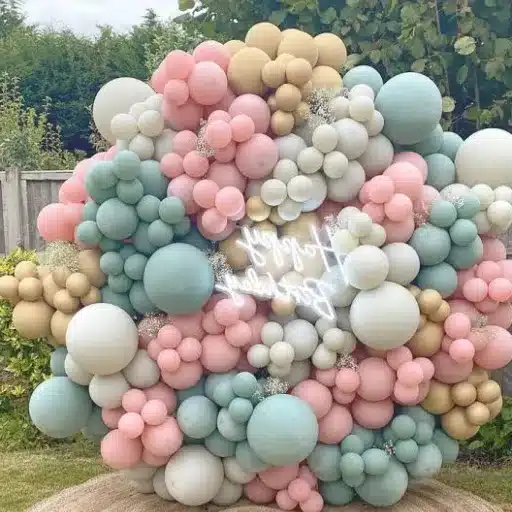
Garlands have become one of the most popular event decor trends because they deliver high visual impact without professional installation prices. A well-built garland looks luxurious, photographs beautifully, and works for almost any occasion. The secret is not fancy equipment. It is understanding size variation, spacing, and fullness.
For a complete overview of broader decoration ideas, see our guide to DIY balloon decorations.
Supplies You’ll Need for a Balloon Garland
The right supplies make the difference between a garland that looks professional and one that looks rushed. Cheap balloons pop, thin tape tears, and hand-pumping a hundred balloons will exhaust you before the fun begins.
Balloons
Latex balloons are the foundation. For a standard garland, use a mix of:
- 11-inch balloons as your base size (about 70% of total count)
- 5-inch balloons as filler balloons (about 30% of total count)
- 16-inch or 18-inch balloons as statement accents (optional, about 10%)
Professional-grade latex balloons hold air longer, have more consistent sizing, and resist popping better than budget options. If you are decorating a high-visibility event or planning to reuse leftover supplies, invest in quality materials.
Tools and Accessories
- Electric balloon pump: Saves time and gives consistent inflation.
- Balloon decorating strip or garland tape: A plastic strip with holes for attaching balloon knots.
- Fishing line or 260 balloons: Alternative base materials for organic garlands.
- Glue dots or low-temp glue gun: For attaching filler balloons after hanging.
- Command hooks, removable strips, or backdrop stand: For mounting the garland.
- Balloon sizer or cardboard template: Helps keep balloon sizes uniform.
Want to start with reliable materials? Explore our high-quality latex balloons designed for garlands and event decor.
How Many Balloons Do You Need?
Balloon count is the question beginners ask most often, and it is the detail many tutorials gloss over. The answer depends on garland length and how full you want it to look.
| Garland Length | Standard Fullness | Extra-Full / Organic |
|---|---|---|
| 1 meter / 3.3 feet | ~18 balloons | ~25 balloons |
| 2 meters / 6.6 feet | ~36 balloons | ~50 balloons |
| 3 meters / 10 feet | ~54–60 balloons | ~75–80 balloons |
| 4 meters / 13 feet | ~72 balloons | ~100 balloons |
| 5 meters / 16 feet | ~90 balloons | ~125 balloons |
For the size mix within those counts, aim for about 70% medium balloons, 30% small filler balloons, and optional large statement balloons. Always buy 10–15% extra to account for pops and mistakes.
These estimates align with industry guidance from balloon professionals. For another useful reference, BearloonSG’s balloon count guide breaks down quantities for different garland styles.
Method 1: Balloon Garland Tutorial with Decorating Strip
The decorating strip method is the easiest entry point for beginners. It keeps balloons evenly spaced and creates a structured, balanced garland.
Step 1: Inflate and Size Your Balloons
Inflate balloons to about 90% full. Slightly underinflated balloons are rounder, less likely to pop, and easier to cluster. Use a balloon sizer or a cardboard cutout to keep sizes consistent within each category. Aim for roughly half at base size, one quarter smaller, and one quarter larger.
Step 2: Attach Balloons to the Strip
Leave a twelve-inch tail of empty strip at each end for hanging. Pull the knot of each balloon through a hole in the strip, then slide it down to lock it in place. Space balloons about two to three inches apart. Alternate sides and colors as you go. The garland will look sparse at this stage, which is normal.
Step 3: Hang and Fill Gaps
Mount the garland with Command hooks or a backdrop stand. Once hung, step back and identify gaps. Inflate several 5-inch balloons and attach them with glue dots or a low-temp glue gun. Aim the knots toward the inside of the garland so they stay hidden.
Best for: Beginners, straight garlands, dessert table frames, and anyone who wants predictable results.
Method 2: Balloon Garland Tutorial with Fishing Line
The fishing line method produces a fuller, more organic look. It is the technique many professional decorators prefer for wedding and event backdrops.
Step 1: Create Pairs and Quads
Tie two balloons together by their necks to make a pair. Twist two pairs together to form a quad. Vary the sizes within each quad for texture. Work in batches of ten to fifteen balloons so the process stays manageable.
Step 2: String the Quads Together
Cut fishing line to your desired garland length plus extra for tying. Loop the line tightly around one balloon in the first quad and tie it securely. Add each new quad by looping the line around one balloon and pushing the quad tightly against the previous one. The closer you push, the fuller the garland becomes.
Step 3: Hang and Shape
Tie the ends of the fishing line to Command hooks or a frame. The garland will be flexible and easy to shape. Add 5-inch filler balloons with glue dots to close any visible gaps.
Mike used this method for his sister’s wedding backdrop. He built an eight-foot garland with blush, sage, and gold balloons the evening before the ceremony. The fishing line method gave him the organic, flowing shape he wanted, and the garland photographed beautifully against the venue’s white brick wall.
Best for: Organic designs, fuller looks, and decorators comfortable working without a structured strip.
Method 3: Balloon Garland Tutorial with 260 Balloons
The 260 balloon method is the most flexible option and the one many professional balloon artists use for complex shapes and installations.
Step 1: Build Pods
Create small clusters or pods of four to six balloons. Tie the necks together so each pod holds its shape. Use varied sizes and intentional color blocking for a sophisticated effect.
Step 2: Connect Pods with Uninflated 260s
Use uninflated 260 balloons as flexible ties between pods. Wrap a 260 around one pod, stretch it to the next pod, and tie it off. This creates a garland that bends, curves, and holds custom shapes far better than fishing line.
Step 3: Mount and Adjust
Attach the garland to hooks, nails, or frame points using 260 balloons. Because 260s are stretchy, you can rearrange pods easily during installation. Fill gaps with small balloon clusters at the end.
Best for: Professionals, complex arches, custom shapes, and event planners who need maximum control.
Pro Tips for a Full, Professional-Looking Garland
No matter which method you choose, these tips will elevate your results.
Under-inflate for roundness. Balloons inflated to 90% full are rounder and more durable than tight, fully inflated balloons. They also cluster together more naturally.
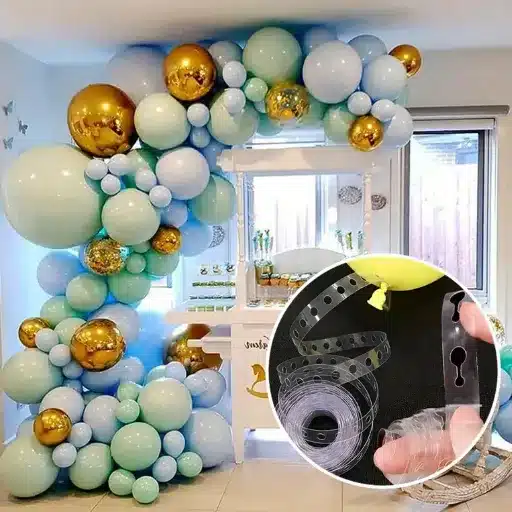
Vary sizes intentionally. A garland built from one balloon size looks like a tube. Mixing sizes creates depth, shadow, and that sought-after organic texture.
Plan your colors first. Stick to two to four colors. Use the 60-30-10 rule: 60% dominant color, 30% secondary color, 10% accent. Lay balloons on the floor before inflating to preview the balance.
Fill gaps after hanging. It is nearly impossible to spot every gap while the garland is on the ground. Hang it first, then add 5-inch filler balloons where needed.
Pre-build when possible. Air-filled latex garlands last several days. Build yours the evening before or up to two days ahead, then store it loosely in a large trash bag in a cool room. This saves stress on event day.
Add finishing accents. Greenery, faux flowers, foil balloons, or custom printed balloons transform a standard garland into a branded or themed statement piece.
For advanced organic techniques, BalloonHQ’s organic garland guide offers excellent professional insights.
Common Mistakes to Avoid
Even a good balloon garland tutorial cannot help if you fall into these common traps.
1. Overinflating balloons. Tight balloons pop easily and lose their round shape. Inflate to 90% full.
2. Using too few balloons. A sparse garland looks unfinished. Use the quantity table above and buy extras.
3. Sticking to one size. Single-size garlands look flat and mechanical. Mix sizes for depth.
4. Skipping the electric pump. Blowing up eighty balloons by mouth is exhausting and produces inconsistent sizes.
5. Ignoring the color plan. Random colors look chaotic. Choose a palette before you start.
6. Weak support structure. Use enough hooks, strips, or frame support for the weight. A sagging garland ruins the look.
7. Installing in direct sun or heat. Heat expands balloons and causes oxidation, which turns them chalky. Outdoor garlands should be installed as close to event time as possible.
8. Waiting until the last minute. Give yourself time to fix mistakes, add fillers, and adjust placement.
How Long Does a Balloon Garland Last?
An air-filled balloon garland made with quality latex balloons typically lasts three to five days indoors. In ideal conditions, it can look fresh for up to a week. Outdoor garlands are more vulnerable. Heat, sun, wind, and humidity can reduce the lifespan to one or two days.
Foil balloons last longer than latex, often one to two weeks, which makes them excellent accents. However, they are not biodegradable, so use them sparingly if sustainability matters for your event.
Store pre-built garlands in a cool, dry place away from direct sunlight. A large trash bag helps protect the balloons from dust and temperature swings.
Conclusion
A balloon garland tutorial should do more than list steps. It should give you the confidence to choose the right method, buy the right quantity of balloons, and finish with a garland that looks professionally made.
Start with the decorating strip method if you are a beginner. Move to fishing line when you want a fuller, organic look. Try the 260 balloon method once you are ready for custom shapes and professional installations. Remember to vary your balloon sizes, plan your colors, under-inflate slightly, and add filler balloons after hanging.
Jenna, an event planner, now builds all her client garlands using the fishing line method. She pre-builds them two days before each event, stores them in trash bags, and arrives on site with most of the work already done. Her clients assume she spends hours on installation. In reality, she has simply mastered a reliable process.
Your next garland can look just as polished. Start with one method, practice on a small scale, and build your confidence. Explore our range of latex balloons and foil accents to get started, or contact our team for custom designs that make your event truly stand out.