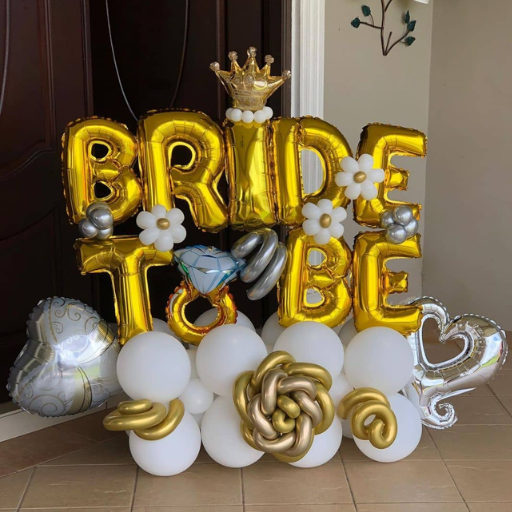

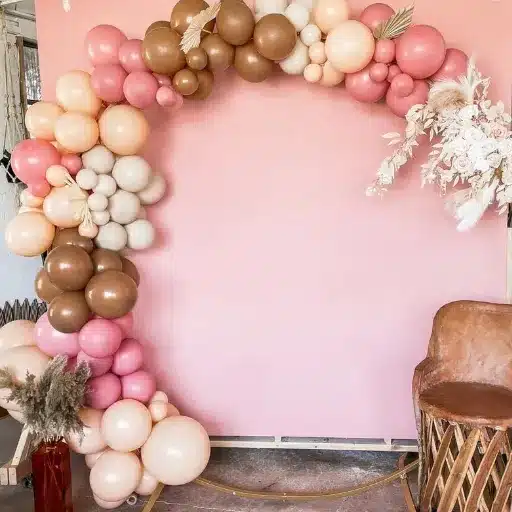
To install a balloon garland on a wall, plan your shape, prep the surface, place one Command hook or nail every 2 feet, and tie the garland to the hooks with fishing line or ribbon. Fill gaps with 5-inch balloons attached by glue dots, then step back and adjust the shape.
That sounds simple until you are standing on a ladder at 9 p.m. the night before a party, watching your perfectly built garland slowly slide down the wall. Most guides teach you how to inflate and cluster balloons, but balloon garland installation is where the magic either holds or falls apart.
In this guide, you will learn how to hang and secure balloon garlands on walls, backdrop stands, staircases, ceilings, and outdoor structures. We will cover the right hooks, anchors, and weights for each surface, plus timing, safety, and troubleshooting from real event setups.
Key Takeaways
- Use one Command hook or anchor per 2 feet of garland on walls, and always add a middle anchor on runs longer than 6 feet.
- Backdrop stands need sandbags or weights at the base, and garlands attach best with zip ties, fishing line, or 260Q balloons.
- Install indoor air-filled garlands 1–2 days before an event; outdoor garlands should go up the same day, 2–4 hours before guests arrive.
- Lighter balloon colors and shaded placement help outdoor garlands survive heat and sun.
- Professional installation starts around 400,whileDIYsetupstypicallyrun400,whileDIYsetupstypicallyrun150–$300 including tools.
Trading Shanxi Co., Ltd. has supplied balloons and event decor guidance to planners in over 50 countries. The steps below are the same ones our team shares with professional decorators and first-time DIY hosts. Contact Trading Shanxi Co., Ltd. for customized balloon garland manufacturing tailored to your event style.
What You’ll Need for Balloon Garland Installation

Before you climb the ladder, gather your tools. The right supplies make balloon garland installation faster, safer, and much less stressful.
Basic tools for every install:
- Command hooks or small nails/screws rated for the garland weight
- Clear fishing line, twine, or ribbon
- Balloon decorating strip or 260Q twisting balloons
- Low-temp glue gun and glue dots
- 5-inch filler balloons
- Ladder or step stool
- Measuring tape
- Pencil for marking hook points
Surface-specific supplies:
- Brick clips or masonry hooks for brick and concrete
- Backdrop stand with sandbags or weights
- Magnetic hooks for metal beams
- Ceiling hooks or adhesive ceiling mounts
- Railing clips or soft twist ties for staircases
Eco-friendly upgrades:
- Reusable Command-style hooks
- Biodegradable latex balloons
- Paper or fabric weights instead of plastic
Safety gear:
- Non-slip shoes
- Gloves for outdoor or rough-surface work
- A spotter when using tall ladders
Pro tip: Buy 10–15% more balloons than your quantity chart suggests. Pops happen, and having extra 5-inch fillers on hand saves trips to the store mid-install.
If you are still building the garland itself, start with our complete balloon garland tutorial before returning to this installation guide.
How to Install a Balloon Garland on a Wall
Wall installs are the most common balloon garland installation. They work behind dessert tables, over mantels, along entry walls, and behind head tables.
Follow these steps for a secure, professional-looking result:
- Plan the shape. Use a pencil to lightly mark where the garland will start, end, and dip or peak.
- Prep the surface. Clean the wall with a dry cloth. Dust and oils weaken adhesive hooks.
- Install anchors. Place one Command hook or nail every 2 feet. For garlands longer than 6 feet, add a middle anchor to prevent sagging.
- Attach hanging line. Tie fishing line or ribbon to the balloon strip or clusters at both ends and at the middle.
- Hang one end first. Loop the line over the first hook, then work your way along the planned shape.
- Fill gaps. Tuck 5-inch balloons into empty spaces with glue dots or a low-temp glue gun.
- Step back and adjust. Rotate clusters, push balloons into place, and check fullness from a distance.
Surface variations:
| Surface | Best Anchor | Notes |
|---|---|---|
| Painted drywall | Command hooks | Wait 1 hour after applying before hanging. |
| Brick | Brick clips or masonry nails | Pre-drill holes for a permanent install. |
| Concrete | Masonry hooks or adhesive strips rated for concrete | Test adhesion 24 hours ahead. |
| Wood paneling | Small finish nails | Easy to patch later. |
| Wallpaper | Command hooks with low-adhesive backing | Test a hidden corner first. |
Mini-story: Maria was setting up a blush-and-ivory garland for her sister’s baby shower. She skipped the middle anchor because the wall looked sturdy. Two hours into the party, the center of the garland sagged into the dessert table. She now installs a hook every 2 feet and one dead center on any run over 6 feet. No more sagging.
Want to make your next event stress-free? Explore our custom balloon solutions and let our team handle the design and installation details.
Balloon Garland Backdrop Stand Installation
Backdrop stands are ideal for photo booths, trade shows, weddings, and anywhere you do not have a usable wall. They also make breakdown easier because the whole structure moves as one unit.
Step-by-step backdrop stand installation:
- Choose the right stand. A 6–8 foot stand fits most dessert-table garlands. A 10-foot stand works for full photo-backdrop arches.
- Assemble on a flat surface. Extend the legs fully and lock all joints.
- Weight the base. Place sandbags or weights on each leg. A top-heavy garland can tip a stand in seconds.
- Attach from the top down. Use zip ties, fishing line, or 260Q balloons to secure the garland to the frame.
- Add side draping. Let extra garland cascade down the sides or pool on the floor for a fuller look.
- Secure against tipping. Cross-brace the legs if possible, or add extra weight to the back.
Common mistakes to avoid:
- Undersized stands that cannot support the garland weight
- Insufficient base weight, especially on carpet or grass
- Top-heavy builds that pull the frame forward
- Forgetting to hide zip ties with extra balloon clusters
Pro tip: 260Q twisting balloons are stretchy and easy to reposition. Professional installers often use them instead of zip ties because they allow last-minute adjustments without cutting anything.
For event planners and corporate clients, backdrop stands with branded garlands are one of the most requested custom balloon solutions we provide.
Staircase Balloon Garland Installation
Staircase garlands create dramatic, cascading visuals. They work for weddings, grand openings, milestone birthdays, and holiday decor.
Best shapes for staircases:
- Cascading garlands that follow the railing down
- Asymmetrical designs with longer drops on one side
- Railing wraps that coil around the banister
Installation steps:
- Measure the railing length. Include the vertical drop if you want a cascade.
- Decide on attachment points. Mark every 3–4 feet along the railing.
- Build in sections. Staircase garlands are heavy and awkward. Smaller sections are easier to carry upstairs.
- Anchor the top first. Secure the highest point before working downward.
- Attach with care. Use railing clips, cable ties, or soft twist ties that will not scratch wood or metal.
- Add fillers and greenery. Tuck 5-inch balloons into gaps and add faux eucalyptus or ribbon for movement.
Safety note: Never obstruct the handrail. Keep the garland on the outside of the railing, and make sure the stairway remains fully usable. For public venues, check fire-code requirements before installing anything on stairways.
Mini-story: James, an event planner in Austin, installed a cascading garland for a 50th birthday party. He used plain cable ties on an antique wooden railing and left small scratches. Now he keeps a pack of rubber-lined railing clips in his kit. The garland stays secure, and the venue stays happy.
Outdoor Balloon Garland Installation

Outdoor installs are beautiful but unpredictable. Wind, heat, sun, and rain can all turn a perfect garland into a disappointment.
Timing: Install outdoor garlands the same day, ideally 2–4 hours before the event. Latex balloons oxidize and fade faster in direct sunlight.
Anchoring methods:
- Weights: Use sandbags, water weights, or concrete bases at each end.
- Ground stakes: Secure garlands along fences, grass edges, or tent perimeters.
- Tent frames and pergola beams: Wrap garland around existing structure points.
- Fence ties: Attach garland to metal or wood fencing with zip ties or 260Q balloons.
Wind protection:
- Choose lower-profile shapes instead of tall arches.
- Build tighter clusters so balloons support each other.
- Avoid open areas where wind has a clear path.
Heat and sun protection:
- Use lighter colors, which absorb less heat.
- Place garlands in shaded areas when possible.
- Mist the garland lightly with water to reduce oxidation on hot days.
Rain and condensation:
- Air-filled garlands handle light mist better than helium designs.
- Always have a backup indoor plan if rain is likely.
- Do not install garlands under dripping trees or gutters.
Surface variations:
| Surface | Anchor Type | Tip |
|---|---|---|
| Grass | Ground stakes or weighted bases | Push stakes deep to prevent lifting. |
| Concrete | Weights or adhesive-safe anchors | Avoid drilling unless permitted. |
| Poolside | Weighted bases away from water | Keep electrical pumps and cords dry. |
| Tent | Frame clamps or zip ties | Test frame strength before loading. |
| Fence | Zip ties or 260Q balloons | Space ties every 12–18 inches. |
Pro tip: Under-inflated balloons hold up better outdoors. They are rounder, more flexible, and less likely to pop when the temperature rises.
If sustainability matters for your outdoor event, choose biodegradable balloons and reusable weights. They deliver the same visual impact with less environmental impact.
Ceiling and Suspended Balloon Garland Installation
Ceiling garlands add drama to entryways, dance floors, and stage designs. They draw the eye upward and make a room feel larger.
When ceiling installs work best:
- Venues with exposed beams or solid ceiling fixtures
- Dance floors where wall space is limited
- Stage backdrops that need overhead framing
Tools you will need:
- Ceiling hooks rated for the garland weight
- Magnetic hooks for metal beams
- Clear fishing line
- Ladder or scissor lift for large venues
- Laser level or string line for alignment
Installation steps:
- Plan anchor points. Space hooks every 2–3 feet along the planned path.
- Install ceiling hooks. Use existing fixtures where possible to avoid drilling.
- Suspend the garland. Tie fishing line to the garland and loop it over each hook.
- Adjust height and drape. Vary the lengths for a cascading effect.
- Hide attachment points. Tuck small balloon clusters around each hook.
Safety warning: Never hang garlands from sprinkler heads, smoke detectors, ceiling tiles, or light fixtures not rated for weight. Confirm the load capacity of any anchor point, and use a professional rigger for large commercial installs.
DIY vs. Professional Balloon Garland Installation
Some events are perfect for DIY. Others are better left to a professional installer.
DIY installation is best for:
- Small parties and home celebrations
- Budget-conscious hosts
- People who enjoy hands-on projects
- Events where perfection is not critical
Professional installation is best for:
- Large venues and outdoor events
- Complex designs with multiple surfaces
- Tight event timelines
- Corporate or branded events
- Situations involving ladders, scaffolding, or ceiling rigging
Cost comparison:
| Option | Typical Cost | Time for 6 Ft Garland |
|---|---|---|
| DIY kit only | ~$60 | 1–2 hours |
| Full DIY setup with tools | 150–150–300 | 1–2 hours |
| Professional installation | $400+ | 30–45 minutes |
What to ask a professional installer:
- Are you insured?
- Is setup and breakdown included?
- What is your weather contingency for outdoor installs?
- Do you provide cleanup and removal?
- Can you match custom colors or brand palettes?
Trading Shanxi Co., Ltd. supports both paths. DIY hosts can order balloon accessories, pumps, and biodegradable balloons. Event planners can request custom designs and bulk pricing for professional installs.
How Long Before an Event Should You Install a Balloon Garland?
Timing affects how fresh your garland looks when guests arrive.
Indoor air-filled garlands: Install 1–2 days ahead. They will stay full and vibrant for a week or more in a cool, dry room.
Outdoor garlands: Install the same day, 2–4 hours before the event. Heat and sunlight shorten their lifespan significantly.
Helium accents: Add these on the day of the event. Helium escapes over time, and day-of inflation gives the best lift.
Foil accents: These can be added 1–2 days ahead because foil balloons hold helium and air much longer than latex.
Storage before install: Keep completed garlands in a cool, dry place away from direct sunlight. Cover them lightly with a sheet to prevent dust and accidental popping.
Pro tip: If you must install the night before, choose air-filled latex in a climate-controlled indoor space. Avoid outdoor overnight installs unless the weather is perfectly calm and mild.
Troubleshooting Common Installation Problems
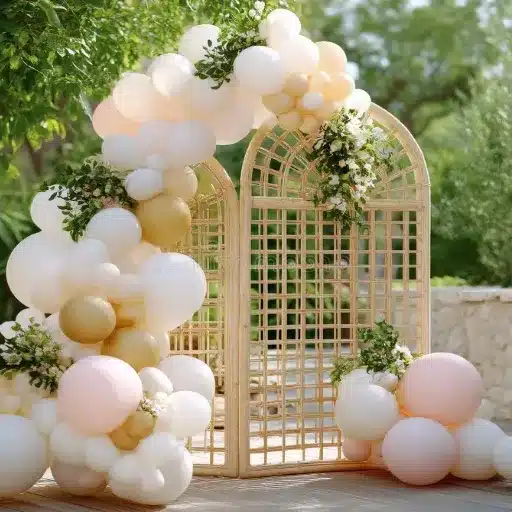
Even experienced decorators run into issues. Here is how to fix the most common balloon garland installation problems.
Garland sagging in the middle
- Add a middle anchor.
- Use tighter fishing line.
- Reduce the span between hooks.
Command hooks falling off
- Clean the wall thoroughly before applying.
- Wait at least 1 hour before hanging.
- Use hooks rated for the actual weight.
- Consider nails for heavy or humid installs.
Gaps visible after hanging
- Fill with 5-inch balloon clusters.
- Use glue dots to attach fillers directly to existing balloons.
- Step back and assess from a distance.
Garland sliding down a railing
- Switch to rubber-lined clips.
- Add more attachment points.
- Use 260Q balloons to tie clusters tightly to the railing.
Outdoor garland popping or oxidizing
- Install closer to event time.
- Move the garland into shade.
- Mist lightly with water on hot days.
- Use lighter colors that absorb less heat.
Uneven shape
- Step back every few minutes.
- Rotate clusters to fill flat spots.
- Adjust before applying final glue.
Mini-story: The team at a corporate gala in Dallas built a 24-foot branded garland across a stage. During rehearsal, the center dipped almost a foot. They added two extra ceiling anchors and tightened the fishing line. By doors-open, the garland looked crisp and level. The lesson: long runs always need middle support.
Reach Trading Shanxi Co., Ltd. for durable balloon garland solutions with flexible design options.
Balloon Garland Installation FAQs
Can you install a balloon garland the night before?
Yes, for indoor air-filled garlands in a cool, dry space. Avoid outdoor or helium-heavy installs the night before.
Can you hang a balloon garland with Command hooks?
Yes. Command hooks work well on painted drywall, smooth wallpaper, and other clean surfaces. Use one hook per 2 feet and wait 1 hour after application before hanging.
How many Command hooks do I need per foot?
Plan for one hook every 2 feet. Add a middle anchor for any run longer than 6 feet.
Can balloon garlands damage walls?
Command hooks usually leave clean walls when removed correctly. Nails and screws create small holes. Always test adhesive hooks in a hidden spot first.
How do you install a balloon garland on brick?
Use brick clips, masonry nails, or adhesive hooks rated for concrete and brick. Pre-drilling may be needed for heavy garlands.
How much does professional balloon garland installation cost?
Professional installation typically starts around 400.Specialtydesigns,balloonwalls,orlargeoutdoorinstallscanstartat400.Specialtydesigns,balloonwalls,orlargeoutdoorinstallscanstartat700 or more.
How long does an installed balloon garland last?
Indoor air-filled garlands last 1–2 weeks. Outdoor garlands last a few hours to 48 hours depending on weather.
Can you reuse installation materials?
Yes. Fishing line, backdrop stands, sandbags, and reusable hooks can all be used again. Replace Command hooks after each use because adhesive loses strength.
Conclusion
Balloon garland installation is the step that separates a good event from a great one. The right anchors, weights, and timing keep your garland secure and stunning from the first guest arrival to the final photo.
Keep these takeaways in mind:
- Use one anchor every 2 feet and add middle support on long runs.
- Weight backdrop stands heavily before attaching any garland.
- Install outdoor garlands the same day, and protect them from heat and wind.
- Choose the right anchor for your surface, and always test adhesion first.
- Know when to DIY and when to hire a professional installer.
Whether you are planning a small birthday party or a large corporate activation, Trading Shanxi Co., Ltd. has the balloons, accessories, and expertise to help your installation succeed. Browse our balloon garland tutorial to learn how to build the garland, explore biodegradable balloons for eco-friendly events, or contact us for a custom installation quote.
Ready to make your next event unforgettable? Start with high-quality balloons and expert guidance from the team trusted by event planners worldwide.