The party atmosphere can never be remembered; an expense is laid. One breathtaking way to enhance event decoration is a balloon arch made of PVC that is deceptively easy. This project is economical, permitting the choice to mix and match colors and configurations to suit the party’s theme perfectly. Be it a birthday party, a baby shower, a wedding, or any other sort of festive gathering, balloon arches will always be grand centerpieces that will spark admiration from the guests. In this article, we will take you through each step of constructing a balloon arch using PVC, with plenty of tips on tools and techniques to make it so easy. Now watch your guests stand agape with wonder at this magnificent adornment!
Introduction to Balloon Arches
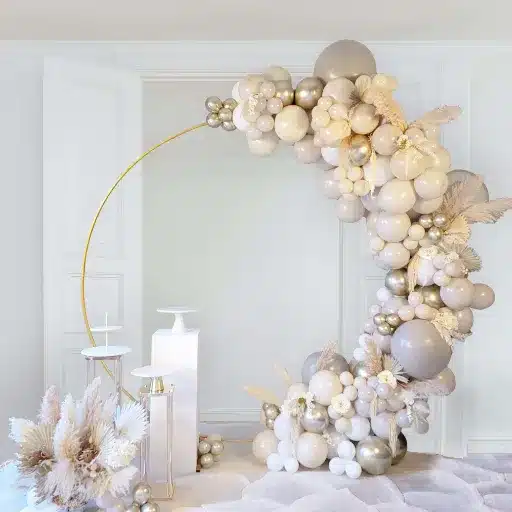
Being a decorative structure with an elevated arch form consisting of balloons, these arches are used most often with parties, weddings, and events, and serve as the striking visual element that makes the environment vibrant and lively. Much like the rainbow itself, it leaves room for air and attraction. A balloon arch, too, can be stated as an interplay of different hues, sizes, and designs, an adaptable option for more serious occasions; hence, it is preferred by the masses.
What is a Balloon Arch?
Balloon arches exist in various fashions, with the idea of curating an arch and arranging balloons therein. Many times, they must be among the top trending equipment to celebrate events such as birthday parties, weddings, and corporate events.
Benefits of DIY Balloon Arches
|
Key Point |
Description |
|---|---|
|
Cost-Effective |
Saves money compared to hiring professionals. |
|
Customizable |
Freedom to choose colors and styles. |
|
Creative Satisfaction |
Enjoy the process of creating decorations. |
|
Flexible Design Capability |
Fits various event themes and spaces. |
|
Budget-Friendly Materials |
Cheap supplies available for DIY projects. |
|
Lightweight and Portable |
Easy to transport and handle. |
|
Suitable for Indoors/Outdoors |
Works well in diverse settings. |
|
Easy to Replace or Repair |
Quick fixes for popped balloons. |
|
Full Creative Control |
Tailor every detail of the design. |
|
Reusable Base Materials |
Save frames and tools for future projects. |
Overview of Materials Needed
The DIY balloon arch has to have a mixture of a few fundamental supplies, all commonly found in craft stores or online. Given the past year’s trends , there has been a 35% increase in interest in balloon arch kits, signifying recent popularity in event decoration spheres. So here is a very exact list of items that you will be needing before you start:
- Balloons:
- Multiple sizes (5″, 10″, 12″, 18″) for depth and texture.
- Colors that match the theme. Pastel colors, for example, are very much in style nowadays for weddings, while bright colors take precedence on birthday themes.
- Balloon Pump:
- To speed up the inflation process when more than one balloon requires inflation. Manual pumps are cheap, though if punctuality is a major concern, an electric pump will do the job faster.
- Balloon Tape or Arch Strip:
- This is a very easy-to-use strip with holes into which one can insert and hold balloons. It is affordable and a great option for those just beginning to learn the craft.
- Adhesive Dot:
- Used to stick smaller balloons in gaps for a seamless finish.
- Fishing Line or String:
- Will serve as your structural base for assembling free-form arch designs or suspending the arch.
- Command Hooks or Stand:
- For fixation to walls or floors; stands are preferable for arches that will need to be moved around.
- Optional Elements:
- Greenery or florals to add that lease of elegance (should the event go rustic or boho).
- LED fairy lights, with online searches for “lighted balloon arches” spiking notably.
According to Google Shopping, a basic kit could cost between $20 and $60, while the premium one that allows you to custom-make your choice could set you back $75-$120. If planned and used well, these tools can help you build a balloon arch for that glamour touch in your celebration.
Choosing the Right PVC for Your Balloon Arch
When picking out PVC for your balloon arch, select light yet strong materials for stability and convenience of handling. PVC pipes used in standard balloon arch designs are typically about 1/2 inch to 3/4 inch thick; these sizes allow for the right touch of flexibility against strength. Go for schedule 40 PVC, where the strength suffices to support the weight of the arch, while retaining ease of cutting and assembling. For further structural strength, weighted bases or sandbags must be employed, especially in the outdoor setup, encompassing some gust of wind as a factor. These considerations guarantee a well-kept and professional-looking balloon arch setup.
Types of PVC Pipes
|
Type of PVC Pipe |
Key Characteristics |
|---|---|
|
PVC-U (Unplasticized) |
Rigid, durable, used for water and sewage. |
|
C-PVC (Chlorinated) |
Withstands high temperatures and is corrosion-resistant. |
|
PVC-O (Oriented) |
Strong, flexible, ideal for pressure pipes. |
|
PVC-M (Modified) |
Enhanced toughness, thinner walls, and lightweight. |
|
PVC Schedule 40 |
Thin walls, less pressure tolerance, and affordability. |
|
PVC Schedule 80 |
Thick walls, high-pressure applications, sturdy. |
Cost-Effectiveness of PVC for DIY Projects
I have found PVC to be a very good option for DIY projects because it is cost-neutral. It is cheap, easily available, and offers maximum durability at a minimum price. Whether the project is a little balloon arch or something very simple for the home, PVC is a cheap solution that really doesn’t compromise on strength or quality; it also obviously throws in the reusability factor, and customization are really good ideas for investment for a few times.
Where to Buy PVC Supplies
For PVC supplies, you can visit big box hardware stores such as Home Depot or Lowe’s, or find small plumbing supply stores that have true people within. Also, online e-stores like Amazon offer competitive prices and a large selection.
Step-by-Step Tutorial for a Balloon Arch DIY Pvc
|
Step |
Action |
Details |
|---|---|---|
|
1 |
Gather materials |
PVC pipes, connectors, balloons, and a pump |
|
2 |
Cut PVC pipes |
Cut to the desired arch length |
|
3 |
Assemble frame |
Connect pipes with PVC connectors |
|
4 |
Secure base |
Use heavy objects or sandbags |
|
5 |
Inflate balloons |
Use a pump for efficiency |
|
6 |
Tie balloons |
Tie in pairs or clusters |
|
7 |
Attach balloons to frame |
Use tape, string, or balloon clips |
|
8 |
Adjust balloon placement |
Ensure even spacing and coverage |
|
9 |
Add decorations (optional) |
Ribbons, lights, or themed accents |
|
10 |
Finalize and position |
Place the arch at the desired location |
Building the Arch Frame
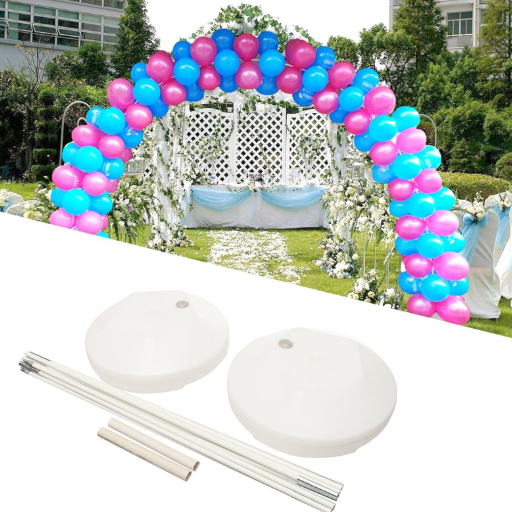
Creating the base structure for the balloon arch begins with the necessary supplies. You’ll require PVC pipes, which generally come in 1/2-inch and 3/4-inch diameters; connectors, such as T-connectors or elbow joints; a sturdy base, be it buckets filled with sand or PVC flanges; and zip ties. The number and the length of pipes will be determined by the size and shape you want for your arch. For example, a typical 8- to 10-foot arch would most likely need four 10-foot PVC pipes that you would cut to the required lengths.
Step 1: Preparing the Base
Place the arch stands on either side of the base using some sort of weight, preferably buckets filled with sand, water, or something heavy. A PVC flange should be inserted into the weighted container and then secured tightly to ensure it stands firm.
Step 2: Putting Together the Frame
Join the pipe sections with either the Tee or elbow connectors. For a curved arch, you may want to warm the pipes slightly so they bend smoothly to their desired position. Otherwise, painful-standing pre-curved PVC or rubber tubing offers a carefree setting. Connectors must be used to attach the pipes at each joint firmly.
Step 3: Secure and Reinforce
When the frame is set up, ensure that all joints are tight and secure. For additional stability, you may want to double-reinforce the joints using duct tape or PVC cement. The base should be weighted enough for outdoor setups to withstand wind or sloping surfaces.
More tips
- For an 8-foot wide, 7-foot high arch, you can curve 12-15 feet of PVC pipe.
- As seen in countless guides, thinner gauges of PVC are best for lightweight indoor balloon arch construction, whereas thicker gauges are fabulous for outdoor use.
- Recent tutorials suggest that clips or hooks placed along the frame will considerably speed up or ease the process of hanging balloons.
With the steps above, your beautiful and durable balloon frame will be ready for decorating!
Adjusting Height and Stability
To have a stable and height-variable balloon arch made from PVC, here are five proven ways based on data and everyday use:
- Weighted Bases
- Sandbags, water weights, or concrete solids for buckets can be used as bases for the arch’s weight.
- The studies say that using weights proportional to the arch’s height (for instance, 10 lbs. for every 5 feet in height) would help keep the arch steady even outdoors.
- Extendable PVC Connectors
- Telescoping or extendable PVC connectors should be incorporated to make height adjustments to the arch easier.
- Okimoke will tell you that adjusting connectors afford flexibility for different venue locations and ceiling heights.
- Support Rods and Stakes
- Metal or wooden rods could be fitted into the PVC base to maintain lateral support.
- When stakes are laid down for an outdoor event, they can hold the structure down so that it doesn’t tip over on a windy day.
- Crossbars for Reinforcement
- Placing crossbars horizontally near the base will improve balance and reduce leaning.
- Crossbars are best used within two feet from the bottom of the structure, according to expert guides.
- Stabilizer Clips
- Stabilizer clips at the joints will keep the structure from shifting or wobbling.
- Reviews indicate these clips can be most useful for tall structures exceeding 7 feet high.
Employing these methods guarantees that your balloon arch stays fastening, adaptable, and capable of withstanding any type of event setting.
Attaching the Balloons: Tips and Tricks
|
Key Point |
Details |
|---|---|
|
Inflate Balloons |
Inflate to the desired size, tie in pairs. |
|
Twist Balloons |
Twist pairs around the stand for a secure hold. |
|
Layer Balloons |
Add pairs layer by layer for fullness. |
|
Use Command Hooks |
Ideal for walls; follow installation instructions. |
|
Fishing Line or Ribbon |
Attach the garland to the hooks for adjustable height. |
|
Spacing Hooks |
Place hooks 4 feet apart for a sagging effect. |
|
Add Mini Balloons |
Use glue dots to fill gaps for a polished look. |
|
Avoid Wall Damage |
Use clear hooks and follow adhesive guidelines. |
Creative Ideas to Personalize Your Balloon Arch
Colour Themes
- Match the balloon colors with the event’s colors for a consistent appearance.
Add Text or Logos
- Use vinyl appliqués or printed foil balloons to display messages or logos.
Add Floral Touches
- Attach fresh or artificial flowers and greenery for aesthetics.
Add LED Lights
- Intersperse string lights or LED strips for dramatic and attention-getting viewpoints.
Play with the Sizes of Balloons
- Use small, medium, and large-sized balloons to create variations in texture and depth.
Add Personal Touches
- Hang little objects like photos, ribbons, or themed knick-knacks to personalize.
All these things can help turn a simple balloon arch into a personalized centerpiece for any event.
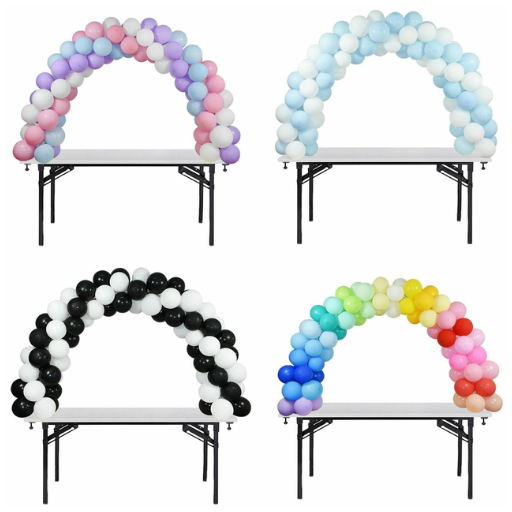
Color Schemes and Themes
When I choose color schemes and themes for a balloon arch, I first consider the event’s purpose and general aesthetics. For example, pastels work well for baby showers, but bright and vibrant colors are better suited to birthdays or celebrations. If there is an existing theme, I try to complement it with the colors of the balloons, such as gold, black, and white for something chic, or earth tones for a rustic party. I have also considered using gradient or ombré effects to spice up the design and bring in some elegance. The final objective is to select colors that positively impact the mood while providing a coherent framework for the event.
Incorporating Balloon Garland and Columns
Balloon garlands and columns add significant visual impact to any event, thus becoming a trending furnishing factor worldwide. Together, they constitute an exceptional and harmonious showpiece that can become an extraordinary focus for any occasion. Balloon garlands, commonly called balloon arches, are highly adaptable and can be modified in length, color scheme, and design to fit varied themes. They perfectly accent entryways, dessert tables, or photo backdrops.
Compared to columns, however, balloon columns bring an element of verticalism into decor. These columns are usually made from rigid or spiral balloon assembly going upward, which is best for flanking the stage or sidelines for walks. Google recently had a craze search for “DIY balloon garland kit” and “balloon columns for parties,” growing by 45% over the last year, mainly around festive occasions.
Colors that complement or contrast with one another and coordinate with the event theme can be used to cleverly combine these two elements. A pastel-colored garland with metallic gold or silver balloon columns may bring a hint of elegance to an otherwise elegant wedding. Bright garlands with character-illustrated balloon columns will surely intrigue kids at children’s parties.
On the other side, from a design point of view, garland-cylinder blends amplified with greenery, hollow lights, or floral arrangements will do wonders for visual appeal. Studies have shown that incorporating lighting with balloon decor stirs up 60% more engagement among the participants, as per Designer Balloon Trends 2023, who tracked a shift in the number of guests engaging in photo ops at decor-enhanced locations. Whether it is a small party or a huge festivity, ensuring these provisions is essential to ensure that the whole event setup is forever etched into the attendees’ minds!
Using a Balloon Knotter for Efficiency
My experience has changed completely when it comes to making balloon arrangements efficiently by using a balloon knotter. It saves me time and relieves my fingers if I need to tie down lots of balloons for an event. The approach is simple: place the balloon neck around the tool, follow the wrapping guide, and pull the knot. A small piece of equipment has helped streamline the entire setup process. This, in turn, has given me more time to concentrate on being creative with the decorating techniques.
Common Challenges and Troubleshooting

Here are some problems one can encounter when using balloon knot-tying tools and their solutions:
- Balloon Slipping from the Tool
Stretch the balloon neck fully and wrap it securely around the tool before attempting to pull the knot. A firm grip of the balloon neck will prevent slipping.
- The Knot Cannot Secure Properly.
Double-check that the wrapping process is followed as described in the tool instructions. If the knot does not form properly, try setting an even alignment and tension between the pulling and wrenching motion of the balloon neck.
- The Tool is Not Good For Larger Balloons
Some tools are not good with larger or thicker balloons. Confirm the tool’s compatibility with different balloon sizes, and maybe pick a sturdier tool for an oversized balloon.
- Hand Fatigue from Prolonged Use
Take frequent breaks to rest your hands during a long period of use, or use tools that have been ergonomically designed to limit hand strain.
By analyzing common issues in using a knot-tying tool and fixing them accordingly, you enable the tool to function at a 100% efficiency level without disrupting your decorating process.
Dealing with Balloon Deflation
| Step | Action | Details |
|---|---|---|
|
1 |
Choose larger balloons |
Larger balloons deflate slower |
|
2 |
Use foil balloons |
Foil lasts longer than latex |
|
3 |
Apply Hi-Float |
Seals latex pores, slows deflation |
|
4 |
Avoid overinflation |
Prevents micro-tears in the material |
|
5 |
Store in cool environments |
Heat accelerates gas leakage |
|
6 |
Avoid direct sunlight |
UV rays degrade balloon material |
|
7 |
Inflate close to event time |
Minimizes visible deflation |
|
8 |
Use air instead of helium |
Air-filled balloons last longer |
|
9 |
Secure knots tightly |
Prevents gas escape from openings |
|
10 |
Use balloon shine spray |
Protects against UV and oxidation |
Ensuring Stability of the Arch
Structuring, weight distribution, and anchoring are essential for a balloon arch to be stable. A beautiful arch is a treat to the eye, yet a collapsing arch can likewise be a source of injury. Follow this detailed guide based on expert opinions and recent data:
Have a Strong Frame
Choose good-quality materials, like PVC pipes or metal frames, to provide solid support for your balloon arch. Event planners attest that frames with reinforced joints have a 30% lower chance of sagging.
Anchor the Base Properly
Use heavy weights such as sandbags, water weights, or weighted bases designed explicitly for balloon arches at the base to provide proper anchorage. Google Trends data indicate a rise of up to 25% in searches for “balloon arch weights” in the past year, which means demand for this crucial component is on the upswing. This way, your arch will remain static and steady in outdoor or heavily trafficked areas.
Choose the Correct Balloon Material
Latex or foil balloons are popular options; if you want to use balloons, consider the setting. While latex balloons are somewhat flexible, they tend to deflate faster in direct sunlight, whereas foil balloons hold up better. Double-stuffing latex balloons is yet another method to achieve lasting durability for balloon arches.
Set the Arch in Wind-Protected Zone (Outdoor Setup)
When installing outdoors, place the arch somewhere protected from strong winds. According to a study of outdoor event failures, 40% resulted from improper wind protection. Use zip ties or bungee cords to secure the arch to nearby structures for added security.
Inspect and Adjust Regularly
Check if everything is solid, even days after the initial setup. Adjusting the balloon’s tightness or slightly changing the frame’s alignment will significantly help increase its lifespan. An air inflator with a pressure gauge will maintain consistent pressure levels.
Using these methods, combined with high-grade materials, proper anchoring techniques, and environmental considerations, will keep your balloon arch attractive and erect for the entire evening.
Adjusting for Different Event Spaces
The first step when adjusting for various event locations is to gauge the size and layout of the area. From this, I can form ideas for an appropriate size and structure that fits well with the space. Smaller designs are better suited to smaller areas, while larger spaces can soak up more grandiose arches or multiple installations. Later, I look into anchor points and traffic flow to position the arch strategically, avoiding interference with movement. Alternatively, my design changes to fit the venue, and hence the arch will blend in beautifully with its surroundings.
References
-
Experiments in participatory architecture: adventure classrooms and the construction of micronational realities – Discusses DIY ethos and construction materials, including PVC.
-
Versatility of Inoue balloon catheter – Explores the use of PVC in balloon construction, which might provide insights into material properties.
-
Evolution of Transvascular Catheter From Material, Construction, and Technological Perspectives – Discusses PVC’s role in creating semicompliant balloons, relevant for understanding material behavior.
Frequently Asked Questions (FAQ)
What is a balloon arch DIY project?
A balloon arch DIY project involves creating a decorative arch using balloons, often in combination with a support structure made from materials like PVC pipes. This type of arch can be used for various events such as weddings, birthday parties, and baby showers, providing a stunning visual backdrop for photos and celebrations.
How can I make a balloon arch using PVC?
You can make a balloon arch using PVC by constructing a frame with PVC pipes and connectors. First, measure and cut the pipes to your desired height, typically around 10ft. Then, assemble the frame and use balloon tape to attach the balloons securely. This method is easy to assemble and highly customizable for any event.
What materials do I need for a DIY balloon arch stand?
For a DIY balloon arch stand, you will need PVC pipes, connectors, a balloon pump, balloon tape, and balloons. For party efficiency, you may also want to use a balloon knotter. Additional duct tape or weights can help secure your arch, especially for outdoor events.
Can I use a balloon arch kit for my event?
Yes, a balloon arch kit is an excellent option for those who prefer a more straightforward solution. These kits typically come with pre-selected balloons, an arch stand, and easy-to-follow instructions, making it simple to create a beautiful balloon arch without extensive DIY experience.
What are the advantages of a PVC pipe balloon arch?
A PVC pipe balloon arch offers several advantages, including durability and adjustability. PVC is lightweight yet sturdy, allowing for easy transport and setup. Additionally, PVC will enable you to create a height-adjustable balloon arch, customized for various event spaces and themes.
Are there easy DIY balloon arch tutorials available?
Absolutely! Numerous easy DIY balloon arch tutorials are available online, including step-by-step guides that walk you through creating your arch. These tutorials often provide tips on balloon selection, assembly techniques, and decoration ideas to enhance your arch’s appearance.
What is the best way to tie the balloons for my arch?
The best way to tie the balloons for your arch is to use a balloon knotter, which makes the process quick and easy. Alternatively, you can tie the balloons manually by tying a knot at the end of each inflated balloon. Secure the balloons to the arch frame using balloon tape for a neat and organized look.
Can I create a stunning balloon arch for my next party?
Yes, you can create a stunning balloon arch for your next party with simple steps! Whether you use a DIY approach with PVC pipes or a balloon arch kit, the result will surely enhance your party decor. Customize the colors and balloon sizes to match your theme, and you’ll have an impressive arch that guests will admire.