You can make a balloon arch at home with a balloon pump, mixed-size latex balloons, a balloon decorating strip, Command hooks, and about 60 to 90 minutes. The basic process is simple: inflate the balloons, thread them onto the strip in an alternating size-and-color pattern, hang the strip in an arch shape, and fill any gaps with smaller balloons.
What if your next celebration looked like it came from a professional event stylist, without the stylist’s invoice? Many people assume balloon arches require helium tanks, expensive stands, or hired help. The truth is that learning how to make a balloon arch at home is far more accessible than it looks. With the right supplies and a clear method, you can build a stunning backdrop for birthdays, weddings, baby showers, or corporate events.
This guide agrees that beginners need straightforward, reliable instructions. We promise to walk you through every step, from calculating balloon quantities to hanging the finished piece. You will learn how to choose supplies, avoid common mistakes, and create an arch that holds its shape throughout your event. At Trading Shanxi Co., Ltd., we offer balloon decoration solutions for birthdays, weddings, grand openings, seasonal promotions, and special occasions. Contact us to discuss your specific needs.
Key Takeaways
- Use mixed balloon sizes (5″, 10″, and 12″) to create depth and a professional finish.
- Plan for roughly 5 to 6 balloons per foot for a full organic arch.
- An electric pump saves time and protects your fingers during inflation.
- Air-filled arches last longer than helium-filled ones and often need no stand.
- Build the garland on the floor first, then hang it for easier shaping and less stress.
What You’ll Need to Make a Balloon Arch at Home
Before you inflate a single balloon, gather your supplies. A complete balloon arch materials list keeps the process moving and prevents last-minute trips to the store. Most items are inexpensive and reusable for future projects.
Essential Supplies
- Latex balloons in mixed sizes. A standard DIY balloon arch uses 5″, 10″, and 12″ balloons as the foundation. Add a few 16″ or 18″ balloons for bold accents.
- Balloon pump. A hand pump works, but an electric pump is worth the investment if you are making arches regularly.
- Balloon decorating strip. This clear plastic strip has pre-cut holes that hold balloon knots securely.
- Glue dots. These small adhesive circles attach tiny balloons to fill gaps.
- Fishing line or twine. Useful for extra support when hanging the arch.
- Command hooks or a backdrop stand. Command hooks work well for wall-mounted arches. A backdrop stand gives you a freestanding option.
- Scissors. For trimming the strip and cutting ribbon.
Optional Add-Ons
- Foil or mylar balloons. These add shine and can display numbers, letters, or custom messages.
- Faux greenery or flowers. Great for softening the arch and matching elegant themes.
- Ribbon or streamers. Adds movement and color.
- Balloon weights. Helpful for outdoor or freestanding arches that need extra anchoring.
- Frame or PVC pipe. Use this if you want a structured arch rather than a flexible garland.
Trading Shanxi Co., Ltd. supplies high-quality latex balloons, custom balloon designs, and balloon accessories that help both beginners and professionals achieve reliable results. If you are planning multiple events, consider ordering in bulk to keep costs down.
How Many Balloons Do You Need for a Balloon Arch?
One of the most common questions beginners ask is how many balloons they need for a balloon arch. The answer depends on the style and length of the arch. Giving yourself a clear formula removes guesswork and helps you order the right amount.
The Simple Formula
For a traditional arch with uniform-sized balloons, plan for 4 to 5 balloons per foot. For a modern organic arch with mixed sizes and a fuller look, plan for 5 to 6 balloons per foot. If you want a very dense garland, you can go up to 7 balloons per foot.
Balloon Quantity Chart
| Arch Length | Traditional Style | Organic Style |
|---|---|---|
| 6 feet | 40–50 balloons | 60–75 balloons |
| 8 feet | 50–60 balloons | 80–100 balloons |
| 10 feet | 60–75 balloons | 100–125 balloons |
| 12 feet | 80–90 balloons | 120–150 balloons |
Balloon Size Breakdown
For a 10-foot organic arch, a balanced mix might look like this:
- 12″ balloons: 50 to 60 for the main structure.
- 10″ balloons: 30 to 40 for mid-size filler.
- 5″ balloons: 40 to 50 for gap filling and texture.
- 16″–18″ balloons: 4 to 6 for accents at the base or focal points.
Always order 10% to 20% more balloons than your calculation suggests. A few balloons will pop during inflation, and extras give you flexibility for last-minute gap filling. This simple buffer is one of the secrets professionals rely on.
How to Make a Balloon Arch at Home: 5 Easy Steps
This balloon arch tutorial breaks the process into five manageable steps. Work on a clean floor or large table where you can spread out supplies.
Step 1: Plan Your Design
Start by measuring the space where you want the arch. A doorway, dessert table, or photo booth wall all work well. Decide on the arch length and the general shape. Sketch a simple curve on paper if it helps.
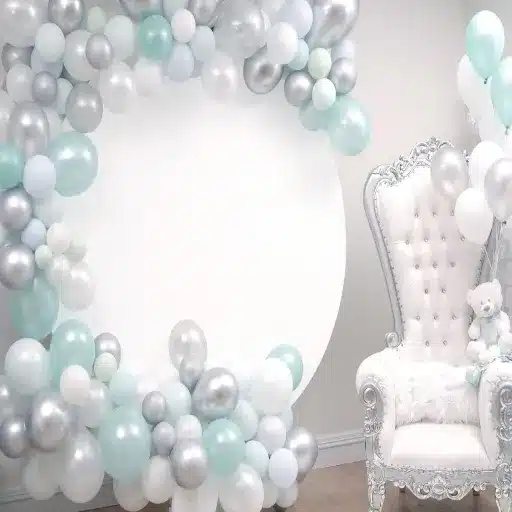
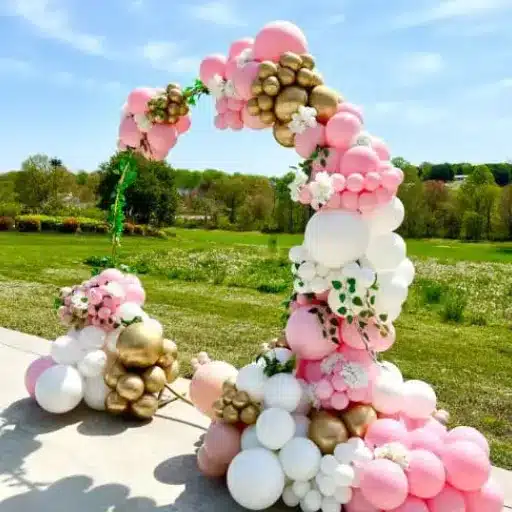
Next, choose your color palette. A professional-looking arch usually follows the 60-30-10 rule: 60% main color, 30% secondary color, and 10% accent color. For example, a blush-and-gold wedding arch might use 60% blush, 30% white, and 10% metallic gold.
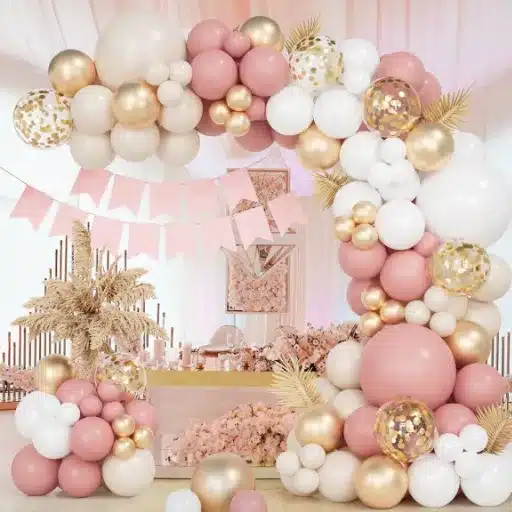
When Maria planned her daughter’s tenth birthday party, she mapped the arch across a 7-foot dessert table. She chose pink as the main color, white as the secondary, and gold as the accent. That early planning made the assembly process smooth and the final result looked intentional rather than random.
Step 2: Inflate the Balloons
Use a pump for every balloon. Blowing up dozens of balloons by mouth is exhausting and can leave uneven sizes. Inflate each balloon to about 80% to 90% of its full capacity. Slightly under-inflated balloons are rounder, less likely to pop, and easier to cluster together.
Vary the sizes as you go. A natural organic arch depends on contrast. If every balloon is the same size, the arch will look flat and artificial. Mix in matte, pearl, and metallic finishes for extra texture.
Pro tip: To create a perfectly round balloon, inflate it fully, then slowly release a small amount of air while pressing the top and bottom together. Tie the knot close to the inflated body.
Step 3: Attach Balloons to the Strip
Leave about 12 inches of decorating strip free at one end. Take a balloon knot and push it through the larger hole in the strip. Slide it down into the smaller hole to lock it in place. Continue adding balloons, alternating colors and sizes as you work.
Keep the balloons close together. A dense arch looks fuller and hides the strip. If the strip starts to curl or twist, straighten it before adding more balloons. Some people prefer to build the entire garland on the floor and then lift it into place.
If you do not have a decorating strip, you can tie balloons into pairs, twist two pairs together to make four-balloon clusters, and thread those clusters onto fishing line. This method takes longer but works in a pinch.
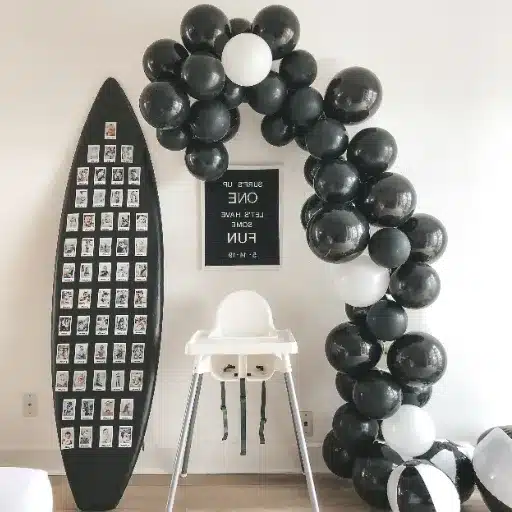
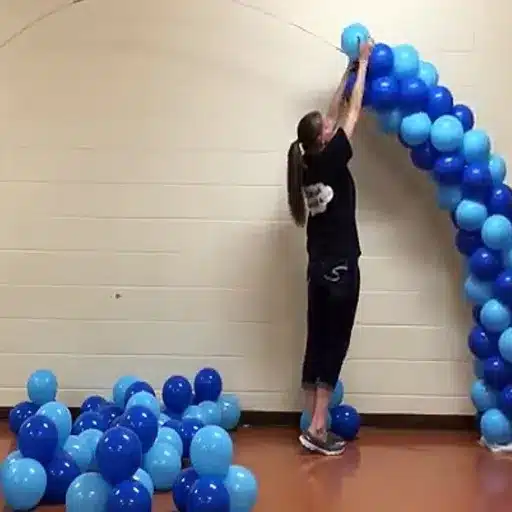
Step 4: Hang and Shape the Arch
For a wall-mounted arch, install Command hooks at the two endpoints and one at the top center. Tie the free end of the strip to a hook, drape the garland into a curve, and secure it at each anchor point. Start from the center and work outward so the arch stays balanced.
For a freestanding arch, attach the garland to a backdrop stand using twine, zip ties, or quilting clips. Tie shorter pieces of twine in the middle and longer pieces toward the ends to create the classic arch curve.
James, a first-time DIY decorator, built his arch the night before a graduation party. He laid the garland on the living room floor, then lifted it onto Command hooks he had placed earlier that day. Starting from the center hook kept the curve symmetrical and prevented the ends from sagging.
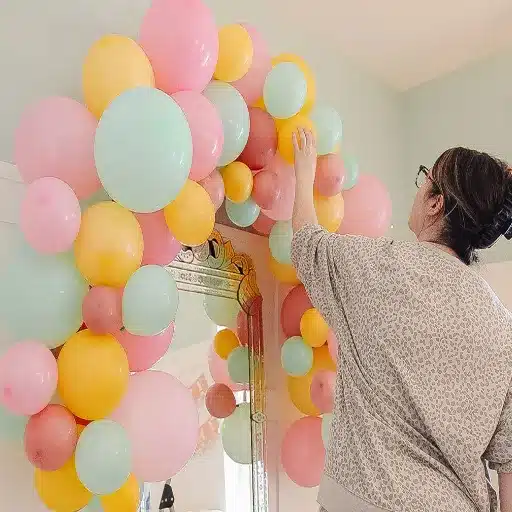
Step 5: Fill Gaps and Add Finishing Touches
This step separates amateur arches from professional ones. Use 5″ balloons and glue dots to fill any spaces where the strip shows through. Create small clusters of two or three tiny balloons and press them into gaps. Add larger accent balloons, faux greenery, ribbon, or foil shapes to match your theme.
Step back every few minutes and look at the arch from a distance. Photos help you spot uneven areas. Adjust balloons by twisting them slightly until the shape feels balanced.
Pro Tips for a Professional-Looking Balloon Arch
A few extra techniques can take your DIY balloon arch from good to gallery-worthy.
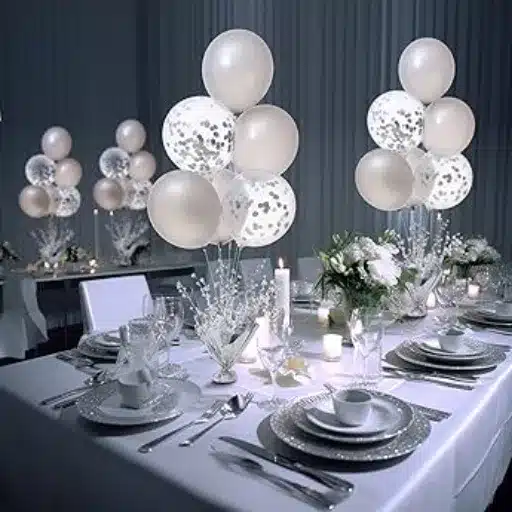
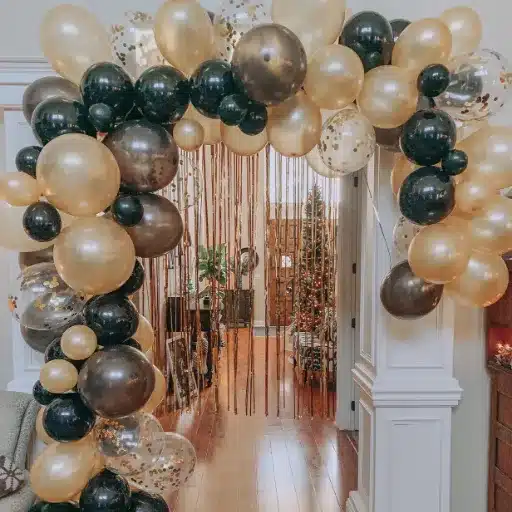
Mix finishes and textures. Combine matte, pearl, metallic, and even confetti-filled balloons. The variety catches light differently and makes the arch feel layered.
Use the 60-30-10 color rule. This design principle keeps the palette harmonious. Too many colors make the arch look messy, while too few can look flat.
Build on the floor first. Laying the garland flat makes it easier to control spacing and color placement. You can see the full design before you commit to hanging it.
Invest in an electric pump. If you plan to make more than one arch, the time savings are significant. Your fingers will thank you, too.
Keep a repair kit nearby. Extra balloons, glue dots, and a small hand pump let you fix pops quickly during setup.
When the team at a local bakery wanted to refresh their storefront for a spring promotion, they used these exact tips. They mixed pastel matte balloons with pearl white accents, followed the 60-30-10 rule, and filled gaps with tiny 5″ balloons. Customers stopped to take photos, and the display stayed intact for five days.
Common Mistakes Beginners Make (and How to Avoid Them)
Even a simple balloon arch tutorial can go wrong if you skip the details. Here are the most common mistakes and how to prevent them.
Overinflating balloons. Large, oval balloons pop easily and create uneven shapes. Inflate to 80% to 90% capacity instead.
Using only one balloon size. A single-size arch looks flat. Use at least three sizes for depth.
Weak anchoring. Sagging arches usually come from too few anchor points. Use at least three hooks or secure ties for wall-mounted designs.
Poor color planning. Random colors can look chaotic. Choose a clear palette before you start.
Hanging the arch too early outdoors. Heat, wind, and sun shorten balloon life. Install outdoor arches as close to the event start time as possible.
Skipping gap filling. The strip should not be visible in the final arch. Use glue dots and small balloons to cover it.
Can You Make a Balloon Arch Without a Stand or Helium?
Yes. In fact, most modern balloon arches use air-filled latex balloons and no helium at all. Air-filled balloons last longer, cost less, and are better for the environment. You can hang the garland on a wall, doorway, or table using Command hooks, curtain rods, or fishing line.
If you want a stand-free option, we have a dedicated guide on how to make a balloon arch without a stand. It covers wall-mounted designs, weighted anchors, and budget-friendly setups that do not require a frame.
Choosing air-filled, biodegradable latex balloons also supports sustainable celebrations. You get vibrant event decor without the environmental concerns that come with helium or plastic-based alternatives.
How Long Will a Balloon Arch Last?
Lifespan depends on where you display the arch and what materials you use.
- Indoor air-filled arch: 1 to 5 days, sometimes longer in climate-controlled spaces.
- Outdoor air-filled arch: 8 to 24 hours, depending on heat, wind, and sun exposure.
- Helium-filled arch: Several hours at most, since helium escapes quickly.
For best results, install indoor arches the evening before or the morning of the event. For outdoor events, set up as close to the start time as possible. Keep spare balloons and glue dots on hand for quick repairs.
High-quality latex balloons from a reliable supplier will hold their shape and color longer than discount options. At Starry Sky Balloon, we focus on durable materials that help your decorations last through the entire celebration.
FAQ
Do you need helium for a balloon arch?
No. Most balloon arches use air-filled balloons attached to a strip or frame. Helium is optional and usually unnecessary for arch designs.
Can I make a balloon arch the night before?
Yes, if the arch will stay indoors. Air-filled latex balloons can look fresh for several days. For outdoor events, assemble the arch as close to the event time as possible.
How do you attach a balloon arch to a wall?
Command hooks are the most popular option. Place one hook at each end and one at the top center. Tie the decorating strip or fishing line to each hook to create the arch shape.
What size balloons are best for an arch?
A mix of 5″, 10″, and 12″ balloons works best for organic arches. Add 16″ or 18″ balloons as accents. Single-size arches can look flat.
What if I don’t have a balloon decorating strip?
You can create four-balloon clusters and thread them onto fishing line or twine. This method takes more time but produces similar results. For more details, Balloon HQ offers a helpful technical overview of how to make a balloon arch without specialty tools.
How much does it cost to make a balloon arch at home?
A basic DIY balloon arch costs between 15and15and50, depending on balloon quality, size, and extras like greenery or foil accents. Buying supplies in bulk lowers the cost per arch.
Conclusion
Learning how to make a balloon arch at home gives you a powerful way to transform any space into a celebration-worthy setting. The process is straightforward: gather your supplies, calculate the right number of balloons, inflate and attach them to a strip, hang the garland in a curve, and finish with small filler balloons.
The key takeaways are simple but important. Use mixed sizes for depth, plan your colors in advance, and build the garland on the floor before hanging. Avoid overinflation, weak anchors, and last-minute outdoor setup. With these steps, you can create professional-looking event decor without hiring a specialist.
If you are planning a large event or need custom balloon designs, our team at Starry Sky Balloon is here to help. We offer biodegradable latex balloons, bulk ordering options, and personalized solutions for weddings, corporate events, and private celebrations. Contact us today to discuss your next project and make your vision a reality.