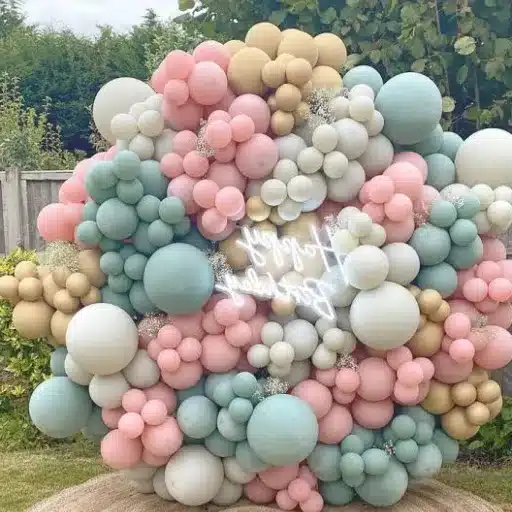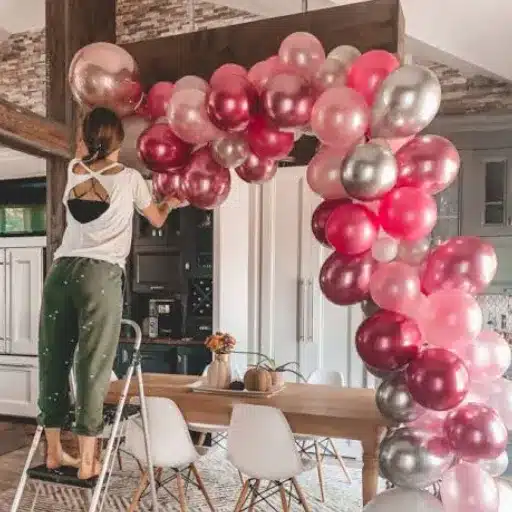
Balloon animals are not only a fun pastime but also a great form of art fusing creativity, dexterity, and a pinch of fancy. The art of balloon twisting is unlimited; thus, if you are still a beginner who wants to make kids happy at a birthday party or a talented hobbyist who likes to try new things, the learning of the simpler forms of balloon twisting is one perfect way to start. In this paper, we plan to bring you some of the best and most effective tips and tricks that will lead you to the creation of interesting and amusing balloon designs with the use of methods that are not only simple but also within reach. So, you will be amused when, with the right materials, a few basic twists and the practice of good knotting, all of which are presented here, you can already make a variety of balloon animals. Get ready to be a hit with very loud and long applause as you present to your beloved audience those bright, fascinating, fun and amusing creations which could never be missed!
Introduction to Balloon Animals
What are Balloon Animals?
Balloon animals are animals made out of balloons that are usually in the form of figures, shaped and inflated, and made of special latex balloons. These elaborate artistic works are usually seen as decorations for various events in the entertainment and area. These sculptures are obtained by the use of an air-tight bag and the dual folds and knots that are necessary to achieve the process, no wonder they look so lifelike. It is an art form that has been around for a long time and it has always been popular. The popularity of balloons has been most apparent after the introduction of helium. The balloons that are used these days are all made out of special materials and it is now possible to create much more than simple round shapes. Balloon twisting has a long history and is a well-loved tradition that has been passed down through the generations. The art of twisting balloons has gained a great deal of popularity since the early 2000s and has transformed into a creative and lucrative business with lots of potential and creativity.
History and Popularity of Balloon Twisting
Balloon twisting, which is mostly known as balloon modeling, has been around since the late 19th and early 20th centuries, its roots mostly being associated with itinerant performers and conjurors. In that time, uncomplicated balloon animals and forms were one of the focus means for attracting the attention of the audience in stage acts. From the middle of the 20th century, the art was greatly appreciated in the society, mainly at kid’s gatherings and amusement parks, and becoming one of the essential elements of the gentle amusement.
Balloon twisting’s development was significantly associated with the improvements in the production of latex, which permitted a more extensive assortment of colors and sizes to be present in balloons as well as allowed better elasticity for delicate designs. Nowadays, balloon twisting is one of the most popular entertainment forms besides being an acknowledged art and competitive discipline. The internet and international contests are major driving forces in the growth of this art, as they offer a wide platform for the artists to teach, show their own pieces of work and even come up with the most unthinkable of ideas for the largest installations. Such a marriage of the past and the contemporary ever-evolving world is what makes balloon twisting a tradition of a sort and an art form that is progressing in the same time.
List of Necessary Materials
In order to be able to obtain the best quality, most precise, and detail-oriented balloon twisting results, one must make use of the best materials and tools in the first place, tailored for this art. The major material that you cannot do without is latex balloons, with assorted sizes, shapes, and colors as the most common and the one enabling the artist to make the most diverse and intricate designs. The best latex balloons are preferred not only because of the long-lasting quality and the stretched material to work with but also because they are less likely to burst while during the working of the artist. In addition, the balloon pump which inflates the latex balloons has to be dependable and of favorable quality as the operation will be much faster and impersonal if the pump is electric. On the other hand, if the pump is manual, a hand pump is the best choice still, keeping in mind the size of the project and level of complexity.
Among the other most important tools are high-tensile fishing line or clear tape for securing large structures and scissors for making precise cuts and markers for applying decorative finishes. The proficient artists might go further and add the following materials, LED lights for lighted designs, or biodegradable balloons for nature-friendly creations. The use of industry-standard materials is a safety and durability issue but it is also about improving the final piece’s aesthetics and structure.
Getting Started: The Basics of Making Balloon Animals
Recommendations for the Ideal Balloons to Start with
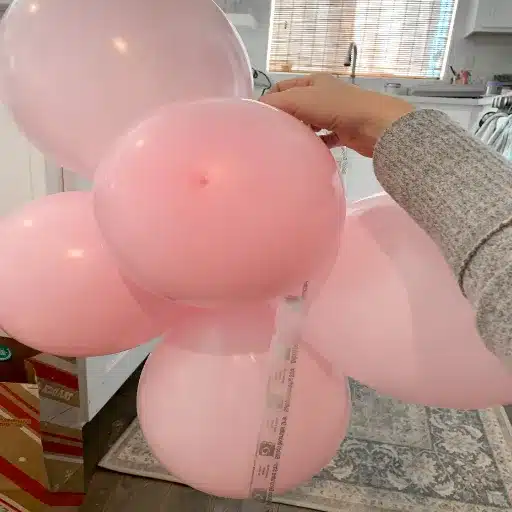
When it comes to beginners, selecting balloons that are durable, elastic, and simple to use should be the main factors that dictate their purchasing decisions; this is especially to guarantee a perfect time to learn. The 260Q latex type, which expands up to 2 inches in diameter and 60 inches in length, is the most prominent model used for animal-shaped balloons. These balloons are designed to ensure that twisting is not only very possible but multiple times without the balloon bursting too easily. If one of these alternatives or similar things are chosen, it is really necessary to get high-quality and professional-grade latex balloons as opposed to the ones with poor quality which are the biggest causes of burst balloons and inconsistently filled balloons. In the case of beginners, the use of a pump instead of the mouth is advisable, so as to avoid exertion and control the air pressure simultaneously. It is generally advisable to use a balloon solution specifically designed for the inflation of these latex balloons; alternatively, tap water can also be used, as long as the balloons are used immediately after. Storing them in a conditioned environment is another requisite to make them last well. For the latter, the balloons must be placed in a cool, dry place to keep their elasticity and to avoid the early decay of the material, so that they could be the partners of the practitioner for a long time.
Proper Inflation of a Balloon
To start with, you should pick a balloon that is of high quality and is made of resistant materials so that the balloon punctures or the sizings are minimized. One can use an electric or manual pump for the perfect inflation task, this way the pump not only saves the inflation time and effort but also the chance of popping the balloon because of overinflation is minimized too. One must plug the pump nozzle into the neck of the balloon at very first to make sure no air gets out during the process of inflation. The balloon has to be inflated slowly and uniformly, and take the observation of airwaves to avoid stretching the balloon in any specific area. It is recommended to save some unpumped balloon at the tail in order to maintain the structure and take off some of the pressure when the balloon is tied. After you have already achieved the size, you intended, fasten the neck with a knot to secure against air leakage. All the inflating skills need to be on the mind to get a high-quality job done, either it is for professional use, decoration, or just an ordinary activity.
Essential Techniques: Basic Twists Explained
Lock twisting technique is an essential method found in balloon modelling that is used to secure the connection between segments. The first step is to inflate the balloon and to make it into three equal parts by twisting twice and forming three bubbles. Then, let the first and third bubbles meet and the middle bubble should be held between them. The first and third bubbles should be gripped tightly and then intertwined in one swift movement. As a result, the three bubbles will be stuck at the specified place without chance of uncurling. The lock twist technique is mainly helpful in making basic shapes like animals’ feet or the structure of head-wears. Once you have acquired this skill, you will be able to provide a high level of security in your projects that are more intricate in design.
Easy Balloon Animals for Beginners
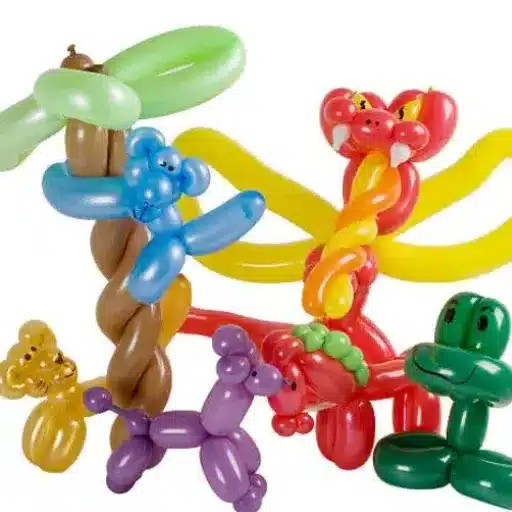
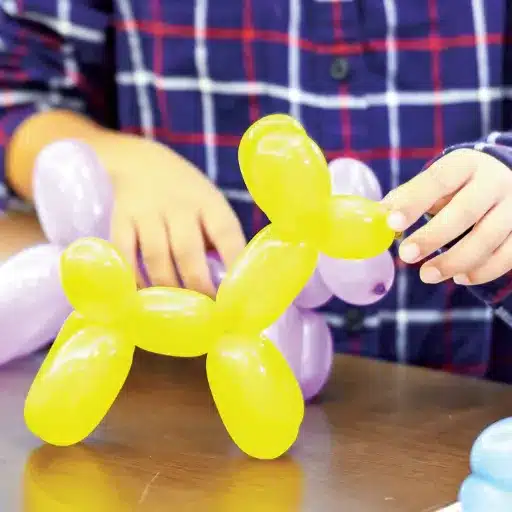
Step-by-Step Guide to Create a Balloon Dog
Inflate the Balloon: To begin, inflate a standard twisting balloon that will have a 4-6 inch uninflated space. The presence of such a space is necessary because the twists can be made more easily and it will prevent the balloon from bursting. Tie up the inflated balloon properly.
Make the Dog’s Nose: Find the place 2-3 inches away from the balloon’s knot and make a twisted knot to form the nose of the dog. The most important thing is to keep the form of the twist by holding it tight.
Make the Ears: Determine and twist two sections, each about 3 inches long, located right next to the nose. Bend in the middle so that the parts become one straight line and lock the twist to bring them together. Those are to be the ears of the dog made of the balloon.
Create the Neck: Start from the point where the ears are, move 2 inches downwards, and make another twist. The short length of this part will be the neck of the balloon dog.
Animal Figure Creation:Have to make sure that each meter of the neck part is divided into two equal parts of 7–8 cm each. Similarly, bunch up these two parts of the side of the head which are similar to the ears so that you can make the front legs thereafter and lock them up with a lock twist.
Shape Up the Middle Part:From the front legs, go up for another 10–13 cm by twisting the balloon to form the middle part of the body. Twist the balloon at the point where it has the right length so that the middle of the body is cut off from the rest of the balloon.
Complete the Animal with Further Legs and a Tail:The last step is to measure and twist two more equal sections, which each section should be about 13cm in length, from the remaining uninflated part of the balloon. Locking these two sections in the same way as it was done with the other parts will create the hind legs. The tail is given for the rest of the drawn off part of the balloon.
The result of sticking to the directions is that the figure looks like a well-proportioned pet with no part standing out too much. The care taken for the length of each segment and the correctness of the twists make the figure last long and appealing to the eye, too.
Making a Simple Monkey Balloon
To make a straightforward balloon monkey a proper one will require a long one-pump balloon and a balloon for pumping. As a starting point, blow up the balloon and do not get rid of about a 5-inch tail not blown up, to have a twisting space. To indicate the nose of the monkey, proceed with a small round bubble that should be added and twisted to keep its shape.
Then, you should invent the identical loops by the rabbit’s nose in such a way that the monkey’s ears are done; it is important to note that the sizes of these loops have to be the same in order to have a good proportion. After the ears are done, the twisting should be done in the area around 2 inches to create the neck. For the arms, two slightly longer segments should be twisted, which preferably would be 3 to 4 inches each, and then they should be interlocked tightly.
Later on, the monkey’s torso-high segment, 6 inches long, should be produced and the monkey’s legs should then be made from the same-sized segments of 4 inches by folding and twisting; the twisting of the legs at the end should be together and even for the monkey to be stable. From the end, the portion that is not blown up is the monkey’s tail.
If you are really careful with the measuring of each segment and perform clean and precise twists, you will be able to make a very visually appealing balloon monkey. Correct proportions and secure connections are crucial to the maintenance of the monkey’s structure and to prevent it from deflating too soon.
Making a Fun Balloon Swan
Doing a balloon swan follows a methodical plan that leads to a product that is graceful and visually compelling. Get the process going by inflating a single long balloon, and when doing so, it should be left with about 4-5 inches of it being not-inflated which makes it possible for twists and changes to be made. The swan’s head should be the first thing to start with by making a small bubble at the nozzle end of the balloon and then making a lock twist in order to create a stable base.
Let us begin with crafting the neck by bending and twisting the bubble gently till it forms one continuous elongated line, keeping an accuracy in the curve similar to a graceful arch of a swan’s neck. To form the body, make the remaining balloon into a loop and by twisting it again, ensure a short part for the tail. Hang the loop at the correct place to give a complete and symmetrical semblance of the shape of the swan’s body.
There is indeed a demand for great care in the measuring and twisting of each part for maintaining the rate of balloons and the integrity of the balloon composition. Making the finishing touches on the shape of the neck and putting it in the right place on the body so that it expresses the charm and elegance of the swan is what makes this process charmed and challenging. The result of all these steps, if followed meticulously, is a very beautiful and very grand balloon sculpture.
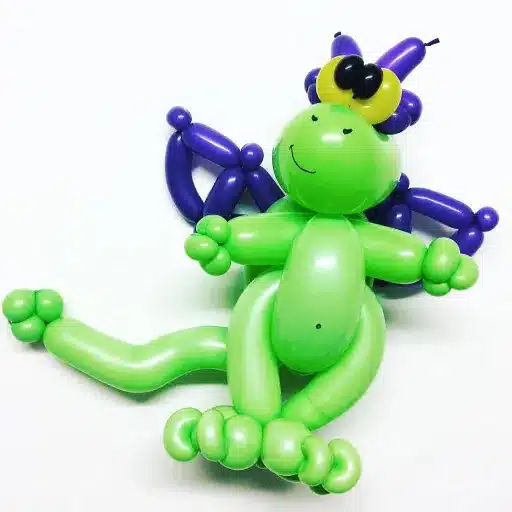
Advanced Balloon Twisting Techniques
To include Lock and Fold Twists
The lock and fold twists are the major steps in an advanced artistic method and the main tools to create elaborate and durable models. Lock twist which is a twisting together of two parts of a balloon and looping one through to secure is the most effective in developing strong junctions that resist the force of pulling. This method proves to be most necessary in the building of multi-balloon sculptures where steadiness is paramount.
Among balloons, something like a lock twist is used to make a pointed end or a sharp corner. At the same time, the fold twist is employed to get rounded shapes or structural elements with depth. It is possible to form various shapes like, for example, loops, petals, or even faces through the practice of folding and fixing a balloon on itself with a twist. Two techniques, when used in combination, give rise to the most intricate and animated designs that are beyond the reach of mere twisting techniques. For the same token, it is possible to make the faces of animals or the floral decorations strong to be used together by the lock and fold twists. By acquiring the technical skills to handle these designs, one is actually broadening her/his professional horizon within the balloon industry and at the same time improving the physical and visual appeal of a balloon sculpture to a great extent.
Do you want to know how to make balloon flowers?
It is a very precise and methodical approach in the case of creating balloon flowers to guarantee the required structural stability and at the same time, the visual allure. Starting with the selection of high-quality latex balloons in the most cases, if possible, the ones with vivid colors that resemble the natural flower shades the best. Inflate the balloons to the size you desire keeping in mind to have an optimal balance between the firmness and flex to avoid the balloons from bursting while being manipulated.
The petals need to be prepared first. You inflate the balloon and leave about 2-3 inches at the end of the balloon that is not inflated so that the twists can be done. Proceed with creating loops of the same size until you get a complete petal arrangement which usually consists of five to six loops. Tightening the loops at the center by twisting is the right way to secure the petals for good.
The flower center represents the next construction step. By using a balloon in a contrasting or harmonizing color, make a small bubble that is round and will be the flower’s center. After tying it off, carefully make it the middle of the petal arrangement with a secure stick, making sure that it is in the center and that the flower is perfectly aligned complete with a visual focal point.
Construct the Stem and Leaves:Fill a green balloon as much as you like Air for the stem but leave a part of it without filling for the leaves. Then carry out a series of twists along the balloon to produce one or more leaf-like forms. As a final step, attach the stem firmly to the base of the flower petals by twining the stems and stabilizing their connection.
Final Adjustments:Afterward, examine the flower for consistency and make necessary alterations to the petals, middle, or leaves if they are not all the same size. To prevent the sculpture from loosening up in the future, make sure that all the twists are firm and safe.
Thanks to these comprehensive steps, the professionals can decorate flower sculptures with balloons and that, too, with life-like images which are also durable and can be worked on by practicing technicians. Therefore, the techniques, if mastered can be utilized to develop elaborate floral designs that include various flowers but are visually connected.
Making Unique Hats and Accessories with Balloons
The act of making balloon hats and other items with balloons is one of those advanced skills, which, if mastered, can be truly rewarding besides displaying the creative and the precise sides in a person. The journey itself starts with the selection of the best suitable balloons – balloons that are very high in quality, strong and long lasting. To make the detailed designs that call for a variety of colors and sizes, the balloons are typically purchased by the bunch.
To make the designer hats, the first thing to do is measure the circumference of the head of the person who is going to wear the hat to ensure it fits properly. The “loop twist” technique is the first step in constructing the base which is the very base of the whole design.
For the addition of elements like spirals, flowers, or animals, the additional balloons can be added through the use of the techniques such as “pinch twists” and “bubble chains” to create an attractive and well-balanced design. For example, a snugly fitting bracelet which does not hinder the mobility or cause discomfort should be achieved; hence the necklace if too tight or too loose. Of course, it needs to be durable for the for the twisting and connecting to be made tight and therefore wearers shouldn’t worry that their designs might fall apart during wearing.
In addition, another way for balloon artists to be more innovative is by experimenting with glow-in-the-dark balloons or metallic finishes on their designs that will give them an updated look. If the artists practice and master these basics, they can gradually lead to the creation of complex themed elements like crowns, carnival hats, or wearable costumes, and this, in turn, will provide them with an unending source for their artistic expression.
Tips and Tricks for Successful Balloon Twisting
Common Mistakes and How to Avoid Them
Based on my own experience, one of the mistakes that occur most frequently in balloon sculpturing is the over-inflating of the balloons, leading to an increased chance of bursting. To steer clear of that problem, I make the balloon accommodate only between 80-90% air by leaving an appreciable amount of “tail” or the uninflated part at the end of the balloon. This provides the opportunity for the twists made and the air to disperse as required in shaping the figure. Furthermore, I steer away from twisting the balloon very tightly for it to avoid the creation of a strong pressure on the material that is unnecessary. Instead, what I do is to do twists that are neither too soft nor too tight but are firm enough to maintain the shape and the toughness as well.
I have also faced the issue quite often that I fail to “lock” the twists properly. Should twists are not firmly fixed the design will deteriorate during the time of usage or conveyance. To tackle this, I make sure that I use ways such as either the end is tied at multiple twists or portions are tied off to make a solid shape. A good idea for beginners is to start with easy shapes like simple flowers or swords to get used to connecting the parts and only then move on to the more sophisticated ones that require locking.
A third point that I can now appreciate is the great importance of the balloons of high quality specifically made for twisting. The ones of low quality become irregular due to a stretch that is uneven and are more likely to burst when subjected to moderate pressure. On the other hand, if a person does not know exactly what to look for, then the whole experience of twisting the professional-grade balloons, say, the ones made of 260Q latex could, without question, be the available solution with respect to those issues. Approximately, it is a matter of remembering and working on the same thing and gaining enough experience to be able to build up feelings of self-reliance in terms of creating very noble and also very robust designs.
Using a Balloon Pump for Efficiency
A balloon pump is a crucial element for the efficient process of balloon twisting, especially when dealing with a lot of balloons or the demanding designs. There are two main types of pumps hand and electric, where each type provides unique advantages based on the operation’s demands. Hand pumps are easy, moveable, and the best option for the less scaled gigs or for the ones on the road, while the electric ones give fast inflation and can be used for huge numbers of balloons or as a part of a professional set-up. It is very important to get a pump with a nozzle meant to go with twisting balloons such as 260Q as a safety measure; the nozzle should also be appropriate size to minimize the leakage during blowing up. Using a pump not only lightens the manual load but also makes the inflation levels more uniform which results in a much greater control over the shapes of the balloons and increased strength of the final. Regular maintenance, such as cleaning the nozzle and looking for wear, will ensure that the pump is reliable and efficient for a long time.
Storing and Caring for Balloons Guide
One of the most important steps of storing balloons is to place them in a cool, dry place that is out of direct sunlight or heat sources. Intense heat or UV light can ruin the latex, making balloons fragile and more likely to pop. It is highly advisable to put them in an airtight container or a resealable bag in order to protect them from moisture and dust, which are also significant factors for rapid deterioration. Do not store the balloons in spaces that are not climate-controlled, like garages or attics, as the temperatures can go up and down and ultimately weaken the material.
Looking after balloons in the right way is just as crucial to their condition as it is to anything else. To keep balloons from getting poked by mistake, I see to it that my hands are clean, and they are without oils, sharp objects, or the like. Doing this daily will avoid unnecessary problems during cuing or specialty events, and it will not even place any additional strain on the balloons, which are the clients’ total cost and should not be problem-free. The popping and tearing due to premature aging of the helium balloons are issues for other intentional mistakes, covered here regarding such common errors as getting balloons too hot because of the continuous shrivel or air leakage[_PEOPLE], an undervalued but serious problem for certain styles and events such as balloon sculptures, trees, and anything that is shown over a period of time.
Lastly, the most probable cause of deflation and other symptoms is that I use the balloons after the storage some time after that first opening date because of all the reasons that form the last three paragraphs combined; even if the main culprit is that we neglect the necessary care of helium balloons’ vitality withastechniquesandspecifications, will be mitigated by proper maintenance and what is left among those that were deflating and other causes – if meet the clients’ strict demands – it might be only about only sixty to seventy percent of the old structure that made the balloons earn an excellent reputation in the previous times. To conclude, the best way to go on with the preparing-to-use process, and then keeping them as long as we can, no matter what time these are the steps in the maintenance that most often are the cause of shortened lifespan and discoloration or a weakening effect before the end of the printed period of latex balloons, should not be taken for granted.
Reference Sources
-
How to Make Balloon Animals – Instruction Kit – A detailed guide with step-by-step instructions for creating various balloon animals.
-
Mathematical Balloon Twisting – A unique perspective on balloon twisting, exploring mathematical algorithms for creating designs.
Frequently Asked Questions (FAQs)
How can the inflation be done on the balloon properly?
Balloon can be inflated with the help of a pump like a hand pump or a pump specifically meant for long balloons such as a balloon pump or a hand pump to help avoid being lightheaded. Always, upon inflating the balloon, make sure you have about 3–4 inches of uninflated tail so you still can do some basic twists and at the same time make sure that you will not pop the balloon end. You can find many video tutorials and a youtube channel that is a really good source of information about how to inflate the balloon and how and where to tie the knot. For those who have preferences for particular brands, Qualatex and Betallatex balloons are very popular, and the modeling balloon size of 260 is the standard. The progress of one’s skill in making consistent segments and tying these together by twisting, indeed, comes from the practice of inflating and tying the balloon securely.
Is it possible for a beginner to create a simple balloon animal dog with a single balloon?
A tutorial that is easy to follow where the basic twists are taught at the same time can be followed by a beginner balloon artist to make a dog with one balloon. The tutorial will walk through the process explaining that the dog is made up of the nose, ears, neck, body, and legs. One good way to build up a balloon model is first setting apart the nose, ears, and the segment that will be connected to the body. Doing folds and twisting of the lower part and legs will create the animal’s silhouette. The abovementioned, making a few small steps and taking the time to work through them gently so that you go through the process, are the real ways that you can eventually grow and advance your skills as a balloonist artist. In addition to the above methods, a beginner can also take some online classes for a more robust and uninterrupted growth.
What are the simplest twist techniques for beginner balloon animals?
The most simple of the twists are the basic twist, coil twist, and lock twist, which are the foundation of most balloon animal designs. You have to take baby steps and start with one small part at a time. Repeat the twist motion until you can go through different parts without the balloons bursting. The best part is that the sections are always going to be the same since the balloons will not pop. Try to get a tutorial or a YouTube channel that goes through each move quite slowly, and you can learn how to make and hold sections and then twist them together. Moreover, you can utilize a 260 long balloon to practice making segments and merging it to small sculptures such as a sword or flower. The idea is to use other animal shapes at each step and even balloon art to extend your performance.
What is the folding and locking twist for the balloon flowers?
To create balloon flowers, you must first start with a simple twist to form petals, then gather all the petals and do a locking twist at the middle to secure the shape. You need to divide the circle in equal parts if you are going to make many of the petals. The center would be the short segments that will be used to tie another balloon for the stem. Many tutorials will show how to pinch and manipulate small segments and how to use a loop to make rounded corners of the petals step by step. For novices[,] watching videos of their favorite balloon artists or a professional magician that has turned into a balloon artist can be very beneficial. It is recommended to experiment with balloons made by the brands Qualatex and Belalatex to find out which one gives you the petal shapes you like the most.
Is a hand pump necessary or can I inflate by mouth for balloon animals for beginners?
Even though a few individuals starting out choose to inflate the balloon using their mouth, it is much safer and it also saves your breath for longer if you use a hand pump; and we advise you to use a balloon pump at all times. When you inflate by mouth, you are likely to leave some moisture inside the balloon and what is more, it may also bring a greater risk of fainting if you are inflating 260s or long balloons in large numbers. A hand pump is also useful for obtaining the consistent pressure and proper length of balloon that is needed for models with tricky features like the giraffe with a long neck or a sword balloon. Besides, to many professional entertainers and youtube channel instructors, starting off with a pump is an essential recommendation for not only cleaner but also more productive operations. In the case you are not willing to-must inflate via mouth, make a quick knot and first aid an uninflated tail, which later can be pushed throgh knot ffor basic twisting.
How do I make a giraffe balloon from a 260-balloon and what are the procedures?
Create a balloon giraffe with a 260. Step-by-step tutorial will guide you through the sequence of making: nose, ears, neck, body leg segments, and then the long neck. The giraffe neck is to be formed using longer neck segments, so get grip at length control and root for making uniform basic twists. Check out video tutorials and a helpful youtube channel to see how to fold and twist the neck into a long neck shape and fix the head with a knot or lock twist. Use Qualatex or Betallatex balloons for durability and repeat the pinch-and-twist technique practice until you can create 3 or more giraffe models one after another. The process of learning how to twist a balloon animal into a giraffe will definitely make it easier for you to make the more difficult figure in the future.
What should be purchased by a balloon maker who is just starting out in the world of balloon sculpture and magic manipulation?
A beginner should start with a hand pump, a pack of 260 balloons (both Qualatex and Betallatex are good choices), and a small pair of scissors or a balloon-tying tool as the basic needs. Find some simple balloon packs with a range of colors and lengths and then you can practice and get proficient making a dog, a sword, and balloon flowers with one balloon each. Many entertainers and professional magicians recommend being able to make the basic twists with a few signature models like balloon swords and hats to entertain crowds. Also, take into account a youtube channel that offers video tutorials and secret tricks among the step by step presentations that include tie techniques, loop twist tricks, and the most frequent errors. Having these elements and practicing regularly, you will be getting closer to get to the point of loving to perform the animals and the simple magic tricks together with your balloon sculptures, and this could happen faster than you think.