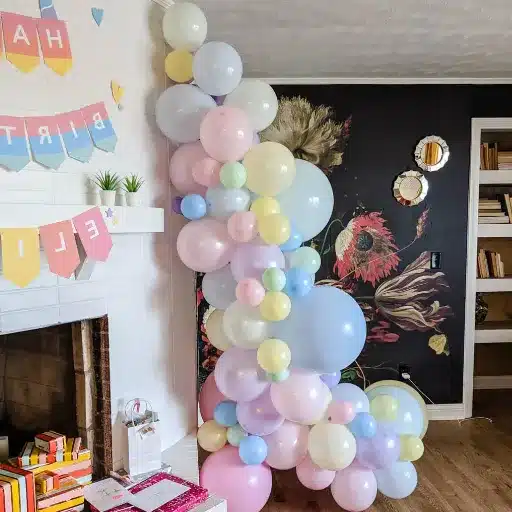
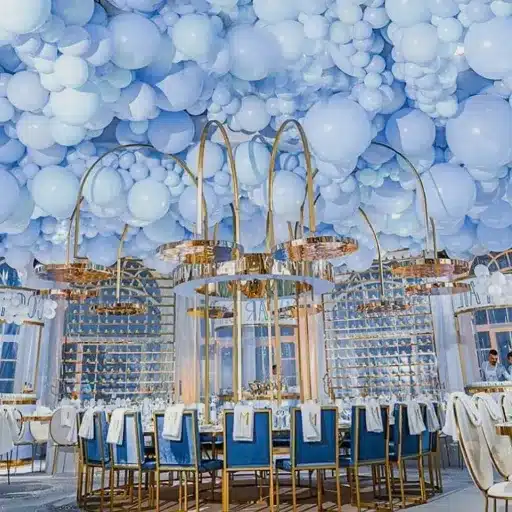
Creating a DIY balloon arch can be a straightforward endeavor with proper instructions. Speeches for weddings, baby showers, birthdays, and any event can be improved by adding an arch. This guide will ensure that your balloon arch looks professional within a couple of tries, regardless of your skill level. From suggesting material choices to outlining the steps for styling your arch, we will work together to achieve your goals. With this balloon arch guide tutorial, any space can be transformed and ready for celebrations.
How to Start Your Balloon Arch Project?
- Prepare for the Event
You are encouraged to gather all the necessary items, which include balloons of your preferred colors, a balloon pump, fishing line, balloon tape, and hooks or command strips for support. For extra charm, you may also consider decorations such as ribbons or faux greenery.
- Choose the Location
Plan for the specific display of the balloon arch. Ensure that the space has walls, doors, or stands that are unobstructed and strong enough to support the arch.
- Puff the Balloons
There is no denying that a balloon pump does make the task easier. You may use it to inflate your set of balloons while managing the size of each balloon to ensure that they are all different sizes. Just remember that over-inflation leads to popping, which is counterintuitive.
- Design and Organize Your Layout
Place the balloons in order of their color to get a clearer vision of the design. Organizing the balloons at this stage helps keep the entire process ordered.
- Commence Construction
When forming the arch, remember to use tape and clusters of balloons so it is created from the sides and not just the center. This gives off an appealing polished look. Don’t forget to assemble the arch from one end as it builds up section by section.
With this revised structure, your balloon arch will capture the attention of your guests.
What Materials Do You Need for a Balloon Arch?
| Material | Purpose |
|---|---|
|
Balloons (various sizes) |
Create a dynamic and full arch design |
|
Balloon decorating strip |
Attach and structure the balloons |
|
Glue dots |
Secure smaller balloons in gaps |
|
Balloon pump (manual/electric) |
Inflate balloons efficiently |
|
Command hooks |
Hang the arch securely on walls |
|
Ribbon or string |
Additional support for hanging |
|
Scissors |
Cut balloon tape or ribbon |
|
Optional: Greenery or flowers |
Add decorative flair to the arch |
|
Optional: Mylar balloons |
Enhance design with themed elements |
How to Inflate and Attach Balloons?
Balloons are essential to parties and celebrations as they add color and elegance. However, crafting stunning balloon arches features balloon prep, which requires a special technique. I will take you through the best strategies I have learned to create stunning balloon arches over the years.
- Choose the Right Inflating Tools
For individuals working on smaller or mid-sized projects, consider inflating each balloon using their mouths. However, for larger projects, I would heavily recommend the use of electric pumps or dual electric pumps, as they can inflate a balloon within 2-3 seconds.
- Take Care Of The Balloons
Do remember that for projects offering large amounts of balloons, such as parties or celeb-based themes, it is essential to avoid gaps, such as the one-inch gap on them opening their mouths.
- Start Inflating
Many people using the tank tend to inflate the balloons individually and set them aside. The balloons do not look appealing until they are all filled with helium. If you want to inflate balloons and set them aside, remember to stop 50% of the way through.
- Sealing and Tying of Balloons
Each balloon should be tied off with a knot. For fishing lines and ribbons, the end of the line should be threaded through the knot before tightening. Non-latex balloons like Mylar and foil are best closed with clips or heat sealers.
- Attaching Balloons to the Structure
- Using Fishing Line: A group of 3-5 balloons is tied into a single cluster and joined to a length of fishing line with pieces of string or wire. Tightly grouped, the balloons’ knots create a smooth surface for easy attachment.
- Using Balloon Tape: Balloon tape is pre-drilled at regular intervals. Knots of balloons can be placed into the holes without any slack coming out. Professional looks include the alternation of dynamic colors.
- Fixing Precision with Dots
Rounding off the contour is made possible with the use of double-sided adhesive dots, which allow smaller balloons to be placed into gaps created in other layers for depth. This is most effective for adjusting the symmetry and balance of the arch.
Even those who are new to this will be able to accomplish a refined and skillful balloon arch by combining the different steps. For a complete aesthetic look, try adding greenery, LED lights, or metallic balloons as they can serve as further accessories. If a balloon arch is prepared appropriately, the structure can last untouched for 24 to 48 hours if stored indoors. However, it is guaranteed to last longer in cool and dry areas.
Tips for Choosing the Right Balloon Colors
Picking balloon color combinations that are the best fit for your event will make it look more appealing and ensure that the theme you want is portrayed. With that in mind, here are five pointers that will help you pick the best combinations:
- Match the Theme of the Event
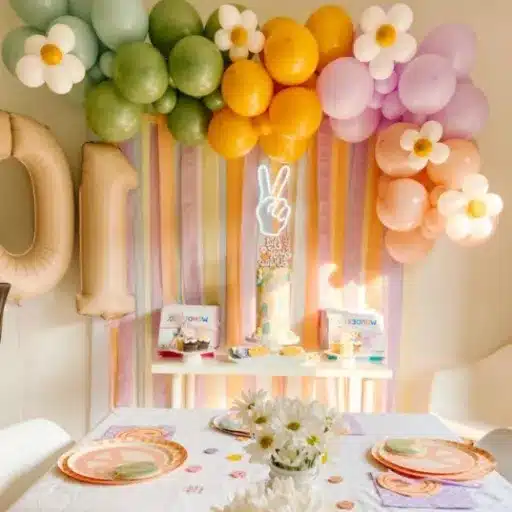
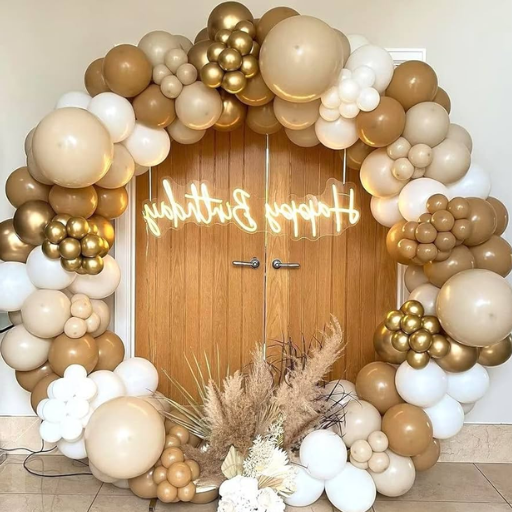
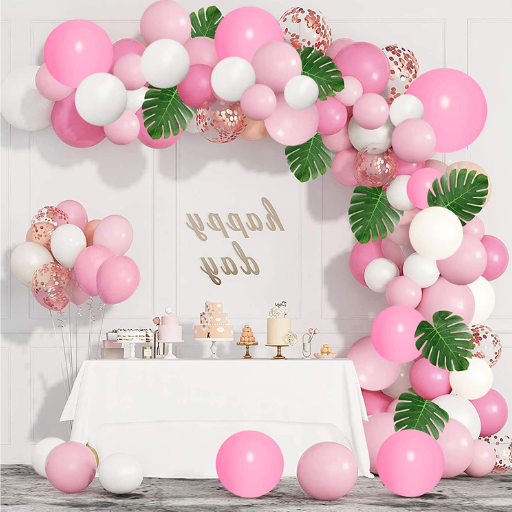
It’s likely that an event has a specific theme or an intended goal, so creating balloon colors suited to the theme would be appropriate. For instance, baby showers or spring events come to life with pastel shades of lavender, pink, and baby blue, while formal parties will be suited for bold colors like red, black, and gold.
- Stick to a Color Palette
Although more than three colors can be selected, limiting the selection to two or three primary colors is advisable. This will enhance the overall cohesion of the look. To make sure your selections are in harmony with each other, use a color wheel to find complementary or analogous colors.
- Consider the Venue’s Color Scheme
Always consider the venue’s existing decor colors. White, cream, or silver are neutral tones that can seamlessly fit into many places, while contrasting tones will stand out more.
- Use Symbolism and Emotion
The symbolic meaning of colors can help significantly decide which colors to choose. Nature and growth can be represented with green, while blue is more soothing and calm. Depending on what the event is aiming for will determine which color would be the best choice.
- Test out the use of balloons made of metallic or transparent materials.
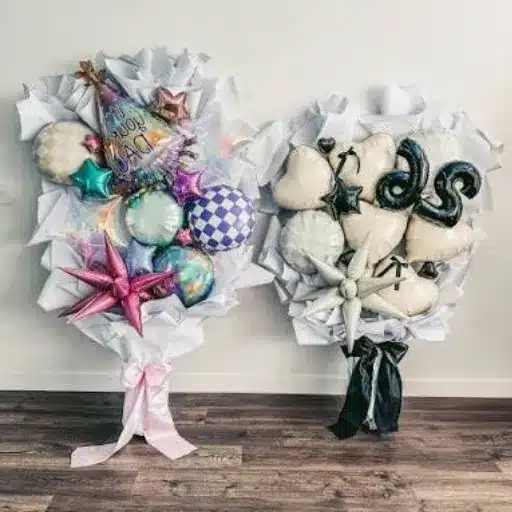
For added interest, consider including metallic or transparent balloons in your design. Clear or transparent balloons add a fun, festive element when filled with confetti or smaller balloons. Furthermore, gold, silver, and rose gold, due to their metallic shades, add elegance and shine.
These suggestions will allow you to create perfectly balanced balloon decorations that are stunning and appropriate for the occasion.
What is the Step-by-Step Guide to Making a Balloon Arch?
- Trim and Gather Necessary Tools
Make sure to have balloons in your preferred shade, a sturdy base or frame to anchor the arch, a balloon pump, and fishing line or cutting tape. Adhesive dots or glue are optional but recommended to attach smaller balloons.
- Inflate Balloons
Use a balloon pump to inflate the balloons to various sizes. Putting effort into inflating some to a greater extent than others will encourage a more visually stunning balloon arch.
- Attach Balloons
Use fishing line or tape to secure the balloons. If fishing line is your choice, tie clusters of 3-4 balloons and place them along the line at equal distances. With balloon arch tape, fasten the tied ends of balloons into pre-cut holes.
- Insert and Build the Arch
Fasten the balloon string or arch tape to a sturdier base or frame. Once inserted, adjust the balloons into gaps until all remaining gaps are filled and the arch has a balanced Void-Filler Appearance.
- Add Additional Decor
Decorate the arch with any remaining balloons, foliage, ribbons, or other embellishments. Adhere using adhesive glue or dots to secure these accents.
- Position and Secure the Arch
Find the perfect location for the arch. Once in position, feel free to secure it with additional weights or anchors to prevent tumbling.
How to Assemble a Balloon Arch Kit?
Follow these five steps to assemble a balloon arch kit correctly:
- Gather Required Equipment
Just like any other project, an outline is crucial to gathering all materials. At the very least, include document and base supports, a pump with helium, and balloons. Make sure to check all needed items ahead of time.
- Pompom your balloons
Depending on the kit provided, make sure the balloons are symmetrically blown. Relatively, keep to uniform sizing for complementing pieces during arch construction. Some kits come with multiple-sized balloons, and it’s best to place them according to the other requirements.
- Fix your balloons on the strip.
Put the strip in an optimal position to constrict the enchained end using one security until the rest are assembled. The balloons should stay in place to minimize movement when placed later.
- Put finishing touches
Put finishing touches on your arch by using adhesive dots, such as ribbons or greenery, custom-fitted to your arch. You can also use them on other pieces for a complete set.
- Safeguard and Fit the Arch
After the arch is completed, it should be placed in position. Use the base supports or weights of the set to stabilize the structure. Modify the angles and spacing for an even look, then lock it in place to eliminate potential crashes.
Following these guides, you can expertly construct a balloon arch for elegant and celebratory occasions or events.
Step-by-Step Process to Create a Balloon Arch
| Step | Description |
|---|---|
|
1. Inflate Balloons |
Use a pump to inflate balloons of all sizes. |
|
2. Prepare Balloon Tape |
Cut the tape to the desired length for the arch. |
|
3. Attach Balloons |
Insert balloon knots into tape holes. |
|
4. Hang the Arch |
Use hooks or string to secure the arch. |
|
5. Add Small Balloons |
Fill gaps with smaller balloons using glue. |
|
6. Add Accessories |
Enhance with greenery, ribbons, or flowers. |
How to Secure and Hang Your Balloon Garland?
| Step | Description |
|---|---|
|
1. Choose Location |
Decide where to hang the garland. |
|
2. Use Command Hooks |
Attach hooks to the wall without causing damage. |
|
3. Prepare Fishing Line |
Tie fishing line or ribbon to the garland ends. |
|
4. Attach to Hooks |
Secure the garland to the hooks using fishing line. |
|
5. Adjust Shape |
Adjust the garland height and shape as needed. |
|
6. Add Decorations |
Enhance with extra balloons or accessories. |
How to Create a 3-Color Balloon Arch?
To make a three-color balloon arch, the steps include the following:
- Picking Colors
Complementary and contrasting color schemes work for events, so make sure to choose three colors, such as blue, red, and yellow.
- Pumping Balloons
Use a pumping device to inflate the same number of balloons per color. All the balloons should be the same size for a professional look.
- Balloon Tape Preparation
Prep a balloon decorating strip of the appropriate length to decide on the final look of the balloons. Sort the colors by groups or alternating colors for more uniformity.
- Setting the Balloons
According to the pattern selected, insert the knots of the balloons into the holes of the tape. Make sure to follow the pattern chosen earlier.
- Arranging the Arch
Decide on the placement of the balloon arch and secure it using string, hooks, or command strips.
- Completing Details
Fill the gaps using smaller balloons or add accessories like ribbons or decorative flowers for more visual impact.
What is the Best Way to Mix and Match Colors?
Regarding color wheels, visual appeal is achieved when bold and neutral tones are balanced, meaning complementary and contrasting shades guarantee the best results.
How to Create a Color Spiral Pattern?
To achieve a balloon arch consisting of a perfect double spiral set of arches, I begin by inflating all the balloons to the same size. The balloons are then organized into groups and attached, starting with the balloon of the first color and repeating this on the other side. This guarantees the spiral design looks as intended.
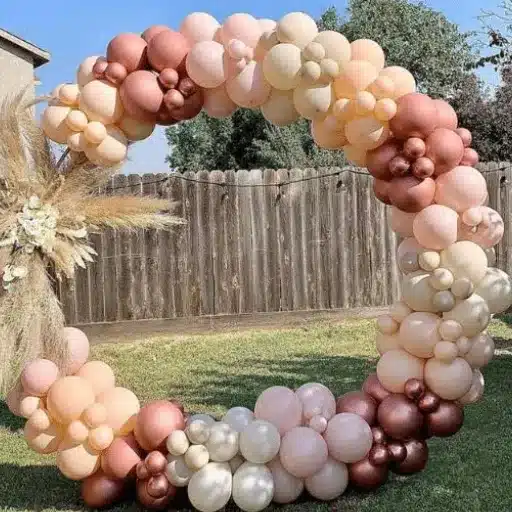
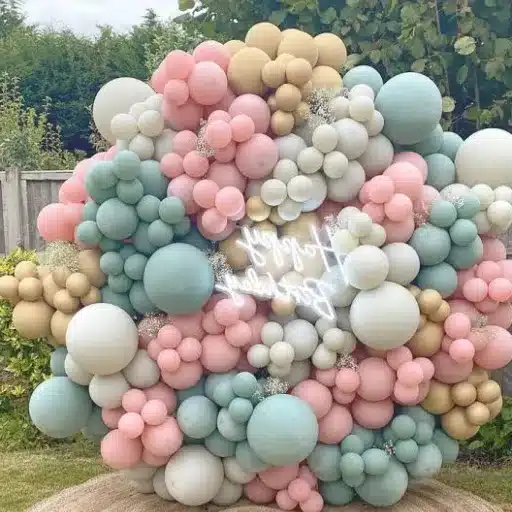
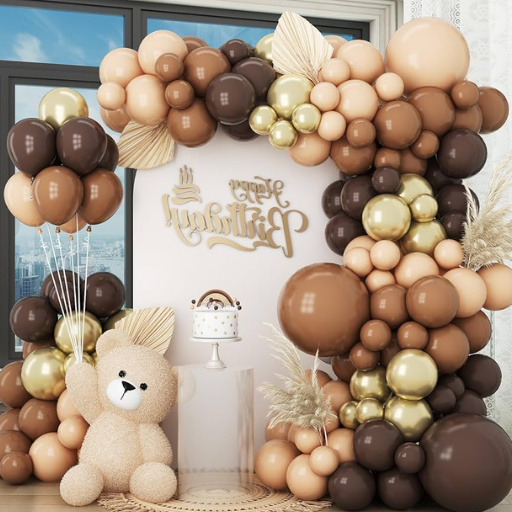
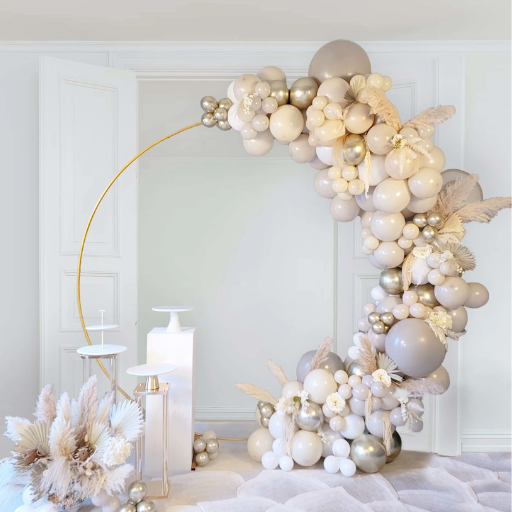
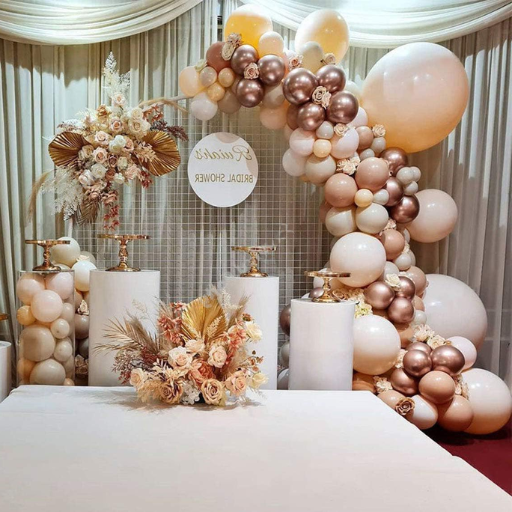
Ideas for a Color Balloon Arch Decoration
| Theme | Color Combination |
|---|---|
|
Elegant Wedding |
White, Gold, Champagne |
|
Rustic Boho |
Terracotta, Sage, Beige |
|
Tropical Party |
Coral, Turquoise, Bright Yellow |
|
Winter Wonderland |
Silver, White, Ice Blue |
|
Pastel Rainbow |
Pink, Mint, Lavender, Baby Blue |
|
Modern Minimalist |
Black, White, Grey |
|
Sunset Vibes |
Peach, Orange, Pink, Purple |
|
Galaxy Theme |
Purple, Blue, Silver, Black |
|
Luxury Event |
Gold, Silver, Rose Gold |
|
Children’s Party |
Red, Yellow, Blue, Green |
What are Common Balloon Arch Mistakes and How to Avoid Them?
- Balloon Arch: Common Problems and Solutions
Using balloons of varying sizes can disrupt the arch’s symmetry. A balloon sizer or template can ensure all balloons are inflated to the same size.
- Skipping a Secure Frame
Secure frames are critical for the structure’s integrity. The balloons will lack the support needed to prevent collapsing without a reliable framework, such as a metal or PVC frame.
- Overinflating Balloons
Stretched balloons are prone to bursting. Balloons should only be inflated to the correct level without stretching the material too much.
- Incorrect Placement of Balloons
It is pivotal to attach balloons in a patterned order. They must be connected using consistent spacing with the proposed layout.
- Failing to Secure the Arch
In unattended outdoor spaces, the arch must be weighted down, as winds and movement will pose serious instability. Sandbags can be used to enforce security.
A visually appealing and sturdy balloon arch can be made by honing in on these various touchpoints.
How to Prevent Balloons from Popping?
Preventive measures must be taken to ensure that your balloons remain intact for as long as possible. Below are some trustworthy methods that are based on science and common sense.
- Avoid Overfilling Balloons
The risk of popping increases with the internal pressure within the balloon, which is caused by over-inflation. It is advised that balloons are inflated to around 90 percent of their full capacity so that some flexibility is added, reducing the chances of the container rupturing.
- Choose the Right Quality of Balloons
Durable latex or thicker plastic balloons tend to have a lower burst rate. Well-known brands tend to be more durable against tearing and external forces, which is ideal for extensive decorations and outdoor environments.
- Consider the Surrounding Temperature
An increase in temperature makes balloon contraction easier, as they tend to increase in size, raising the chances of popping. Extreme cold weather can strengthen and shrink a balloon. Allowing balloons to remain between 68 and 72 degrees Fahrenheit gives them elasticity and strengthens their durability.
- Protect Balloons from Sharp Objects
Balloon assembly and decoration must be handled carefully so that tools that may result in sharp edges, needles, and rough surfaces aren’t used. During installation, ensure that the space is clear from external hazards.
- Use Hi-Float Products or Balloon Conditioner
Balloon sealers such as Hi-Float add protective coatings to balloons, particularly those filled with helium. These conditioners also reduce the balloons’ chances of oxidation, the aging process due to prolonged exposure to sunlight.
- Protection from Wind and Humidity
Strong winds and humid temperatures make balloons pop and degrade faster. If used outdoors, ensure the balloons are shielded or set up in a shaded area where the sun won’t directly hit them. For additional support, use weather-resistant covers or enclosures.
- Use Double-Stripping Techniques
To strengthen the balloons further, try double-stuffing them, which involves placing one balloon inside another. Added sturdiness enhances the balloon’s adaptability for both decorative and functional deployment.
Avoiding balloon popping improves the aesthetics of your decorations and reduces material waste. Following the steps will guarantee that your balloon displays will be versatile and durable for any celebration.
What to Do if Your Balloon Arch is Uneven?
When I inflate my arches and notice that they might be uneven, I make it a point to examine the sections that have the most prominent visual imbalance first. If the placement of the balloons already has gaps, voids, or placements that are close to each other, then the problem could be solved with some gentle adjustments. If the tilt of the stand causes the unevenness, I will ensure that the supporting structure is fully secured and aligned categorically before proceeding. It is also noticeable in the overall look of the arch if a couple of balloons are added or removed from each side. Reviewing from different vantage points ensures symmetry and polish, usually the preferred outcome for any event.
How to Fix Balloons that Won’t Stay in Place?
| Problem | Solution |
|---|---|
|
Balloons slipping off |
Use double-sided tape for secure hold. |
|
Balloons not sticking |
Apply glue dots or tacky putty. |
|
Balloons moving in wind |
Anchor with weights or fishing line. |
|
Uneven placement |
Use a balloon grid or net for stability. |
|
Helium balloons floating |
Tie to ribbons with weights. |
|
Balloons deflating |
Use Hi-Float treatment for longer life. |
|
Balloons falling off walls |
Secure with strong adhesive strips. |
How to Incorporate Decor Elements into Your Balloon Arch?
Add flowers, foliage, ribbons, or other minor signs to the balloon arch when selecting balloons. Distribute the decor uniformly throughout the arch while focusing vital attention on the corners where clusters and cores meet to create significant focus and attention. Band some clear tape to the floral wire or the zip tie and fasten it so the design remains clean and coherent. Do not make the arch top heavy with many decorations; let the balloons retain their place as eye catchers. Refinishing the look of the arch aims to meet the needs of last-minute adjustments, making it multi-functional.
Using Greenery and Other Add-ons
Incorporating greenery to a balloon arch adds a touch of elegance while enhancing its natural appearance. Of the wide variety of options offered, eucalyptus, ivy, ferns, and boxwood are the most popular choices due to their soft tones and versatility. According to event decor trends and items incorporated in the past year, including more natural features like foliage, have gained popularity by 25% when compared to the previous year, particularly in weddings and corporate events. For greater impact, combine the greens with flowers or dried florals.
When adding intuitively to the scenery, use zip ties or floral tape to fasten the stems to the balloon garland without piercing the balloons. Arrange the greens in an arch while accentuating corners and gaps to create visually appealing dynamics. For a greener approach, consider foliage or faux greenery to reduce the event’s carbon footprint—research suggests around 70% of sustainable event organizers claim that is eco-friendly.
These plant-based improvements transform the balloon arch into the most striking attribute of any celebration. Adjust placements as needed for maximum visual impact.
How to Create a Themed Balloon Arch for Events
| Key Point | Details |
|---|---|
|
Choose Venue |
Measure space for arch placement. |
|
Select Balloon Colors |
Match event theme or color scheme. |
|
Balloon Sizes |
Use a mix of small, medium, and large balloons. |
|
Materials Needed |
Balloons, pump, garland tape, glue dots, frame/stand. |
|
Inflate Balloons |
Use an electric pump for speed and uniformity. |
|
Attach Balloons |
Use garland tape or fishing line for structure. |
|
Create Clusters |
Tie balloons in groups of 4 for fullness. |
|
Hang the Arch |
Use hooks, zip ties, or a sturdy frame. |
|
Add Accessories |
Include greenery, ribbons, or themed props. |
|
Inspect and Adjust |
Check the balance and fill in the gaps with small balloons. |
|
Outdoor Setup |
Use weights and protect from the weather. |
|
Maintenance |
Keep out of direct sunlight and sharp objects. |
|
Eco-Friendly Options |
Use biodegradable balloons and dispose of them responsibly. |
Adding Twinkle Lights for a Magical Touch
Twinkle lights should be included to make balloon arches for events spectacular. These lights provide a soft glow that complements the arch and the occasion. Here are five ideas on how to incorporate twinkle lights with balloon arcs.
- Lighten Up Balloons with Fairy Lights
Fairy lights can be twirled around balloons at the base to create an eye-catching effect. In addition to their enchanting look, fairy lights are compact, making them easy to hide in the arch.
- Add String Lights Behind the Arch
String lights can be arranged around the arch to serve as a backdrop. The warm white color of the string light makes it blend perfectly with the arch while adding a subtle, dreamy aesthetic.
- Add LED Clips with Blooming Additions
Floral arrangements can be used to beautify a balloon arch. By attaching LED clips to some parts of the floral arrangements, the design can be uplifted further by gentle twinkling lights.”
- Soften up the balloons visually with micro LED lights
Using translucent latex micro LED bulbs inside the balloon that eject light can make the entire arch glimmer beautifully. This provides spectacular illumination to the arrangement.
- Put curtain lights over the arch.
Twinkle lights can be used to cover the balloon arch. Loosely arranging them can create a gentle cascading and captivating look, ideal for weddings or other formal events.
The balloon arch will be the highlight of the event, and these lighting tricks will mesmerize all the attendees.
References
-
Balloons: a holistic unit – A resource discussing the use of balloons in educational and creative contexts.
-
Designing the shape of a large scientific balloon – A study on the mathematical modeling of balloon shapes, which could provide insights into structural design.
-
Quantitative echocardiographic analysis of the aortic arch predicts outcome of balloon angioplasty – While focused on medical applications, it includes detailed analysis of balloon structures.
Frequently Asked Questions (FAQ)
Q: What materials do I need for a DIY balloon arch pattern?
A: To create a DIY balloon arch, you’ll need latex balloons, a balloon pump, a balloon decorating strip or balloon tape, glue dots, twine, and possibly smaller balloons to fill in any gaps. If you’re creating a free-standing arch, you might also want to use a balloon column for added stability.
Q: How do I start with a balloon arch pattern?
A: Begin by inflating the balloons using a balloon pump. It’s important to use balloons of different sizes for a more dynamic and beautiful balloon arch. Once inflated, group the balloons into clusters, usually by twisting two balloons around each other, and then attach them to the balloon decorating strip.
Q: How do I create a spiral balloon pattern?
A: To create a spiral balloon pattern, start by alternating the colors of the balloons in your clusters. When attaching to the balloon decorating strip, ensure the colors are consistently placed sequentially to form the spiral effect as you build your arch or garland.
Q: What is the best way to inflate balloons for an arch?
A: To inflate balloons for an arch or garland, it’s best to use a balloon pump. This ensures they are inflated evenly and saves time. Avoid using helium unless you want the arch to float, as regular air is sufficient for most balloon arches.
Q: How do I attach the balloons?
A: After inflating, twist two balloons around each other to form a cluster. Then, attach these clusters to a balloon strip or tape. You can use glue dots to secure any smaller balloons that fill in gaps or create more depth in your arch.
Q: Can I make a balloon arch without a balloon strip?
A: Yes, you can use twine or fishing line instead of a balloon strip. Simply tie the clusters of balloons to the twine at intervals to create your desired arch shape.
Q: How do I ensure my balloon arch is stable?
A: To maintain stability, use a balloon column or weighted bases at the ends of the arch. If the arch is attached to a structure, use twine or command hooks to secure it.
Q: What’s a pro tip for a perfect balloon arch?
A: A pro tip for creating a beautiful balloon arch is to mix 5-inch and regular-sized balloons to add texture and fill in any gaps. This creates a fuller and more visually appealing design.
Q: Where can I find more inspiration and tutorials?
A: You can find additional tutorials and inspiration on YouTube, Pinterest, and Quora. Many creators share their step-by-step guides on making stunning balloon decorations for events like weddings or baby showers.