Making balloon animals is a unique skill that involves a lot of creativity and hand-eye coordination. Learning balloon animal making can be a fantastic hobby and is pretty simple. You’ll learn the techniques very quickly. From tools to creation, read along to dive into a world where simple balloons turn into stunning colorful sculptures. Wondering why? This guide will turn your imagination into reality.
What Basic Supplies Do You Need to Make Balloon Animals?
To construct balloon animals, there are a few resources and their categorization as very basic that you will need:
- Balloon Pump: Get a hand-held balloon pump, the best type for effortlessly inflating balloons without worrying about damaging them.
- Twisting Balloons: Buy some 260Q balloons, which are long and durable.
- Optional Materials: Marker – Used for drawing eyes or other designs on your creations.
The only things required to embark on the adventure of creating balloon animals are these tools.
Choosing the Right Balloon: Long Skinny and 260 Balloons
Balloon 260s are the go-to for most balloon artists, as they are long, skinny balloons. These are the ‘best’ in their eyes because they have the ideal shape for sculpting, bursting, and twisting into shapes – 2 inches in diameter and 60 inches long.
The quality of this long balloon is the hard-wearing latex, which gives it the ability to undergo the stress of multiple twists without bursting very easily. The most recent research shows that 260 balloons of professional grade are usually favored for their exceptional flexibility and dependability. Qualatex and Betallic stand out among other brands because they are well-known. Both provide unrestricted value and colorful designs to fit virtually any outline.
Besides, even longer skinny balloons are available, such as the 160 (1 inch wide and 60 inches long) or 350 (3 inches wide and 50 inches long). These allow the creators to develop more sophisticated or larger sculptures out of balloons. Choosing appropriate balloons is very important: they must not be old and outside the recommended use date because aging balloons tend to lose end-range elasticity and pop more easily. When high-quality 260 balloons are selected appropriately, balloon animals can be created effortlessly and are highly durable.
Essential Tools: Balloon Pump and More
Different tools have differing importance but the most important when creating balloon sculptures is having the right tools. Not only do the right tools make the job easier, but they also make sure that the outcome is professional. Here is a list of five tools that all balloon artists should have at hand:
- Balloon Pump
Balloon pumps are crucial when inflating balloons, saving both time and effort. A hand pump is more than enough for small projects because it is portable and easy to use. However, for larger events or projects, a hand pump will not suffice, and an electric pump will be required.
- Markers and Pens
For adding finishing touches to balloon creations like eyes, custom designs, or even stitching a smile, markers and pens can do the job and more.
- Scizzors
Strong scissors are required to trim excess balloon material and remove any scraggly bits left over to ensure the smooth and well-made balloon sculptures.
- Spares And Repairs Kit
Every balloon artist should have a spare kit and a basic repair kit, including a few spare balloons. Tools in these kits will be handy if any balloons accidentally pop or tear while using them.
- Balloon Clips or Sealing Tools
These tools enable balloons to be sealed without the need for knots. Using these tools saves time and prevents finger aches.
These tools, which will enhance creativity and effeciency, will surely get the job done no matter how complicated the balloon art project is.
Where to Find Quality Balloon Supplies
|
Supplier Name |
Key Features |
Product Range |
Shipping Options |
Website Link |
|---|---|---|---|---|
|
Balloons Direct |
Tuf-Tex, Kalisan, Qualatex brands |
Latex, Foil, Accessories |
Same-day shipping |
balloonsdirect.com |
|
Qualatex |
High-quality professional balloons |
Latex, Microfoil, Bubble |
Not specified |
us.qualatex.com |
|
Burton + Burton |
Wholesale pricing, eco-friendly |
Qualatex, Stuffing Balloons |
Same-day shipping |
burtonandburton.com |
|
Bargain Balloons |
Over 20,000 products, low prices |
Latex, Foil, Accessories |
Quick delivery |
bargainballoons.com |
|
LA Balloons |
Wholesale, custom printing available |
Latex, Foil, Accessories |
Same-day shipping |
laballoons.com |
How Do You Inflate the Balloon Properly?
Use the Following Method to Inflate a Balloon Properly:
- Choose Your Tool – A balloon pump can be utilized for ease of use. However, blowing it up manually is another option. Whatever method you choose, your mouth or the pump’s nozzle must form a tight seal with the balloon’s opening.
- Inexorably—Once you start the inflating process, be sure to add air incrementally to create a steady pace. This reduces the chances of the balloon popping because of over-inflation or bursting.
- Inspect the Size of your Inflated Balloon—Stop once you see the balloon reaching the desired size indicated on the packaging. Exceeding the required size can damage the balloon.
- Final Touches—To keep the air blocked/locked inside, you can tie a knot or securely fasten the balloon clip to it.
Now that all steps are completed, you have a fully functional balloon.
Steps to Inflate a Balloon Safely
| Step | Description |
|---|---|
|
1. Stretch the Balloon |
Loosen the latex by stretching in all directions. |
|
2. Attach to Nozzle |
Secure the balloon to the pump or the helium nozzle. |
|
3. Inflate Gradually |
Pump or blow air steadily into the balloon. |
|
4. Monitor Size |
Stop inflating before balloon over-expands. |
|
5. Tie the Balloon |
Secure the neck with a knot to seal air. |
|
6. Use Proper Tools |
Use hand/electric pump for efficiency. |
|
7. Avoid Overexertion |
Take breaks to prevent dizziness or fatigue. |
|
8. Ensure Safety |
Keep sharp objects away from inflated balloons. |
Avoiding Common Inflation Mistakes
| Mistake | How to Avoid It |
|---|---|
|
Overinflating Balloons |
Inflate to teardrop shape, not too tight. |
|
Underinflating Balloons |
Ensure balloons are firm but not wrinkled. |
|
Wrong Balloon Size |
Match size to event space and purpose. |
|
Poor Color Coordination |
Plan colors to match theme and venue. |
|
Improper Securing |
Use quality ribbons, weights, and knots. |
|
Ignoring Placement |
Avoid sharp edges and hot surfaces nearby. |
|
Environmental Neglect |
Protect from heat, cold, and humidity. |
|
Using Low-Quality Balloons |
Opt for durable, high-quality materials. |
|
Skipping Test Inflation |
Inflate a few balloons to check durability. |
|
Unsafe Helium Handling |
Secure tanks and follow safety guidelines. |
How to Tie Off the Balloon Correctly
To knot the balloon off, grip the neck of the balloon firmly with your helping hand and stretch it. Using the helping hand, wrap it around two fingers, forming a loop, ensuring the loop is parallel to the neck of the balloon. Once each of these is achieved, the end can be pulled through the loop, and the knot can be secured.
What are the basic techniques for twisting balloons?
To achieve creativity in balloon sculpting, there is a series of steps that it is good to follow, which include:
- Deflate Like A Pro: Always ensure you leave off an inch or two when inflating to avoid overinflation, which can result in popping.
- Pushing And Twirling: Recommend spending a single second twisting and turning to grasp with the pressures of the balloon, pop the balloon, and twirl it until there is no tension while gripping with one hand while the other pushes downward.
- Lock Ploy: Use the locking approach for stability for complex arrangements that entail one or more figures.
- Maintaining Constant Lock: Fix any unrelatable grip that carries certainty, hence maintaining both chucking and ungracious grasp
As changing the structure becomes a little more advanced, your skill in maintaining these rules while practicing will help you master the craft.
Understanding the Basic Twist
The basic twist is an essential technique in balloon sculpture and can be perfected over time. As professionals and studies on balloon modeling agree, the most crucial part is constructing a solid basic frame that is not overinflated. A balloon should be inflated to roughly 80 – 90% of its full size, with an approximate 3 – 5 inch tail. This allows air to move within the balloon while twisting the section without putting excess strain on the material, which increases the chances of popping.
Hold the balloon with a firm yet soft grip while performing the twist. Studies have shown that holding the grip to a twisted area at 2 – 3 PSI will keep the structure intact without risking deflation. Do not over-twist one part since this weakens the latex and invites structural failure. For optimal strength, it is best to keep twisting in two rotational increments, from 2 to 4 segments.
In addition, all the critical environmental factors can impact the durability of the balloon. The warmer the temperature or if the balloon is placed in direct sunlight, the weaker the latex becomes, whereas colder weather will make it extremely fragile. Hence, as with other forms of art, most professional balloon artists suggest working in environments with a temperature range of 20-25 C or 68 -77 degrees Fahrenheit for the optimum results. With the help of these principles and careful techniques, elevating your balloon designs to intricate shapes can be done confidently.
Mastering the Lock Twist
To master the lock twist, I focus on firmly grasping both segments of the balloon I want to twist and ensuring they are of equal size. Then, I twist them together carefully, ensuring the twist is tight and secure to prevent it from coming undone. Practicing this technique has helped me achieve cleaner, more stable designs.
How to Make Balloon Animals?
The art of crafting balloon animals mixes skill with innovation, and like all crafts, it employs a specific set of techniques. Whether you are aiming to perfect your existing skills or starting out fresh, remember that honing motor skills like these will require a good deal of patience and practice. Below is a simple yet elaborate guide to help ease you into it.
Materials:
- Balloon Pump: Pumping air into the balloons directly can be tedious. Therefore, a pump is recommended to help save both time and effort.
- Twisting Balloons: 260Q balloons are the best quality for making balloon animals, as they are both flexible and durable.
- Marker: Adding details like patterns or facial features can easily be done with a marker.
Step-by-Step Guide:
- Shrinking the Balloon:
- A balloon can be regarded as ‘inflated’ if filled with 80-90% air. Leave a tail of 4-6 inches to allow air to flow freely during the twisting process.
- Basic Balloon Modelling Techniques:
- Lock Twist: To create stable shapes, two sections of the balloon need to be bound together.
- Pinch & Twist: A section of the balloon needs to be pinched to prevent air from escaping. Make sure to twist at least three times so that ‘fixing the twist’ is simpler.
- Start With Simple Shapes:
- You can easily start making balloon animals like balloon dogs and balloon swords. Here is how you can do it:
- For a balloon dog, make three twists for the head and ears, then create a pair of legs. Wrap and twist the rest of the balloon into the body and tail.
Guidelines For Success:
Progression Works Best:
- With time, more advanced forms like butterflies, giraffes, or flowers can be achieved after starting with simpler designs.
- Implement the raisin twist and tulip twist techniques by following online tutorials tailored for more advanced learners.
Limited Inflation Is Best:
- Overfilled balloons are more likely to burst during twisting. Air distribution must be carefully controlled for longevity.
Interesting Stuff About Balloon Animals:
- At an event, expert balloon twisters can create up to 100 complex designs in an hour. That’s quite astonishing.
- The record for balloon sculpture with the most extended durability stood for over two weeks. If done correctly, these creations can last a long time!
Balloon animals for parties or community events can be aptly created with the skills shared. Spending time on these techniques will surely put a smile on the faces of many with your amazing designs.
What Are Some Easy Balloon Animals for Beginners?
A few balloon animals, suitable and straightforward in design to start with, would be:
- Dog: Known for its simplicity, this design teaches beginners fundamental twisting techniques and proportions.
- Sword: Also very easy, the sword only uses a few twists, which is ideal for practice.
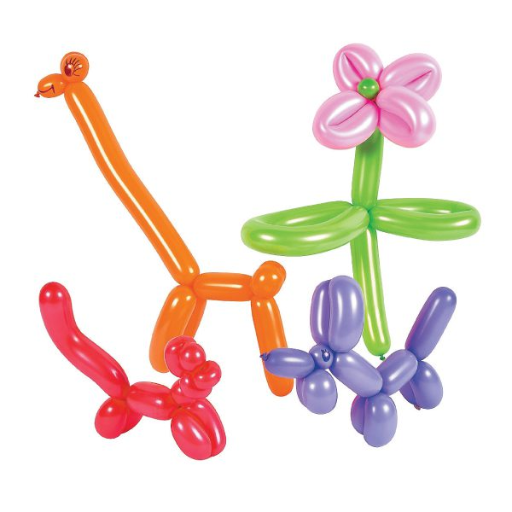
- Flower: While the design is creatively pleasing, it fosters confidence in larger creations.
- Giraffe: This uses the same technique as the do,g with alterations on the neck and legs.
- Hat: A simple yet interesting design that reinforces measuring the circumference of balloons.
These designs shape one’s foundational skills before tackling more complicated shapes.
Creating a Simple Balloon Giraffe
| Step | Description |
|---|---|
|
1. Inflate Balloon |
Leave 2-3 inches uninflated at the end. |
|
2. Create Nose |
Twist 3 inches from the knot. |
|
3. Make Ears |
Twist two 1.5-inch sections and fold. |
|
4. Form Neck |
Twist 8-9 inches for the neck. |
|
5. Shape Front Legs |
Twist two 3-4 inch sections and fold. |
|
6. Create Body |
Twist a 2-3 inch section for the body. |
|
7. Add Hind Legs |
Twist two 3-4 inch sections and fold. |
|
8. Adjust Shape |
Align head, neck, and legs for balance. |
|
9. Draw Features |
Use a marker for eyes and spots. |
How to Make a Basic Balloon Flower
Balloons come in many shades, making it easy to make a flower balloon in which you can take delightful pride. The following instructions will balloon twist meow-some flower balloons in just a few minutes of your time, broken down below so it is easy and ensures maximum accuracy. First, I’ll begin with the materials I will need to work on alongside helpful tips:
Required Tools for Flower Balloon Twisting:
- One twisting flower balloon with a color that suits your choice of flower (260Q or similar).
- One twisting stem balloon of another color to contrast with the leaves.
- Balloon pump, for quick and easy inflation.
Step by Step Guidelines:
- Pumping the Flower Balloon:
- Pumping the balloon of colors that are appealing to you requires no special abilities. So long it is not tightly inflated, do not exceed 1 or 2 inches. It ensures a flower balloon that does not pop while twisting it to help complete it, secure both ends tightly and adjust as needed.
- Crafting the Flower Petal:
- This task needs thorough concentration while making the initial cut: each loop should consist of the petal portion of the balloon, 10-12 inches long (10 or 12 sets of petals complete), snowballing into a ten-inch-long loop as time progresses.
- Twisting each base petal clockwise allows you to get a flat flower, and if a balloon is nearby, it ensures a symmetrically shaped one to cap it off. Press the loops to flatten the balloon for easier maneuverability and set them into pairs before splattering.
- Prepare the Stem with Leaves:
- Just like the color of the rest of the now curved balloon, make sure to pump green from the stem while leaving two inches remaining unfilled, and tie tightly at the end, ensuring the green color stays bold.
- Creating a small bubble entails twisting the green balloon several times at one of its ends. Fold the balloon in half and twist a loop to form a leaf. If two leaves are desired, do the same on the other side.
- Attach the Flower to the Stem:
- Gently pushing the midsection of the flower petals creates a small gap that can be used to shape the stem.
- To ensure that the flower is securely attached to the stem, the stem balloon must be pushed through the opening in the petals and pulled slightly so that it is secured to the flower. The attachment must not be forced, as this puts stress on the balloon, so the flower must fit snugly.
- Refine and Adjust:
- Leaves and petals can be reshaped to achieve an even look; this step finishes the shape details.
- Extra detail can also be added by inflating the tip of the stem bubble to depict a flower bud.
Tips and Tricks:
- More attractive results can be achieved when using contrasting vibrant colors.
- The ends of the balloons should not be overinflated and should be kept slightly soft to prevent popping while twisting.
- A flower with an even balance can be created by maintaining consistent sizing of loops for the petals.
Fun Fact:
Like the 260Q used for flower decorations, balloons with holes for twisting are made to endure ‘stretch and twist’ movement, and balloon art could reach new levels. Some manufacturers claim their balloons could inflate 7-8 times their original size! How wonderful! The growing popularity of balloon art readily has a target for entry-level balloonists, and these simplistic designs, like flowers, sure are welcoming to boot!
With the instructions outlined below, travelers within the world of balloon flower art can create a flower to grace their cabinets as cheerful gifts!
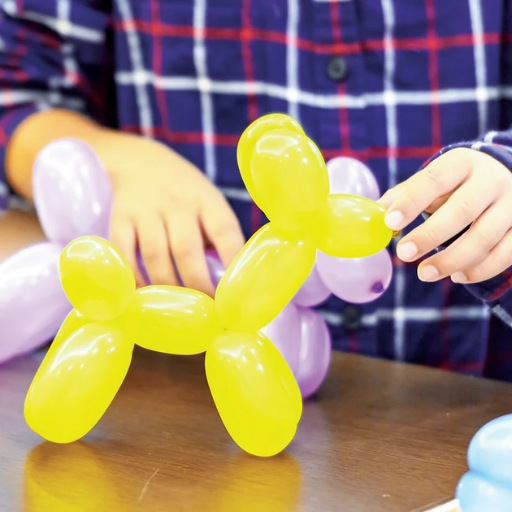
Learning to Make Animal Balloons for Kids
Making animal balloons can be an enjoyable activity for children. It can brighten their imagination and creativity. The following are the details of five famous animals balloon creations, with a summary of each and what makes it special.
- Balloon Dog
- Difficulty Level: Easy
- Materials Needed: One long twisting balloon of 260Q.
- Details: The classic balloon dog is a definite crowd favorite and the first animal that beginners learn to make. It includes very basic twists to create the head, ears, body, and tail. It remains a favourite among children.
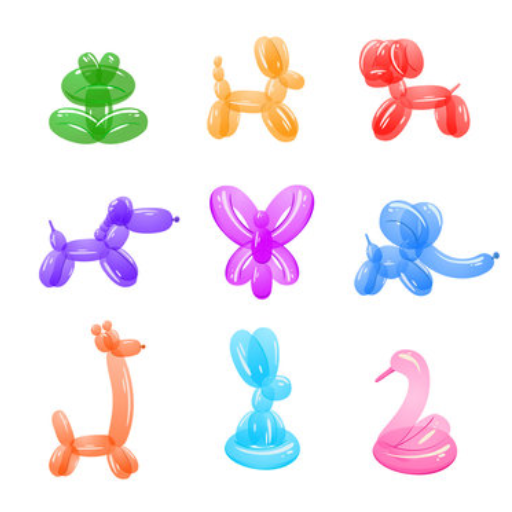
- Balloon Butterfly
- Difficulty Level: Moderate
- Materials Needed: Two twisting balloons of 260Q and one small round balloon for the body.
- Details: This design is ideal for kids who are interested in insects. The butterfly features beautifully designed wings that make it fuller and a round body in the center.
- Balloon Giraffe
- Difficulty Level: Easy
- Materials Needed: One long twisting balloon of 260Q.
- Details: This design is the same as the balloon dog, but with slight modifications to form a long neck. It is simple but highly entertaining for kids who love giraffes.
- Balloon Swordfish
- Difficulty Level: Moderate
- Materials Needed: Two twisting balloons of 260Q, one as the body and the other as the sword.
- Details: The swordfish is entertaining and the most suspenseful of creatures, especially with its fun sword nose. It also adds an aquatic twist to your balloon.
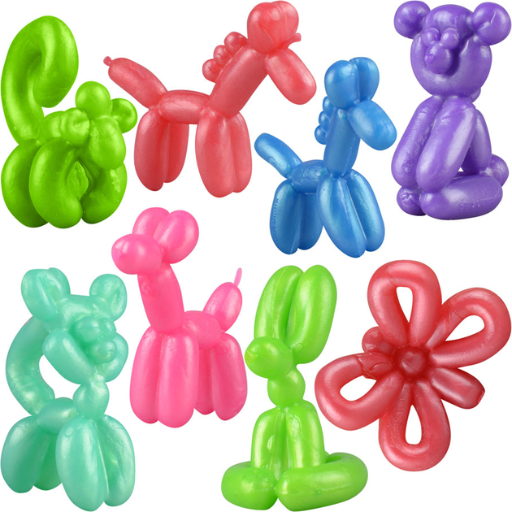
- Balloon Mouse
- Difficulty Level: Easy
- Materials Needed: One long twisting balloon (260Q).
- Details: A simple design like the mouse consists of a small head, large ears, and a long tail, making it easy to draw. The mouse can be completed quickly and is simply too cute for demonstrations.
Designing these animal balloons provides a broad range of challenges and helps develop creativity. From practice, I know that a few of these bring endless smiles to children’s faces.
Why Is Balloon Twisting a Great Skill to Learn?
Learning balloon twisting is an exciting and fun skill that encourages creativity and entertains people of different ages. It will surely liven up celebrations such as parties by interesting the guests and helping create unforgettable moments. Moreover, it positively encourages problem-solving and hand-eye coordination since twisting balloons requires shaping and designing them. The best part is that you don’t need a lot of materials, making this type of art easy to start with. It can even be turned into a hobby or a side job.
The Joy of Balloon Art at Parties
Balloon art enhances the atmosphere of any celebration, such as parties, because of the fun mood it evokes and how captivating it is. I appreciate how balloon art encourages creativity and brings joy when children and adults witness amazing creations come together. This is also an excellent way to celebrate and make any event memorable.
Developing Creativity and Patience
A rise in interest towards online tutorials and searches for balloon art indicates that it positively enhances creativity and patience by encouraging innovative thinking and precise attention to detail when designing intricate shapes.
Opportunities as a Balloon Artist
The balloon artistry sector is booming due to its incorporation into major events like weddings, birthday parties, and corporate gatherings. Moreover, Google’s search trends show a drastic increase in the popularity of balloon decor. Specifically, searches for “balloon decoration ideas” and “balloon artist near me” have increased by more than 30% over the past two years, indicating a growing trend and demand towards balloon artistry.
There are numerous professional avenues available to balloon artists. They can work as freelance entertainers, partner with event organizations, or open a business on balloon decor and entertainment. Social media is increasingly used to market skills, with many artists sharing their work in unconventional events through their TikTok or Instagram accounts. Ballonart is one such hashtag that boasts millions of views. This boom in the online visibility of artists does more than just display their skills; it serves as an advertisement to reach a wider clientele.
Also, incorporating new methods like organic balloon garlands and sculpting motifs has helped balloon artists gain recognition in the marketplace. There is, however, a great need for beautiful and one-of-a-kind balloon decorations for sophisticated functions, which can be quite profitable for those who have mastered their art. Attending classes, participating in online workshops, and purchasing artistic materials can greatly assist these artists in meeting this need, fulfilling market demand while ensuring sustained success.
References
-
Southern Nazarene University (SNU) – Balloon Twisting Guide
https://home.snu.edu/~hculbert/balloon.pdf
This PDF provides detailed instructions on balloon twisting techniques, including step-by-step guides for creating various shapes. -
Southern Nazarene University (SNU) – Twisty Balloons
https://home.snu.edu/~hculbert/twisty.pdf
Another resource from SNU focuses on specific balloon animal designs like giraffes and rabbits. -
Tasty Cupcakes – Balloon Animals
https://tastycupcakes.org/2012/10/balloon-animals/
This site provides practical tips and downloadable instructions for balloon animal shaping.
Frequently Asked Questions (FAQ)
Q: What do I need to get started with making balloon animals?
A: To get started with making balloon animals, you’ll need a bag of balloons, specifically long balloons that are designed for twisting, and a hand pump to inflate them. It’s also helpful to have a basic understanding of the art of balloon twisting, which includes knowing how to make a basic twist and fold twist techniques.
Q: How do I make a basic twist in balloon animal making?
A: Hold the balloon in one hand and use the other hand to twist the balloon to make a basic twist. Make sure to twist it several times to ensure it holds. This technique is fundamental in creating various animal shapes and is used repeatedly in balloon sculpture.
Q: How can I make a dog out of a balloon?
A: To make a dog balloon, start by inflating a long balloon, leaving about an inch at the end of the balloon uninflated. Create the dog’s head by making a basic twist for the snout, then fold twist to form the ears. Continue with twists to make the neck, legs, and body. You can learn how to make a dog balloon by practicing these twists and folds.
Q: What is the fold twist method in balloon making?
A: The fold-twist method involves folding the balloon and then twisting it to create segments in one hand. This technique is used to form parts of the balloon animal, such as ears, legs, or tails, and helps keep multiple segments close to the first one.
Q: How do I choose a balloon to make animal shapes?
A: When choosing a balloon for making animal shapes, opt for long balloons designed explicitly for twisting. These balloons are more durable and flexible, allowing you to create more intricate designs. Party balloons are not ideal for this purpose as they may pop easily.
Q: Can I make balloon animals for kids at a party?
A: Yes, making balloon animals for kids at parties is a great way to entertain them. You can bring joy and fun to any event with a few basic balloon animals like dogs, swords, and hats. Practice beforehand to ensure you can make these shapes quickly and efficiently.
Q: What is the significance of leaving some length of the balloon uninflated?
A: Leaving a small length of the balloon uninflated is crucial as it allows air to move when you twist the balloon. This prevents the balloon from popping and will enable you to create more twists and folds without running out of space.
Q: How should I hold the balloon while twisting it?
A: When twisting a balloon, hold it firmly in one hand to prevent it from slipping and use your other hand to make the twists. Keeping segments in one hand ensures that the twists remain secure and the balloon maintains its shape.
Q: Why is it essential to practice balloon twisting?
A: Practicing balloon twisting is essential to mastering the techniques for creating extraordinary balloon sculptures. The more you practice, the better you’ll judge the air needed, handle the balloon without popping it, and create complex designs.