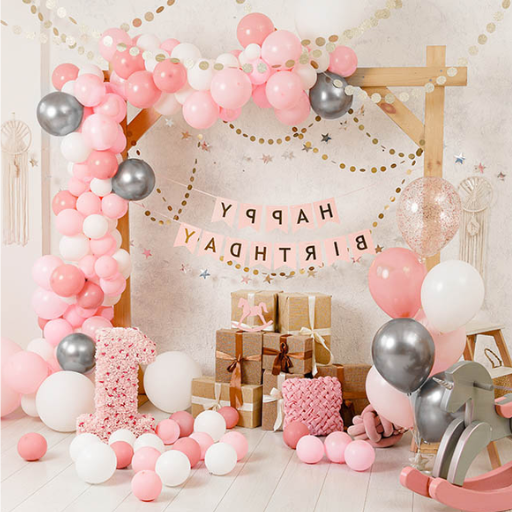
Crafting a gorgeous balloon garland can be a delightful experience that enhances any celebration without requiring too much effort! Balloon garlands can be used to decorate for birthday parties, baby showers, weddings, and virtually any other festive occasion. This guide allows even the most inexperienced balloon decorators to achieve a fabulous, professionally-crafted balloon garland through easily followed guidelines and helpful tips. Through reading this guide, your guests are sure to be astounded when you create a dazzling centerpiece in an impressively straightforward manner!
How Do You Make a Balloon Garland Easily?
For simply creating a balloon garland, you can follow these instructions:
- Gather Supplies: Gather a set of balloons in different colors and sizes, a balloon pump, a balloon decorating strip, and optional adhesive dots for covering gaps.
- Inflate the Balloons: Use a pump to pump air into your balloons. Inflating the balloons to different sizes will achieve a more dynamic appearance.
- Attach Balloons to the Strip: Tie the balloons and place them in the holes of the decorating strip. For a ‘balanced’ look, remember to alternate colors and sizes as you proceed.
- Hang the Garland: Use command hooks, tape, or string to hang and secure the garland at the desired location.
- Fill Gaps (Optional): To make the balloon garland look fuller, use smaller balloons or other accents and attach them with adhesive dots.
These simple instructions will help you achieve the stunning balloon garland you desire!
What Supplies Are Needed for a DIY Balloon Garland?
A stunning balloon garland consists of a couple of essential supplies; no single one could be omitted. Here is everything you are going to need to complete the garland:
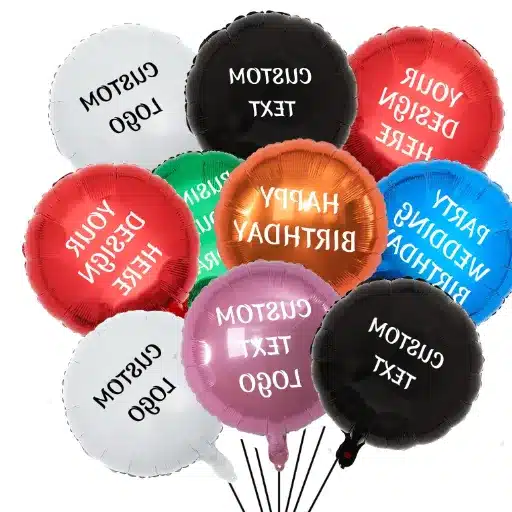
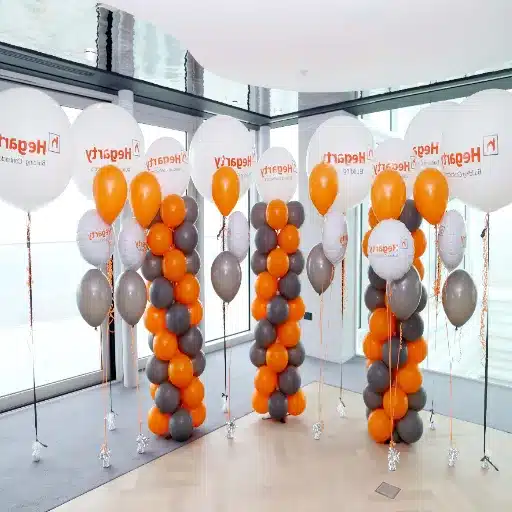
- Balloons: Multiple-size and multi-colored balloons are absolutely necessary to match the theme. Garlands typically use 5-inch,10-inch, and 12-inch balloons and sometimes even 18-inch balloons for added depth. For a 6-foot garland, you will need around 50 to 75 balloons.
- Pump: A manual or electric pump is important to help save time and effort when inflating balloons. A pump will do wonders because of the sheer number of balloons needed.
- Decorating Strip (Balloon Arch Tape): This plastic strip has holes at equal distances. Each balloon can be strung through the holes, making it easier to arrange them in a garland formation. Most projects need a 16-foot-long strip, but so that it can be trimmed to the desired length.
- Adhesive Dots: These dots can be used to attach smaller balloons to the garland to add some sense of depth.
- String or Command Hooks: These are used to pin or affix the balloon garland to a doorframe, wall, or anywhere else. Command hooks are easy to add without ruining the wall.
- Optional Decoration: Add some green and faux flowers along with tassels, greet, and add charm and complete the design.
- Scissors: Required for trimming the string, tape, or decorating strips to finish your arrangement.
- Tape or Fishing Line: These help hold the garland or create different shapes.
Supplies can be obtained from craft shops and the internet, allowing you to prepare beforehand and easily assemble your balloon garland. As long as the right tools are at hand, professional-level decorations that stand out in any event can be made.
How to Use a Balloon Garland Kit Effectively
To utilize a balloon garland kit correctly, read the provided steps to ensure all portions of the kit are used. Blow the balloons to different sizes to add depth and attach them to the decorating strip. Use tape or adhesive dots to decorate gaps and balance other areas figuratively and literally.
Step-by-Step Tutorial for an Easy Balloon Garland
| Step | Key Point | Details |
|---|---|---|
|
1. Gather Supplies |
Balloon kit, pump, hooks, tape |
Include balloons of various sizes and colors. |
|
2. Inflate Balloons |
Use an electric pump |
Inflate balloons to different sizes for variety. |
|
3. Attach to Strip |
Use a balloon decorating strip |
Insert balloon knots into strip holes, alternating colors and sizes. |
|
4. Plan Shape |
Decide garland shape |
Mark the wall spots for hooks to visualize the arrangement. |
|
5. Hang a Garland |
Use hooks and fishing line |
Secure the garland to the hooks, working section by section. |
|
6. Fill Gaps |
Add smaller balloons |
Use glue dots to fill visible gaps for a fuller look. |
|
7. Add Decorations |
Include themed embellishments |
Use ribbons, faux flowers, or other accents to match the party theme. |
|
8. Final Touches |
Adjust and secure |
Ensure alignment and stability before stepping back to admire your work. |
What Are the Best Tips for Using a Balloon Pump?
- Choose the Right Pump: If inflating many balloons, consider using an electric pump, while handheld pumps work best for smaller tasks.
- Secure the Balloon Properly: Before inflating, ensure that the balloon’s neck is well secured over the pump nozzle to prevent air from escaping.
- Inflate Gradually: To avoid bursting the balloon, slowly and evenly inflate it without overfilling it.
- Check Balloon Size: Stop inflating at the desired size to ensure consistency, or use a measurement tool to check the size, if preferred.
- Use in a Ventilated Area: Ensure that the area in which you plan to use the electric pump is well ventilated; this will prevent overheating.
- Rest Between Uses (for Electric Pumps): Continuous use of the electric pump makes it hot, so allow the device to cool off if you want to prolong its usage.
In any decoration project, balloon inflation using an electric pump must ensure efficiency and safety, and these tips help achieve that.
Choosing the Right Balloon Pump for Your Garland
Considering the scale of your project, it is equally important to pay attention to your specific requirements while selecting a balloon pump for a garland. Here are five types of balloon pumps with their characteristics and applications:
- Hand Pump
- Features: Compact size, lightweight, and manually operated.
- Best For: Small-scale or infrequent projects.
- Pros: Inexpensive, easy to carry, and does not rely on electricity.
- Cons: Can be physically demanding and exhausting when a large number of balloons need to be pumped.
- Single Nozzle Electric Pump
- Features: Compact electric pump with one nozzle for continuous air pumping.
- Best For: Medium-scale projects that have a moderate number of balloons.
- Pros: Saves time and is easy to operate.
- Cons: Only one balloon can be filled at a time.
- Dual Nozzle Electric Pump
- Features: Comes with two nozzles for simultaneous inflation of multiple balloons.
- Best For: Large-scale parties or professional use by balloon people.
- Pros: Very efficient for larger projects, which saves time.
- Cons: Heavier and more costly than single-nozzle versions.
- Battery-Operated Pump
- Features: Wireless, portable, and powered by rechargeable or single-use batteries.
- Best For: Outdoor functions or any location without electricity.
- Pros: Flexible and functional for multiple occasions.
- Cons: Diaphragm life is short, and the device is not designed for heavy-duty work.
- A foot pump
- Features: This is a manual pump operated by the foot and made of sturdy material.
- Best For: Projects of medium scale where using electric or battery pumps is impossible.
- Pros: It can be operated without hands and does not require electricity.
- Cons: It is more physically demanding compared to the electric pumps.
Once you comprehend the advantages and restrictions of every pump type, you’ll know how each can help you create the perfect balloon garland.
How to Inflate Different Sizes of Balloons
| Step | Key Point | Details |
|---|---|---|
|
1. Use a Balloon Sizer |
Ensure consistent balloon sizes |
Insert balloon into sizer, inflate to marking |
|
2. Select Inflation Method |
Choose air or helium |
Use a pump for air or helium valve for helium |
|
3. Inflate Gradually |
Avoid overinflation |
Inflate slowly to prevent bursting |
|
4. Match Balloon Size |
Follow size chart |
Use 5″, 9″, 11″, or larger as needed |
|
5. Secure Balloon |
Tie securely after inflating |
Prevent air or helium leakage |
Efficiently Pumping Balloons for Your Next Party
To inflate the balloons for the party, I meticulously plan to make everything as efficient as possible. The first step is picking up the right pump depending on the number of balloons that need to be pumped up and the time I have on hand. For instance, if it’s a small family function, I will go with the handheld manual pump, and if it’s a large gathering, I will switch to an electric pump because it saves time. To streamline the process even more, I maintain an organizational system where balloons of different sizes and colors are sorted, allowing me to inflate multiple balloons at once. Overall, having a plan saves me time and reduces stress.
How to Hang Your Balloon Garland Perfectly?
Pick a strong anchor point, such as a wall, an arch frame, or a railing, so the balloon garland is adequately secured. The best way to ensure the garland does not damage any surfaces is by using command hooks, clear fishing lines, or adhesive strips that are easily removable. While placing the garland, feel free to drape it however you want as long as one end is attached and the shape is as desired. Even distribution along the length of the garland is essential; if the distribution isn’t even, this will lead to sagging in the balloons. Finally, do any last-minute polishing to alter the ratio or the position of the balloons to look appealing and further enhance the balloon garland.
Using Command Hooks and Twine for Stability
Using Command hooks paired with twine makes setting up decorations such as balloon garlands a quick and easy twine-on solution that does not leave any damage on walls. Decorated hooks can carry significant amounts of weight, and with small (0.5 lbs) and jumbo hooks (7.5 kg) available, there is a hook suitable for every sized garland. Strings of twine paired with hooks will reduce the chances of sagging or detached decorations, ensuring the weight is evenly distributed.
Placing Command hooks in the middle of the balloon garland permits a hands-free position along walls or ceilings. Ducks and gallops should be spaced 12-18 inches apart, depending on the overall length and weight of the garland. The cut twine should also be long enough so that it is easy to tie around the hooks. Garlands should always be tested before the occasion, so any possible adjustments can be made. Removing the retired decorations becomes easy and quick after the event without any marks left on the surfaces.
Attaching Balloons: Tips and Tricks
|
Key Point |
Description |
|---|---|
|
Inflate Balloons Evenly |
Ensure similar sizes for symmetry. |
|
Tie Necks Together |
Use a half knot for secure attachment. |
|
Create Duplets and Triplets |
Combine 2 or 3 balloons for clusters. |
|
Twist for Quad Clusters |
Twist two duplets for a stable quad. |
|
Use String or Ribbon |
Thread balloons for banners or arches. |
|
Avoid Sharp Objects |
Prevent popping by keeping balloons safe. |
|
Add Decorations |
Use streamers or flowers for extra flair. |
|
Use Fishing Line for Banners |
Strong and invisible for long banners. |
|
Secure with Tape or Hooks |
Hang banners with tape or adhesive hooks. |
|
Experiment with Colors |
Mix colors for themed or vibrant designs. |
Securing Your Garland with Glue Dots
To attach the garland with glue dots, I carefully stick the glue dots on the back of the garland and then gently press them onto the required area. I’m certain to press hard enough for it to stay put but not so fast that the tearing will happen. Choosing glue dots prevents any mess and damage, making it one of my go-to decorating tools.
How to Create a Stunning Color Scheme for Your Balloon Garland?

|
Key Point |
Description |
|---|---|
|
Start with a Theme |
Match colors to event theme or occasion. |
|
Consider Venue Colors |
Complement existing venue decor. |
|
Use Color Psychology |
Choose colors to evoke desired emotions. |
|
Incorporate Trends |
Use popular colors like pastels or metallics. |
|
Mix and Match Finishes |
Combine matte, metallic, and pearl finishes. |
|
Balance Light and Dark |
Use light and dark tones for depth. |
|
Add Neutral Tones |
Use neutrals to balance bold colors. |
|
Follow Color Theory |
Use complementary or analogous color schemes. |
|
Experiment with Ombre |
Create gradients for a dynamic look. |
|
Test Before Finalizing |
Assemble a sample to ensure harmony. |
Choosing Pastel or Rainbow Colors for Your Balloon Arch
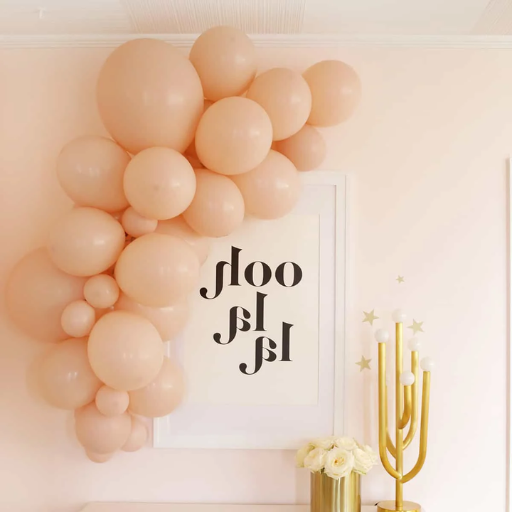
When ordering pastel or rainbow colors for your balloon arch, remember to think about the atmosphere of your event. Pastel hues are refined and ideal for baby showers, weddings, or springtime celebrations. At the same time, rainbow colors are bright and festive, lending themselves well to birthdays, carnivals, and pride events. Here are some of the most popular combinations of colors that can be used for balloon arches in both pastel and rainbow tones:
Popular Pastel Color Combinations
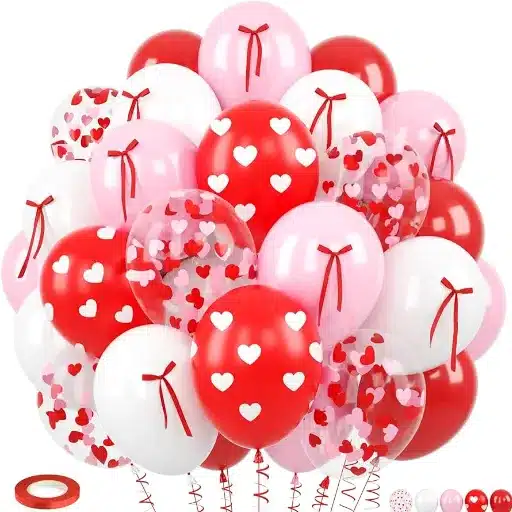
- Blush Pink, Lavender, and Cream – Suitable for an overpoweringly romantic or feminine feel.
- Soft Blue, Lilac, and White – Great for tranquil and calm themed events.
- Mint Green, Peach, and Pale Yellow – A cheerful sight for everyone.
- Powder Pink, Baby Blue, and Gray – For classic blends at baby showers.
- Light Coral, Sage Green, and Ivory – Earthy blends for rustic themed settings.
Popular Rainbow Color Combinations
- Red, Orange, Yellow, Green, Purple, and Blue—This is a classic rainbow spectrum combination for those looking to be bold with colors.
- Hot Pink, Turquoise, Lime Green, Yellow, and Lilac are ideal for extremes in the summer or a tropical vibe.
- Vivid Blue, Fiery Red, Bright Orange, and Lemon Yellow – Bold and festive colors perfect for casual parties.
- Neon Rainbow (Electric Blue, Bright Pink, Neon Green, Yellow) – Playful yet contemporary style for night decorated themes.
- Sleek, modern, but not neglecting fun, Rainbow Ombre features every gradient tone of the original colors for a sophisticated stance while retaining the theme’s deeply expressive purpose.
Pastels and the bold, bright colors of rainbows are emphasized in all these color schemes, effectively enhancing the decorations, which are bound to elevate the event’s atmosphere.
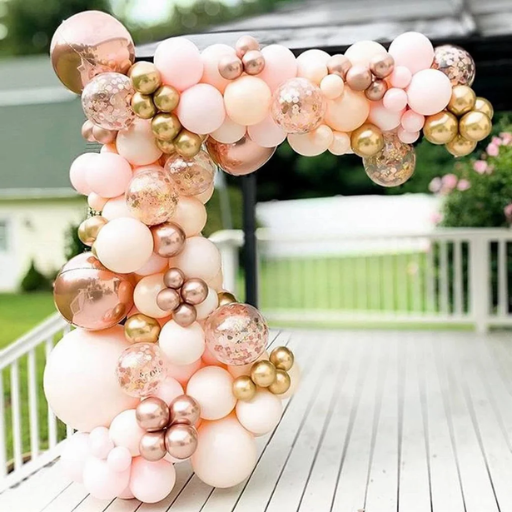
Incorporating Confetti and Filler Balloons
Confetti and filler balloons make your balloon arrangements stand out. They add visual complexity and an element of surprise. For example, balloons with shiny trim and metallic foil of differing colors capture light beautifully and create an eye-catching shimmer. Themed shapes like stars and hearts can also be used as confetti along with colored paper and gold, silver, or rose gold to best capture the attention of your guests. Due to its glamor, foil confetti has seen increased demand for weddings and upscale events.
On the other hand, filler balloons involve placing smaller balloons inside larger ones. Expert decorators use a mixed technique, placing tiny 5-inch balloons into 12—or 18-inch. While some match the color scheme with the rest of the decoration, others choose to introduce an accent color that adds to the visual contrast. This increased interest in unified design explains why searches for ‘double-stuffed balloons’ increased by over 30% last year.
To achieve the best results, it can be beneficial to use opaque balloons with fillers and juxtapose them with transparent balloons filled with confetti. Furthermore, using a hand pump or electric inflator keeps the water inside the balloons from condensing, maintaining a polished and professional appearance. From birthdays and weddings to corporate events, these balloon additions will make your decorations stand out and ensure the event will be unforgettable!
What Are Common Challenges When Making a Balloon Garland?

|
Key Point |
Description |
|---|---|
|
Over-Inflating Balloons |
Leads to popping and uneven shapes. |
|
Uneven Balloon Sizes |
Creates an unbalanced and messy look. |
|
Loose Garland Structure |
Causes gaps and instability in the design. |
|
Skipping Mini Balloons |
Leaves gaps and reduces visual depth. |
|
Improper Balloon Placement |
Results in asymmetry and poor aesthetics. |
|
Popping During Assembly |
Caused by over-tightening or sharp objects. |
|
Transporting the Garland |
Risk of popping or deformation in transit. |
|
Temperature Sensitivity |
Heat or cold can shrink or pop balloons. |
|
Low-Quality Balloons |
Prone to deflating and popping quickly. |
|
Inadequate Planning |
Leads to mismatched colors or incomplete design. |
Tying Balloons and Preventing Knots
Balloons, whether inflated for a celebration or located at an amusement park, can require a lot of management when filling or tying them up. The following are five tasks one may encounter while managing balloons and the tools/solutions to help mitigate them:
- Knot Tightening by Hand
The repetitive task of tying knots manually can take a toll on one’s hands and fingers. To make it easier on your fingers and also make it faster, try to get a balloon tying tool.
- Balloons Popping During The Tying Process
When balloons are tied, they can sometimes pop due to surplus air being filled into them. It is always advised to fill a balloon to a good level without going too extreme and to try to keep some space at the end of the balloon open for movement.
- Balloons Getting Loose/Unsecured
The constant shifting of balloons due to air coming out of them gets annoying. To overcome this problem and keep the balloons secured, use double knotting on the ties or balloon clips.
- Balloon Garland Entanglement
When creating a balloon garland, it becomes increasingly complex to untangle balloons that have become tangled by the end. To mitigate this issue, tie the balloons in clusters before hanging and systematically attach them to the garland ribbon.
- Too Many Ropes Aglow Can Lead To Confusion On Loops That Are Tied The Most
Making changes or putting adjustments can become problematic when ropes are tightly secured within a bow. Avoid getting into too many frustrations by switching back to basic knots and using balloon clips. Filling them can make the entire process super simple and fun—
With so many celebrations taking place all across the globe for Kids, balloon walls are an easy way to fill them up with the rest, leaving people amazed. This is great for upgrades! Overcoming these obstacles allows for a smoother process of balloon decorations, which enhances the overall setup for any event.
Handling Holes in the Balloon Strip
|
Key Point |
Description |
|---|---|
|
Skip Some Holes |
Avoid over-tightening by skipping holes. |
|
Use Larger Balloons Sparingly |
Prevent overcrowding by spacing larger balloons. |
|
Alternate Balloon Sizes |
Create a dynamic look with varied sizes. |
|
Secure Knots Firmly |
Ensure balloons stay in place securely. |
|
Fill Gaps with Mini Balloons |
Use smaller balloons to cover empty spaces. |
|
Adjust Placement |
Slide balloons for better spacing. |
|
Trim Strip to Fit |
Cut strip to match the desired garland size. |
|
Avoid Overloading Strip |
Prevent sagging by balancing balloon weight. |
|
Test Stability |
Check for secure attachment before hanging. |
|
Use Adhesive for Extra Hold |
Add glue dots for additional stability. |
Ensuring the Garland Stays Intact at Your Birthday Party
Day of the week balloons make for superb decorations; however, to guarantee that the balloon garlands maintain their integrity over the celebratory period, some pragmatic measures and materials should be employed. Follow these five steps to ensure that the strengths of the garlan is kept at an optimal level:
- Use Strong Adhesives, Hooks, or Command Strips
Consequently, the garland should be anchored to the wall or any other surface using durable adhesive hooks or command strips. These remove the risk of damaging the surface while supporting the weight that must be hoisted.
- Use Of Durable Balloon Tape
Invest primarily in tapes that are prone to theft but not prone to tearing under pressure, as this type of tape will keep the different parts of the Garlan aligned and secure during the event.
- Weights At The Ends To Anchor
Securing weighted objects, such as sandbags or bulging balloons, to the end of the garland can add stability to motion or prevent the garland from loosening due to air currents.
- Pre Party Check For Weak Links
Prior to the checking, the garland will always have a few loose balloons to plug any putida cracks that may form an issue or hinder the usability of the tape. These balloons will always be held fast with added tape or clips.
- Store the Garland in a Designated Safe Static Location
Store the garland in a location that will experience minimal movement within the vicinity, such as a wall or ceiling mount. Additionally, avoid placing it near windows or regions exposed to direct sunlight, as the heat will damage the inflatable balloons.
Carrying out the procedures above will guarantee the preservation of the balloon garland throughout the duration of your birthday celebration, allowing you to display it seamlessly without any last-minute preparations.
References
-
University of Texas at El Paso – Arts and Crafts – This page provides a guide on creating a DIY balloon garland for events like birthdays or baby showers.
-
DIY Balloon Garland (Better Homes & Gardens) – Step-by-step instructions with balloon garland tape.
-
How to Make a Balloon Garland and Arch (Shimmer and Confetti) – A detailed tutorial with time estimates.
Frequently Asked Questions (FAQ)
Q: What are the easy steps to make an easy balloon garland?
A: Select your balloon sizes and colors to make an easy balloon garland. Inflate your balloons using an electric balloon pump for efficiency. Use a balloon decorating strip to attach the balloons, alternating between larger balloons and smaller balloons for a balanced look. Trim the garland strip as needed and use balloon tape to secure loose ends. Finally, hang your garland using hooks or string.
Q: How do I choose the right balloon sizes and colors for my garland?
A: Consider the theme and decor of your event. For a pastel rainbow balloon garland, opt for soft, pastel colors. Use a mix of 12″ balloons and smaller balloons to create depth and dimension. Mixing different sizes and colors helps your garland look more dynamic and visually appealing.
Q: What is the best way to hang your garland?
A: To hang your garland, use hooks or string that can support the weight of the balloons. For a more secure hold, you can also attach the garland to a backdrop using a glue gun. Make sure the surface is clean and dry before attaching the garland.
Q: Can I create a balloon garland without a balloon decorating strip?
A: Yes, you can create a balloon garland without a balloon decorating strip using balloon knot tying techniques. However, a balloon decorating strip is an easy way to add structure and is easy to use, making the process quicker and more efficient.
Q: How do I ensure my balloon garland is a great centerpiece?
A: Choose a prominent location for your balloon garland’s display to ensure it is a great centerpiece. Use a variety of balloons to make the garland vibrant, and consider incorporating themed elements or complementary decor to enhance the overall look.
Q: What tools and materials do I need for a DIY balloon garland?
A: To make a DIY balloon garland, you’ll need latex balloons, an electric balloon pump, a balloon decorating strip or balloon tape, hooks or string to hang your garland, and possibly a glue gun to secure it in place. These tools make the process quick and easy.
Q: How can I incorporate a rainbow balloon theme into my garland?
A: To incorporate a rainbow balloon theme, use various vibrant colors arranged in a rainbow pattern. A pastel rainbow balloon theme can be achieved by selecting softer shades. Ensure a balanced distribution of colors for an eye-catching effect.
Q: Is there an easy way to add embellishments to my balloon garland?
A: Yes, you can embellish your balloon garland with additional decor such as flowers, foliage, or ribbon. Secure these elements with balloon tape or a glue gun to ensure they stay in place and enhance the visual appeal of your decor.
Q: What is the purpose of using smaller balloons in a garland?
A: Smaller balloons fill gaps and create a fuller appearance in a balloon garland. They help achieve a layered effect and add texture, complementing the larger balloons and making the overall display more dynamic.
Q: How do I ensure my balloon garland lasts for my event?
A: To ensure your balloon garland lasts, avoid over-inflating the balloons, as this increases the risk of popping. Assemble the garland as close to the event time as possible and store it in a cool, dry place to prevent the latex balloons from overheating or deflating too quickly.