Creating your own balloons at home is a fun and creative activity and a fantastic way to add a personal touch to parties, decorations, or even simple craft projects with your family. Whether you want to customize designs or experiment with eco-friendly materials, DIY balloon-making opens the door to endless possibilities. This guide will walk you through the process, offering valuable tips and tricks to help you craft unique and eye-catching balloons. Get ready to channel your inner creator and turn ordinary materials into extraordinary decorations!
What Materials Do I Need to Make My Balloons?

To make your balloons, you will need the following materials:
- Liquid latex – The primary material for creating balloons, available at craft or specialty stores.
- Balloon molds – Shaped forms used to provide the structure for your balloons.
- Coagulant solution – A mixture that helps the latex set and take shape on the mold.
- Brush or sponge – This is used to apply coatings of latex and coagulant evenly.
- Warm water and mild soap – Clean molds before use, ensuring a smooth finish.
- Gloves – To protect your hands while working with latex and coagulants.
Having these essentials on hand will help you get started creating customized and durable balloons.
Choosing the Right Latex or Liquid Latex
Selecting the ideal latex or liquid latex is crucial for creating durable, professional-quality balloons. Multiple types of latex are available, and understanding their properties can significantly impact your results.
- Natural Latex vs. Synthetic Latex
-
- Natural Latex is biodegradable from rubber trees, making it an environmentally friendly option. It provides a high level of stretch and durability, which is ideal for balloon-making. The tensile strength of natural latex typically ranges between 16 and 31 MPa (megapascal), ensuring flexibility and resistance to tearing.
- Synthetic Latex is manufactured from petroleum-based products. While less elastic than natural latex, it is more resistant to heat and chemicals and provides a smoother surface finish. This can be ideal for specialized balloon designs.
- Pre-Vulcanized vs. Unvulcanized Latex
-
- Pre-vulcanized latex is treated to improve its elasticity and durability. It is ready to use and requires less curing time, making it perfect for beginners or quick production cycles.
- Unvulcanized latex requires adding curing agents, but it allows for more customization in terms of flexibility and final texture. This is better suited for advanced applications.
- Consideration of Color and Additives
Liquid latex is often available in various colors or can be tinted using pigments. For vibrant balloon-making, opt for a high-pigment latex that maintains its color even when stretched.
Additionally, consider latex with added UV resistance if the balloons will be used outdoors for prolonged periods, as regular latex can degrade under sunlight.
- Health and Safety
Be aware that some people may have a latex allergy due to proteins found in natural latex. If necessary, choose low-protein or hypoallergenic synthetic latex to minimize risks.
When purchasing, prioritize high-quality, trusted brands like Mold Builder, Liquid Latex Fashions, or Concentrated Balloon Latex, which offer dedicated formulations for balloon-making. Compare reviews and specifications to find latex that matches your specific project needs. By selecting the right type of latex, you ensure your balloons become customizable, durable, and visually appealing.
Essential Tools and Balloon Weights
Creating professional and eye-catching balloon decorations requires the right tools and materials. Below is a detailed list of essential tools and balloon weights to help you get started:
- Balloon Pump or Inflator
A balloon pump, whether manual or electric, saves time and effort during the inflation process. Electric inflators are especially useful for large-scale projects.
- Tying Tool
A balloon tying tool can prevent hand fatigue and speed up the process, especially when dealing with high volumes of balloons.
- Balloon Clips
Balloon clips are an easy alternative to tying knots, ensuring the balloons stay securely inflated.
- String or Ribbon
High-quality string or ribbon is essential for creating balloon garlands, arches, or clusters and attaching balloons to weights.
- Balloon Weights
Weighted bases, available in various shapes and sizes, anchor helium-filled balloons in place. They can also serve as decorative elements to complement the display’s theme.
These five tools and accessories make balloon decoration more efficient and ensures professional project results.
Preparing a Balloon Mold for DIY Projects
|
Key Point |
Description |
|---|---|
|
Balloon Selection |
Use round or skinny balloons. |
|
Stretching Balloons |
Inflate balloons multiple times first. |
|
Funnel Preparation |
Cut a bottle to create a funnel. |
|
Mixing Material |
Adjust consistency for easy pouring. |
|
Filling Balloons |
Use a funnel and a blow to fill evenly. |
|
Removing Air Bubbles |
Jiggle and burp air from the balloon. |
|
Sealing Balloons |
Tie off securely after filling. |
|
Drying Time |
Allow 2 days for hardening. |
|
Final Touches |
Sand to smooth edges if needed. |
How to Create a Balloon with Latex?
- Prepare Materials
Gather liquid latex, a mold (such as a round object or pre-designed balloon mold), and a clean work area. Ensure all tools are dry and free of debris.
- Coat the Mold
Dip the mold evenly into the liquid latex, ensuring it is fully coated. Allow excess latex to drip off to create a uniform layer.
- Dry the Latex
Place the coated mold in a well-ventilated space, allowing the latex to air-dry completely. For thicker balloons, repeat the dipping and drying process to add layers.
- Release the Balloon
Once dry, gently peel the latex off the mold. Use talcum powder to prevent sticking if necessary.
- Inflate and Use
Inflate the balloon carefully using a pump, then secure the opening. Your latex balloon is ready for use!
Steps to Dip and Coat the Mold in Detail
Here are five specific steps to dip and coat the mold for creating high-quality latex balloons:
- Prepare the Latex Mixture
Begin by thoroughly mixing the liquid latex to ensure consistency. If needed, add coloring agents to achieve different shades. Aim for a uniform texture and color in the mixture for smooth application.
- Preheat the Mold
Heat the mold slightly before dipping it into the latex mixture. This step helps the latex adhere evenly to the mold and creates a flawless coating.
- Dip the Mold Gradually
Slowly immerse the mold into the latex mixture at a steady and consistent speed. This prevents air bubbles from forming and ensures an even coat. Hold the mold in the latex for a few seconds to allow proper adhesion.
- Control Excess Latex
Remove the mold gently and let the excess latex drip back into the container. Rotate or tap the mold to remove any lingering drips and avoid uneven layers.
- Inspect the Coating
Check for imperfections, such as thin areas or bubbles, and touch up if necessary. This guarantees a durable and uniform finish for your balloon. If required, repeat the dipping process for thicker results.
Drying and Sealing the Balloon Properly
|
Key Point |
Description |
|---|---|
|
Humidity Control |
Dry balloons in low-humidity areas. |
|
Proper Inflation |
Avoid overinflation to prevent bursting. |
|
Twist Before Tying |
Twist the neck to maintain a tight seal. |
|
Secure Knot |
Tie a tight knot to prevent air escape. |
|
Use Balloon Clips |
Add clips for extra sealing security. |
|
Avoid Direct Sunlight |
Prevent heat expansion and bursting. |
|
Store in Cool Place |
Keep balloons in a dry, cool area. |
|
Inspect Regularly |
Check for deflation during the event. |
|
Portable Pump |
Use for quick on-site touch-ups. |
Using Additives for Enhanced Durability
When using additives for enhanced durability, I select the right ones compatible with latex, such as curing agents or strengthening powders. These additives help improve the elasticity and lifespan of the latex, making the final product more durable. Following the recommended proportions, I carefully mix the additives into the latex to avoid compromising the material’s quality. This step ensures a finished balloon that is both resilient and long-lasting.
How Can I Make a Homemade Helium Balloon?

You will need a balloon, a helium tank, and some string to make a homemade helium balloon. Follow these simple steps:
- Prepare the Balloon: Start with a high-quality balloon free of holes or defects. Latex balloons are recommended for better expansion and durability.
- Fill with Helium: Attach the neck of the balloon to the nozzle of the helium tank, ensuring a secure fit. Open the helium valve slowly and allow the balloon to fill. Do not overfill it, as this could cause the balloon to burst.
- Tie the Balloon: Once the balloon is filled to your desired size, carefully remove it from the nozzle and tie the neck into a secure knot.
- Attach the String: Tie a string to the neck of the balloon to prevent it from floating away. Adjust the string’s length as needed based on its intended use.
Handle the helium tank carefully and follow all the manufacturer’s safety instructions. Helium is a non-toxic gas, but it should be used in a well-ventilated area.
Understanding Buoyancy and Float Mechanics
Buoyancy and float mechanics are governed by the principles of fluid dynamics. An object floats when the upward buoyant force exerted by the fluid equals the object’s weight, a concept grounded in Archimedes’ principle.
Filling the Balloon with Helium or Hydrogen
|
Key Point |
Description |
|---|---|
|
Gas Safety |
Helium is non-flammable; hydrogen is flammable. |
|
Buoyancy |
Hydrogen provides more lift than helium |
|
Cost |
Hydrogen is cheaper than helium |
|
Availability |
Helium is widely available |
|
Inflation Process |
Use a nozzle for controlled filling |
|
Sealing |
Tie securely or use self-sealing valves |
|
Float Duration |
Helium balloons last 12-24 hours |
|
Safety Precautions |
Avoid heat sources with hydrogen |
|
Environmental Impact |
Hydrogen is renewable; helium is limited. |
Attaching Balloon Weights for Stability
Attaching weights to balloons is essential to maintain control, stability, and safety, especially during events, scientific experiments, or decorative displays. Balloon weights prevent the balloon from drifting away, allowing it to stay grounded or float at a desired height. When choosing balloon weights, it’s essential to consider factors such as the size of the balloon, the lifting force of the gas used (helium or hydrogen), and environmental conditions like wind.
The lifting capacity of helium is approximately 1 gram per liter of gas, while hydrogen, being slightly lighter, has a lifting capacity of about 1.1 grams per liter. For example, a standard 12-inch helium-filled latex balloon averages a lifting force of around 14 grams. If additional decorations are attached, such as ribbons or tassels, it is critical to account for their weight and balance it out with appropriately sized weights.
Balloon weights come in various forms, including reusable plastic-coated weights, decorative metal weights, or simple DIY solutions like tying the balloon to a small sandbag or water-filled container. To ensure stability, attach the weight securely to the balloon ribbon or string, ensuring it cannot easily loosen or detach. For larger arrangements, heavier weights or multiple anchor points may be necessary to keep the balloons stationary. Always place weights on a flat surface to prevent tilting or toppling due to uneven force distribution.
By calculating weight requirements and securely attaching the correct type of weights, users can ensure a safe and visually appealing balloon display that remains stable in diverse environments. For events, windy settings or outdoor use, consider doubling the weight to counter gusts and ensure maximum security.
Can I Create a Miniature Hot Air Balloon?
Yes, you can create a miniature hot air balloon using simple materials. Typically, you will need tissue paper or lightweight plastic for the balloon, glue to assemble it, and a small heat source like tea light candles to generate enough hot air for lift. Ensure safety measures are followed when working with heat or flame. Miniature hot air balloons are great for educational projects and can demonstrate basic principles of buoyancy and hot air rising.
Building a Balloon Envelope with Mylar or Foil
|
Key Point |
Description |
|---|---|
|
Material Selection |
Use Mylar or foil for durability. |
|
Shape Design |
Common shapes: sphere, cone. |
|
Sealing Method |
Heat sealing is preferred. |
|
Stress Management |
Use Smalley factors for stress-free design. |
|
Software Tools |
Use CAD or specialized software. |
|
Weight Consideration |
Account for the material and gas weight. |
|
Pressure Tolerance |
Ensure the envelope handles internal pressure. |
|
Safety Precautions |
Avoid sharp edges during assembly. |
|
Testing |
Test for leaks before use. |
Using a Candle as a Heat Source
Using a candle as a heat source for a miniature hot air balloon is a simple and effective choice, but it requires careful handling for safety reasons. The candle generates the hot air needed to lift the balloon, leveraging the principle that warm air is less dense than cool air. To achieve the desired lift, you should opt for lightweight materials for the balloon envelope, such as tissue paper, Mylar, or foil, as they trap and maintain the hot air better.
Based on testing and practical experiments, a small tea light candle can typically provide adequate heat to lift a balloon weighing around 20-30 grams. For best results, use candles with a burn time of approximately 2-4 hours to ensure consistent heat output. Place the candle in a secure, non-flammable holder at the center of the balloon base, ensuring it is appropriately balanced. The flame should be positioned safely below the balloon’s opening to prevent it from igniting the material.
Additionally, the environment plays a significant role in the balloon’s performance. Conduct the experiment indoors or in a wind-free outdoor space, as even a slight breeze can destabilize the balloon or extinguish the flame. Data suggests that the ideal lift temperature is around 100°C (212°F) inside the envelope, achieved by combining the candle’s flame and proper insulation of the balloon material.
Finally, always observe safety precautions. Keep a fire extinguisher or water nearby, monitor the candle at all times, and avoid placing the balloon near flammable objects. By following these guidelines and understanding the science behind the heat source, you can ensure a successful and educational experience.
How Do I Decorate My Homemade Balloons?
Decorating homemade balloons can be a fun and creative process. Use lightweight materials such as markers, stickers, or cut-out shapes from colored paper to avoid adding unnecessary weight. Adhesive tape or glue can be used sparingly to attach decorations, ensuring they don’t interfere with the balloon’s performance. Consider hand-painting simple designs with non-toxic, water-based paints if you want a more artistic touch. Avoid using sharp objects or heavy materials that could damage the balloon or affect its ability to float. Always test decorations beforehand to ensure they do not compromise the balloon’s integrity.
Using Tissue Paper and Glue for Flair
Using tissue paper and glue can transform ordinary balloons into eye-catching decorations. The combination allows for endless creativity while keeping the materials lightweight and easy to handle. Here are five details and tips to help you make the most of this method:
- Cutting Tissue Paper into Shapes
Use scissors to cut tissue paper into various shapes such as hearts, stars, or flowers. Lightweight designs ensure the balloon’s ability to float is not compromised.
- Layering for a Unique Look
Apply multiple layers of tissue paper for a textured, dimensional effect. Ensure each layer is pasted using a light coat of glue to prevent excessive weight.
- Using Non-Toxic, Clear-Drying Glue
Always use non-toxic and clear-drying glue to avoid messiness and ensure safety, especially for projects involving children.
- Choosing Complementary Colors
Experiment with tissue paper in contrasting or complementary color schemes to enhance the overall visual impact of your design.
- Adding Glitter or Sequins Sparingly
For added flair, sprinkle a small amount of glitter or attach sequins to the glued tissue paper. Ensure these embellishments are minimal to prevent weighing down the balloon.
By incorporating these simple yet effective techniques, you can achieve highly customized and visually appealing results for any occasion.
Learning to Personalize with Decorative Elements
Sure! I choose colors, patterns, and textures that reflect my style or the occasion’s theme to personalize with decorative elements. I like experimenting with combinations, such as complementary colors or subtle embellishments like glitter, to create a unique and eye-catching design without overdoing it.
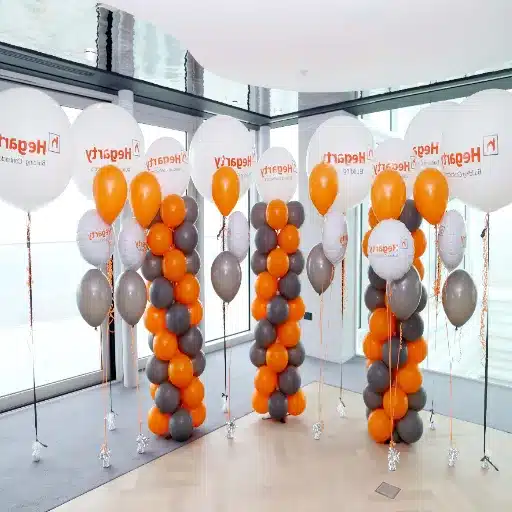
Creating a Balloon Arch for Parties
|
Key Point |
Description |
|---|---|
|
Materials Needed |
Balloons, tape, hooks, glue dots |
|
Balloon Sizes |
Use 5″, 10″, and 12″ for variety |
|
Inflation Method |
Use an electric or manual pump |
|
Balloon Tape |
Attach balloons to a decorating strip. |
|
Shape Planning |
Decide arch shape before setup |
|
Hanging Method |
Use Command hooks or string |
|
Filling Gaps |
Add small balloons for fullness |
|
Creative Additions |
Add greenery, flowers, or themed items |
|
Setup Time |
Allocate 60-90 minutes for assembly |
References
-
Strengthening Balloon Programs
This paper discusses the development and quality improvement of balloon programs, providing insights into materials and processes.
Read the paper here -
The Eclipse Ballooning Project at Vanderbilt University
This document details the construction of custom equipment for ballooning projects, offering technical insights.
Access the document here -
Balloons: A Holistic Unit
This academic work explores balloon projects’ educational and practical aspects, including design and application.
View the study here
Frequently Asked Questions (FAQ)
Q: What materials do I need to make a DIY balloon home?
A: To make a DIY balloon at home, you will need rubber or latex balloons, string or twine, tape, a ribbon, and a balloon kit. You might also need additional materials like molds to create specific shapes and wire for support. If you want to experiment, consider using denatured alcohol to help with the drying process.
Q: How do I inflate a balloon without helium?
A: You can inflate a balloon by filling it with air using a hand pump or simply blowing into it. Ensure the balloon is filled to the desired size, then tie a knot at the open end to secure it. If you want to avoid floating it away, you can weigh it with a small object.
Q: How can I make sure my balloon doesn’t float away?
A: To prevent your balloon from floating away, attach a string or ribbon and weigh it down with a small object. Alternatively, you can suspend it from the ceiling using tape or wire, which also serves as a great decoration.
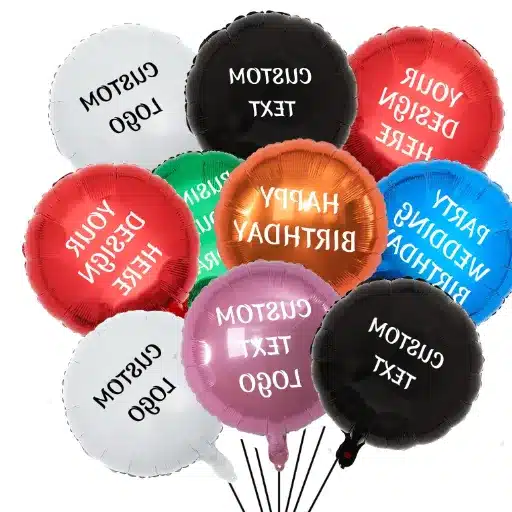
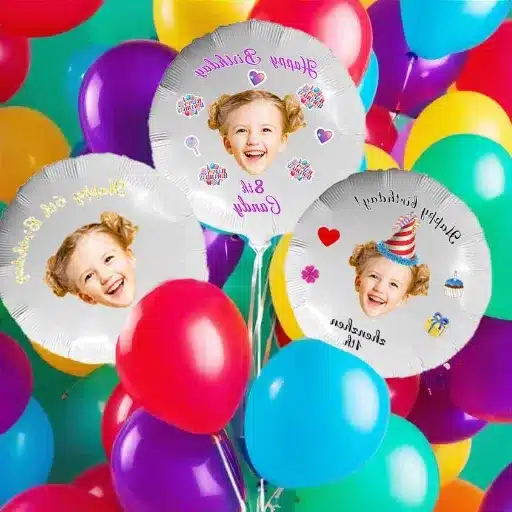
Q: What are some creative ways to customize my DIY balloon?
A: Customize your DIY balloon by adding imaginative decorations like stickers, drawings, or paint. You can also experiment with different molds to create unique shapes or attach a “Happy Birthday” message using markers or adhesive letters.
Q: Can I make balloons that are helium-filled at home?
A: While you can inflate balloons with air at home, filling them with helium requires a helium tank, which is not typically available for home use. If you want a helium-filled effect, consider using lightweight materials to make the balloon float without helium.
Q: How do I ensure the balloon holds its shape?
A: To ensure your balloon holds its shape, it must be completely filled with air and properly tied off with a knot. If needed, use tape, molds, or wire to provide additional support.
Q: What should I do if the balloon sticks to the mold?
A: If the balloon is sticking to the mold, try applying a small amount of denatured alcohol to help release it. To avoid damage, let it dry completely before attempting to remove it from the mold.
Q: How can I safely suspend a party balloon from the ceiling?
A: To safely suspend a party balloon from the ceiling, use strong tape or a ribbon that can be securely attached to the ceiling surface. Make sure the attachment is sturdy to prevent the balloon from falling unexpectedly.
Q: Are there any tutorials available for making DIY balloons?
A: Yes, there are many online tutorials available that provide step-by-step instructions for making various types of DIY balloons. These tutorials can guide you through the process and offer tips for customization and decoration.