From earning some extra cash to starting a new hobby, learning how to make balloon animals opens up opportunities for many people. Balloon twisting is undoubtedly advantageous, but it’s far more than a skill–it is a creative outlet that can bring joy to any occasion. The art of twisting balloons to entertain different audiences is suitable for all ages, toddlers, and adults. Here is a guide built with a clear goal in mind–to teach balloon twisting to beginners effortlessly, and honorably guide them through every step. You don’t need a lot to get started; you can only put a smile everywhere you go with the right materials and simple techniques. By the end of this write-up, you will learn far more than just impressive balloon creations; you will learn how to hone your skills and refine them with expert tips. With adequate practice, you’ll be set to transform dull balloons into delightful shapes and amaze everyone effortlessly.
What is a Balloon Animal and How Do You Make One?
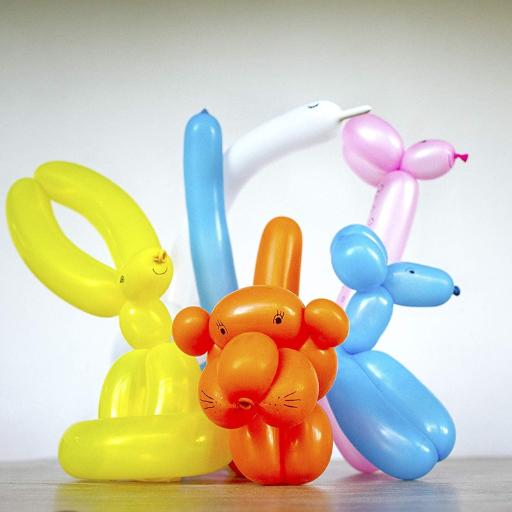
An incredible example of art is balloon animals. Basically, they are sculptures created by twisting and shaping a long, thin balloon into the form of an animal, such as a dog, giraffe, or swan. Making one is pretty easy; all you have to do is make sure the balloon is fully inflated, except for a small uninflected tip.
Afterwards, follow a sequence of folds and twists to achieve the desired shape, securing and binding each segment by twisting it several times. Once the basic techniques are grasped, it is simple, though it may take time and practice. With a cystic fibrosis of imagination, it is possible to use these basic techniques to design many remarkable animal shapes.
Understanding the Basics of Balloon Twisting
Twisting balloons, or balloon modeling, is an art and craft that involves skilled handiwork where ordinary balloons are shaped into beautiful forms with designs. It requires a great deal of creativity, as the primary foundation of the practice is a balloon, renowned for its elasticity. To create stable, well-defined forms, the balloon must be inflated correctly and twists must be performed. Most beginners start out with single-balloon creations such as dogs, swords, and hats before moving on to multi-balloon sculptures like flowers or more advanced character sculptures.
Balloon twisting continues to gain the popularity it deserves. Industry data indicates that balloon décor and art have become essentials in event planning. Reports show that the global market for balloons was valued at $636.6 million in 2020 and is set to increase at a rate of 3.9 percent from 2021 – 2028, demonstrating steady demand for unique balloon sculptures and artworks.
Modern balloon twisting has been made easier using biodegradable balloons, which consumers consider environmentally conscious. Many artists now use digital platforms to expand their reach, offering virtual tutorials and classes so hobbyists worldwide can learn this fascinating craft. These changes emphasize the merging of incorporating traditional techniques alongside modern ones to ensure that balloon twisting is still relevant and easy to understand.
Essential Supplies You Need to Get Started
The first step in learning to twist balloons is acquiring the appropriate materials. These five items are the minimum required for any beginner:
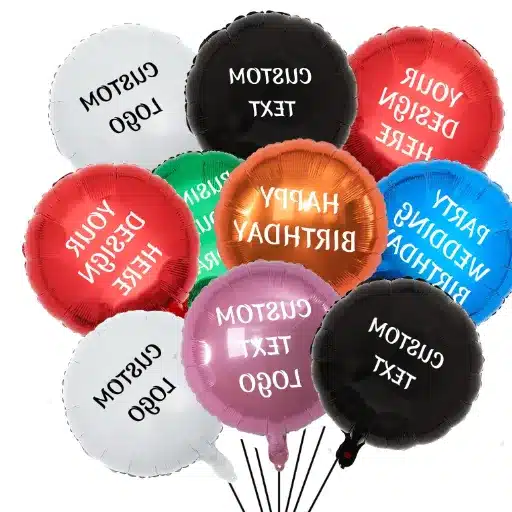
- Balloons—It is wise to invest in professional-quality twisting balloons that come pre-packaged. The most commonly used sizes are 260Q (good for most designs) and 160Q and 350Q, which are used for smaller or larger specialized shapes.
- Balloon Pump – A hand pump or an electric one becomes useful when inflating many balloons. Hand pumps are also very portable, unlike electric ones.
- Marker Pens—You can draw Details such as eyes or Designs on your balloons using colored permanent marker pens.
- Scissors—Sculpting unique designs requires the fine detailing offered by a good pair of scissors, which allows for trimming and cutting balloons.
- Balloon Sizer—This tool becomes Handy when you wish to achieve Precision and Symmetry. It accurately measures balloons for even spacing, which is essential for professional-looking designs.
With these, you will surely achieve stunning balloon designs and learn to sharpen your skills.
How Did You Learn to Make Balloon Animals?
Making balloon sculptures is a very thrilling and pleasant process. The following are some essential techniques you should adopt to perfect your skill:
- Online Classes and Videos – Specialized websites and YouTube have dozens of free tutorials with step-by-step instructions for children of all ages. Professional artists often feature on these resources.
- Books and Guides—Many instructional balloon art books are available, offering diagrams and helpful hints for mastering balloon twisting maneuvers.
- Workshops and Classes—Mentored online or in-person workshops conducted by seasoned balloon artists can prepare you with the skills necessary to create balloon sculptures successfully.
- Self-guided Practice – Improve your skills by setting aside time to work with unique designs. Trying out various techniques and playing around with different patterns is one of the best ways to sharpen your skills over time.
- Online forums and discussion boards—Joining social media groups or communities focusing on balloon art allows you to share your concepts and tricks and discuss them with experts, which can improve your understanding.
All the resources mentioned above provide students with the professional balloon artistry and balloon sculpture skills they wish to learn.
Step-by-Step Guide to Making a Balloon Dog
| Step | Key Point |
|---|---|
|
1. Inflate Balloon |
Leave 2-3 inches uninflated at the end. |
|
2. Create Snout |
Twist 2-inch segment near the tied end. |
|
3. Form Ears |
Make two 1-inch twists for the ears. |
|
4. Lock Ears |
Twist ear segments together to lock. |
|
5. Make Neck |
Twist a 3-inch segment below the head. |
|
6. Create Front Legs |
Make two 3-inch twists for front legs. |
|
7. Lock Front Legs |
Twist front leg segments together. |
|
8. Form Body |
Twist a 4-inch segment for the body. |
|
9. Make Back Legs |
Create two 3-inch twists for back legs. |
|
10. Lock Back Legs |
Twist back leg segments together. |
|
11. Adjust Shape |
Ensure proportions are balanced. |
How Do You Inflate the Balloon Properly?
To inflate a balloon properly, follow the instructions below:
- Selecting A Balloon Pump – Invest in a balloon hand pump or an air compressor for balloons. This equipment avoids overfilling the balloon and provides a constant air flow. Beginners typically prefer hand pump models.
- Fixing the Balloon—Use the hand clamp to cover the wide part of the balloon, which will lock in the air when it is put over the pump. This will prevent air from escaping during the balloon’s inflation process.
- Slow Inflation—Inflate the balloon slowly to mitigate the risk of bursting. Also, ensure that you remove the pump when the desired size is reached. If inflating a balloon dog, keeping an inch at the tip uninflated for easier twisting is best.
- Final Steps—The balloon must be removed from the pump, and air must be anxiously added to ensure some air remains in it. Securing the neck prevents air from escaping from those links. After this step, the balloon can be inflated into varying shapes.
As can be observed, following the procedures mentioned ensures that the balloon is inflated and set to be sculpted into various shapes.
Choosing the Right Hand Pump for Inflation
While selecting a hand pump to be deemed “the best” for inflating, there are some key criteria I focus on. First, I want a hand pump that is user-friendly and lightweight because it allows balloon inflation to be faster and less tiring. I also prefer dual-action pumps because they inflate the balloon on both the pull and push, making it faster and less energy-consuming. Sturdiness is very important too, so I ensure the pump is made of strong materials that can withstand frequent use. Lastly, I check the nozzle size to guarantee that it fits perfectly with different types of balloons, which makes everything smooth and efficient.
Step-by-Step Instructions to Inflate a Balloon
| Step | Key Point |
|---|---|
|
1. Choose Balloon |
Select a balloon of the desired size and color. |
|
2. Stretch Balloon |
Stretch it gently to loosen the latex. |
|
3. Position Balloon |
Hold the neck firmly with thumb and finger. |
|
4. Take Deep Breath |
Prepare lungs for steady airflow. |
|
5. Seal with Lips |
Place lips tightly around the balloon neck. |
|
6. Blow Steadily |
Inflate with consistent, controlled breaths. |
|
7. Pinch to Pause |
Pinch your neck if you need a break. |
|
8. Stop at Fullness |
Stop when the balloon feels firm, not overfilled. |
|
9. Tie the Knot |
Secure the neck with a tight knot. |
Troubleshooting Common Inflation Problems
Pumping up balloons may cause some problems for people. However, these problems often have quick and easy solutions. Refer to the most common issues and their solutions listed below:
- Balloons Bursting While Being Inflated
- Cause: Scenario balloons are made of poor quality or cheap materials, and they are likely to burst when overinflated. Breathing or inhaling sharp objects in the environment may also be damaging.
- Solution: Cross-check the recommended size for inflation, which is usually indicated on the balloon packaging. For instance, a standard latex balloon routinely bulges to 11 or 12 inches in diameter. Utilize a pump with controlled air pressure and inflate slowly to diminish shocks on the material. When inflating outside in hot weather, ensure that the balloons are kept away from sunlight post-inflation, as excessive heat can damage the latex and increase the chances of popping.
- Balloon Neck Will Not Seal
- Cause: Blows, a mismatch in nozzle size, and improper tying techniques may induce unrestricted balloon neck seal leaks, resulting in unwanted air escaping.
- Solution: Place tight-fitting nozzles that align perfectly with the balloon opening. Additionally, twist the neck of the balloon before sealing it to prevent flotation. Lastly, seal latex balloons with clips or balloon tape for better security.
- Pump Losing Efficiency or Not Operational
- Cause: The airflow may not function as intended due to a damaged or clogged pump nozzle. Mishaps, dust, dirt, and debris may also hinder the pump’s proper functioning.
- Solution: As with any gadget, your pump should be frequently cleaned and checked for defects. Maintaining dual-action hand pumps according to user guides helps them last longer. Moreover, occasionally applying lubrication to the pump’s mechanism can also help improve efficiency.
- Asymmetrical Inflation(Balloons Looking Out Of Shape)
- Cause: Air coming in at uneven intervals leads to this scenario. In specific cases, the balloon material’s changeable pump pressure or stretching during inflation could cause it.
- Solution: With the tip of your fingers, make gentle stretches to the balloon, aiding it to inflate uniformly. For even results, try using a steady and smooth pumping motion. Programmable electric pumps can temper the amount of inflation, guaranteeing a balanced result.
- Challenging To Inflate Foil Balloons
- Cause: Foil balloons come with self-sealing valves that standard pumps do not fit, so their circumference is simply insufficient, or a lack of pressure is applied.
- Solution: While partially inflating them, ensure that they seem tight and stop when they seem full. Over-pumping causes these seams to explode, so putting in moderate amounts is ideal. Using fine-tip nozzle attachments meant for these balloons allows the correct fit.
Choosing quality balloons and maintaining your equipment are two major factors in preventing issues. For instance, most product reviews indicate that ASTM International safety latex balloons tend to be more durable. If these techniques are coupled with the proper measures, you can achieve effortless and smooth balloon inflation every time.
What are the Basic Twisting Techniques for Beginners?
For enhancing the skills of beginner balloon twisters, the following techniques are necessary at the start:
- The Basic Twist – A simple yet effective technique. It requires the participant to grip the balloon securely near the nozzle and twist it three to four times to segment it. To keep the shape stable, always twist in the same direction.
- The Lock Twist – A locking technique that first requires two segments formed by basic twits. From here, they can then be twisted together to lock their position. This step is crucial for balance and proportional structures like the arms or legs.
- The Fold Twist—Loops are needed to create shapes such as ears and petals. In this case, a section of the entire balloon needs to be folded, and the two ends need to be twisted inwards.
- The Pinch Twist—Commonly used for animal noses, this technique twists a small balloon segment and folds it back over before turning again.
For more advanced designs, these, coupled with not overinflating the balloon for easier twist, the softening attribute further prevents popping. Consistently working these techniques strengthens fundamental building blocks for beginners.
How to Make a Basic Twist
| Step | Key Point |
|---|---|
|
1. Inflate Balloon |
Leave 2-3 inches uninflated at the end. |
|
2. Pinch Balloon |
Pinch where you want the twist. |
|
3. Roll Balloon |
Roll the pinched section 3-4 times. |
|
4. Hold Twist |
Secure twist between fingers to prevent undoing. |
|
5. Create Lock |
Twist two sections together to lock. |
|
6. Adjust Shape |
Ensure the twist is firm and balanced. |
Understanding the Fold Twist and Lock Twist
| Twist Type | Key Point |
|---|---|
|
Fold Twist |
Fold a long bubble and twist the ends together. |
|
Purpose of Fold |
Create large ears, hands, or feet. |
|
Lock Twist |
Twist two bubbles and lock them together. |
|
Purpose of Lock |
Secure legs, ears, or other parts. |
|
Common Use |
Used in animal figures and complex designs. |
|
Key Tip |
Ensure twists are tight to prevent undoing. |
Creating Easy Balloon Animals with Basic Twists
Learning a few basic twists will enable you to make simple balloon animals, which are great for children. Mastering the basic, fold, and lock twists allows you to create myriad designs.
Simple Balloon Dog
Balloon dog is perhaps the easiest and most popular balloon animal. Here is by step-by-step instruction on creating one:
|
Step |
Instruction |
Tip |
|---|---|---|
|
1 |
Inflate the balloon, leaving approximately 4 inches uninflated at the end. |
This prevents the balloon from popping when twisting multiple sections. |
|
2 |
Make a basic twist about 3-4 inches from the tied end to form the dog’s nose. |
Hold the twist securely between your fingers. |
|
3 |
Create two more basic twists of the same size for the ears. Pinch and twist together to lock the nose and ears into place. |
This is the first lock twist. |
|
4 |
Measure about 5 inches and twist again to form the neck. |
Ensure the balloon isn’t too tight. |
|
5 |
Make two basic twists of equal length for the front legs and lock them by twisting together. |
Lock twists are essential to maintain the shape. |
|
6 |
Repeat the process for the body and hind legs. The remaining portion forms the tail. |
Adjust each section to maintain proportionality. |
Once you master it, you’ll start mastering other designs, too. Making a balloon dog takes 2-3 minutes with a bit of practice.
Fun Balloon Sword
Balloon sword is another incredibly popular but easy-to-make design. It can be made in less than 2 minutes with a few twists:
|
Step |
Instruction |
Tip |
|---|---|---|
|
1 |
Fully inflate a long balloon, leaving about 1 inch uninflated at the tip. |
This prevents bursting during the final fold. |
|
2 |
Fold the balloon into three equal parts toward the base. |
Ensure accuracy for balance. |
|
3 |
Twist the folded sections together about 4-5 times to shape the sword’s guard. |
Keep the twist firm but avoid over-twisting. |
|
4 |
Straighten the uninflated part to form the blade. |
Adjust folds to refine the shape. |
Based on what some online sources indicate, the balloon sword is one of the simplest designs taught in newer class levels, and it is one of the most popular because it is fun to use.
Statistics and Trends in Balloon Art
Interest in topics such as how to create balloon animals for novices increased by almost 40%. Multiple online sites, such as YouTube, offer free guides with different levels of difficulty. There has also been a steady increase in demand for balloon twisting as a hobby and in the entertainment industry for event planning.
For any type of occasion, whether it is a birthday, community gathering, or ordinary celebrations, with these basic twists, you can achieve multiple designs while entertaining viewers of all ages.
How Can You Learn Balloon Twisting Efficiently?
Nothing beat the traditional way to learn balloon twisting: begin with trustworthy online sources, like YouTube. There is beginner- and advanced-level free content out there so everyone can learn at their own pace. If you prefer a more guided approach and want to learn deeper concepts, enrolling in teaching-focused sites is an excellent option. Ensure you have access to high-quality balloons, as creating and regularly practicing with them will strengthen skills and lead to durable creations. Unlike online forums, joining regional groups can provide invaluable aid in learning pliable techniques and receiving constructive critique. Do prioritize, though, mastering the simple twists: they serve as building blocks for more complex creations down the road.
Top Tutorials for Beginners to Follow
| Tutorial | Key Point |
|---|---|
|
Mossieur Ballon Tutorials |
Step-by-step guides with English subtitles. |
|
Balloon HQ Twisting 101 |
Covers basic twists and advanced techniques. |
|
YouTube Beginner Playlist |
Visual tutorials for simple balloon designs. |
Why Practice is Key to Mastering the Art of Balloon Twisting
Constructing different shapes out of balloons becomes an effortless task through consistent practice since it strengthens one’s confidence level in performing various complex designs, improves techniques, and develops muscle memory.
Joining a Community of Balloon Artists
Through balloon art classes, I joined a community that helped broaden my interaction with new ideas. Being in contact with more experienced artists has been highly motivating and, so far, has proven extremely helpful. Engaging with like-minded people who pursue the same passion helps build creativity and provides the needed skills for improvement.
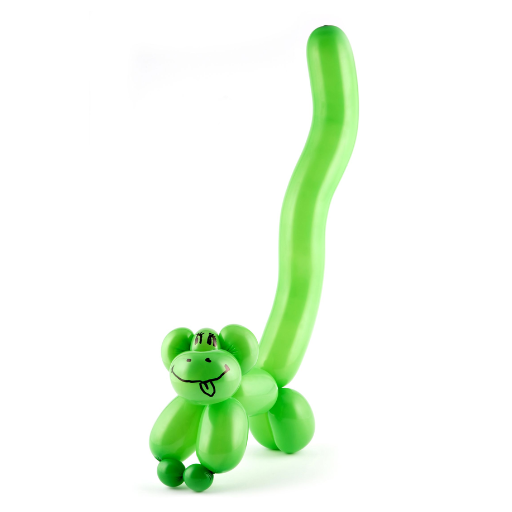
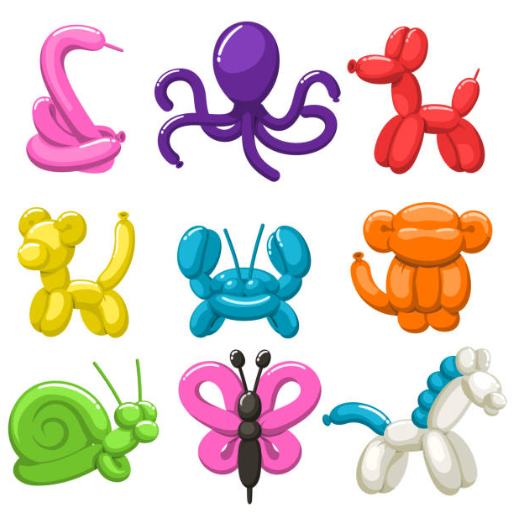
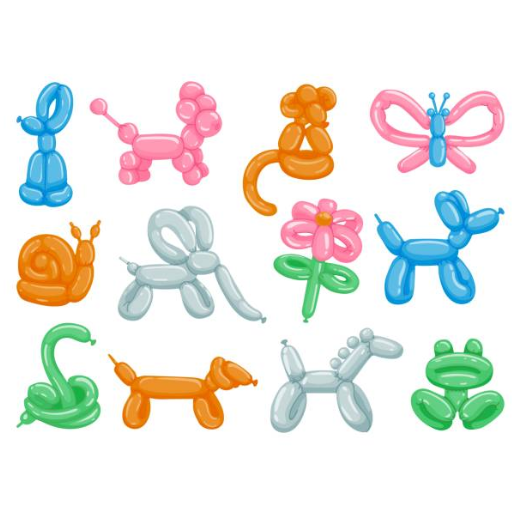
What are Some Popular Balloon Animals to Start With?
For someone trying out balloon twisting for the first time, sculpting a basic dog, sword, flower, and butterfly would be among the best choices. These figures are easy and serve as a way of learning the basic advanced techniques taught in balloon twisting. Familiarizing oneself with these shapes can help one gain confidence and prepare to embrace the more challenging designs.
Creating a Balloon Swan: A Step-by-Step Guide
| Step | Key Point |
|---|---|
|
1. Inflate the Balloon |
Leave 2-3 inches uninflated at the end. |
|
2. Create Head |
Twist a small bubble for the swan’s head. |
|
3. Form Neck |
Twist a long segment for the neck. |
|
4. Make Body |
Create a loop for the swan’s body. |
|
5. Shape Wings |
Twist two loops for symmetrical wings. |
|
6. Adjust Shape |
Curve the neck and adjust proportions. |
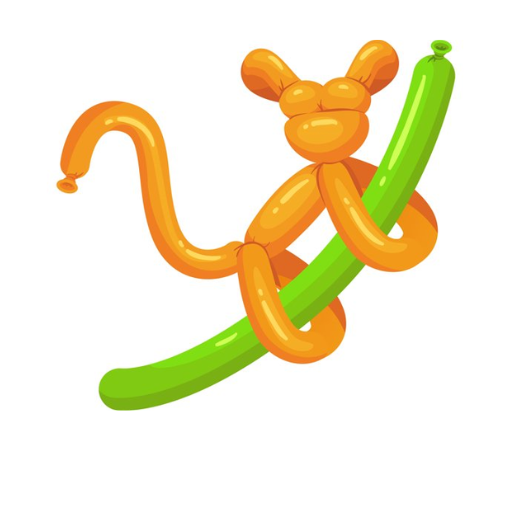
Making a Balloon Monkey: Tips and Tricks
| Step | Key Point |
|---|---|
|
1. Inflate Balloon |
Leave 6 inches uninflated at the end. |
|
2. Create Face |
Twist 1-2 inches for the monkey’s face. |
|
3. Make Ears |
Use fold twists to form two small ears. |
|
4. Form Forehead |
Add a short twist for the forehead. |
|
5. Complete Head |
Twist ears together to lock the head. |
|
6. Add Arms |
Twist two equal segments for the arms. |
|
7. Shape Body |
Create a segment for the body. |
|
8. Make Legs |
Twist two equal segments for the legs. |
|
9. Add Tail |
Leave the remaining balloon for the tail. |
|
10. Add Details |
Draw a face or add a balloon tree. |
Exploring the Art of Balloon Flowers and More
Balloon artists can express high levels of creativity through the skillful repertoire of balloon designing, ranging from flowers to other complex shapes. The adaptable nature of balloon flowers makes them appealing for various uses, including gifts, decorations, and entertainment. Presented below are five balloon designs that embody both artistry and skill:
- One of the most romantic balloon designs is the Balloon Rose. As the name suggests, the design is of a blooming rose created using multiple twists and layers of balloons.
- The tulip design is elementary in Balloon Tulips but has an air of sophistication. This design has a favored curl, the pinch twist, which is loved by novices and experts alike.
- The Balloon Daisy is perfect for cheerful decorations. This design combines the petals and center balloon so intricately that it becomes realistic, removing any hint of simplicity.
- Lily is known for its striking appearance and complexity. The petals are shaped with several twists at various points, increasing the skill level required.
- The fitting sunflower design enhances the beauty of themed events and seasonal displays. These balloons serve as defined decorations that are eye-catching when placed against different colors.
Capturing these designs while trying to master new skills ensures that balloon artists can provide beautiful bronze pieces to enhance any occasion’s charm.
References
-
Strengthening Balloon Programs: University and Business Collaborations, Research, Outreach, and Internal Support – This document discusses various aspects of balloon programs and their applications.
-
The Red Balloon Project: Re-Imagining Undergraduate Education – A study focusing on innovative educational approaches, which includes references to balloons in learning contexts.
-
What Goes Up Must Come Down: An Evaluation of a Zoo Conservation-Education Program for Balloon Litter – This research evaluates the impact of balloon-related education on visitor understanding and behavior.
Frequently Asked Questions (FAQ)
Q: What is the best way to get started with balloon twisting?
A: To get started with balloon twisting, it’s essential to choose a balloon suitable for beginners, such as a 260 balloon. You’ll also need a good balloon pump to help inflate the balloons efficiently. Begin by learning basic balloon twists and progressing to more complex balloon sculptures.
Q: How do I properly inflate a balloon for twisting?
A: Use a good balloon pump to inflate the balloon to the desired length, leaving about a 3-inch tail uninflated to allow room for twisting. This space at the end of the balloon is crucial for making twists without popping it.
Q: What is a basic balloon twist, and how is it done?
A: A basic balloon twist involves holding and twisting the balloon at a designated point to create a segment. To perform a basic balloon twist, hold the balloon with one hand and use the other hand to twist the balloon about three times in the same direction. This technique is fundamental in balloon art.
Q: How can I learn to make balloon animals?
A: Start with simple designs, such as a basic balloon dog or sword, to learn to make balloon animals. Practice the basic twists and folds, such as the pinch twist, and gradually move on to more complex balloon creations as you gain confidence and skill.
Q: What should I do if my balloon pops while twisting?
A: If your balloon pops, don’t be discouraged. Simply get another long balloon and try again. Make sure to leave enough space uninflated, and avoid over-twisting or applying too much pressure near the end of the balloon.
Q: Are there specific techniques to make impressive balloon animals?
A: Yes, to make impressive balloon animals, it’s essential to master various twisting techniques such as the fold twist and the pinch twist. Combining these techniques allows you to create more complex and visually appealing balloon sculptures.
Q: What is the purpose of leaving a portion of the balloon uninflated?
A: Leaving a portion of the balloon uninflated allows you to twist the balloon without it popping. It provides the necessary flexibility and space to make two or more twists and complete your balloon creation.
Q: How do I ensure my balloon sculptures stay together?
A: To ensure your balloon sculptures stay together, twist the balloon securely at each point and tie off the balloon ends properly. Consistent pressure and even spacing when twisting the balloon will also help maintain the integrity of the balloon art.
Q: What are the most common mistakes beginners make when learning to make balloon animals?
A: Common mistakes include overinflating the balloon, not leaving enough uninflated space, and not securing the twists properly. Beginners should focus on controlling the balloon’s length and practicing basic twists to build a strong foundation in the art of balloon animals.