DIY balloon decorations are air-filled (or helium-filled) balloon arrangements you can build yourself for parties, weddings, corporate events, and home celebrations. With a balloon pump, a decorating strip, and the right balloons, even a complete beginner can create a professional-looking garland or centerpiece in under an hour.
Maya learned this the hard way. Last spring, she stayed up until midnight blowing up balloons by mouth for her daughter’s fifth birthday. By morning, half had popped, the tape wouldn’t stick, and the “Pinterest-perfect” arch looked more like a lopsided rainbow. The next year, she bought an electric pump, followed a simple strip method, and finished her setup in 45 minutes while her coffee was still hot.
That is the difference between guessing and following a proven process. This guide gives you that process. You will learn which supplies actually matter, how to build your first mini garland and centerpiece, and when to call in a professional for larger installs.
Key Takeaways
- Air-filled latex balloons are the best starting point for DIY balloon decorations because they last longer, cost less, and do not require helium.
- A standard 8–10 ft balloon arch needs 80–120 balloons, while a small table garland uses 30–50.
- A balloon decorating strip is the easiest way for beginners to build garlands; fishing line gives a fuller, organic look but takes more practice.
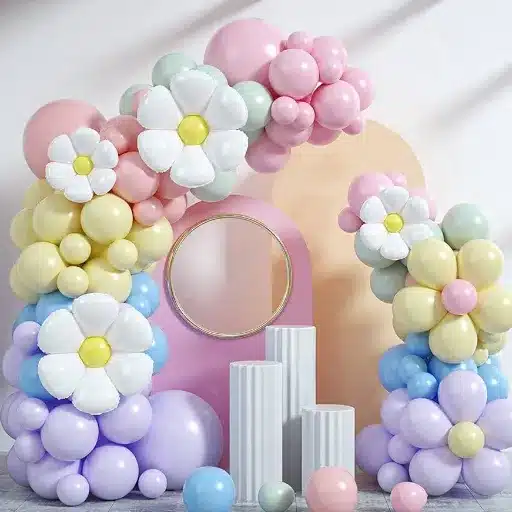
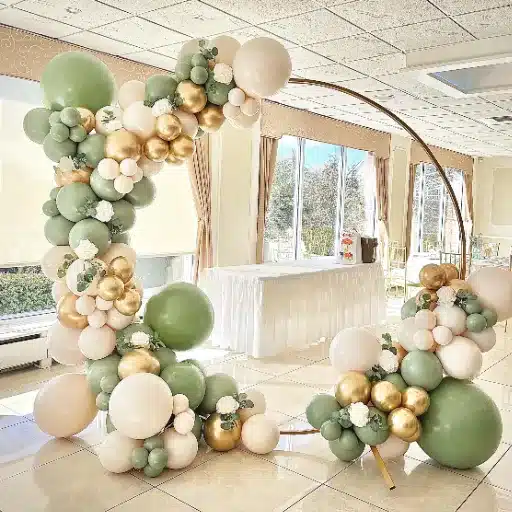
- Mixing balloon sizes (5″, 11″, and 18″) and finishes creates a professional, layered effect.
- Always dispose of balloons responsibly: pop them and place them in the bin; never release them outdoors.
What Are DIY Balloon Decorations?
DIY balloon decorations include any balloon arrangement you create yourself rather than hiring an event decorator. Common projects include garlands, arches, centerpieces, bouquets, balloon walls, and ceiling clouds.
For beginners, the smartest place to start is with air-filled latex balloons. They stay inflated for several days, do not require a helium rental, and work well indoors or in sheltered outdoor spaces. You can build them on a decorating strip, fishing line, or arch frame depending on the look you want.
Helium still has its place. Floating bouquets and ceiling effects create drama that air-filled balloons cannot match. However, helium is more expensive, harder to transport, and the balloons deflate faster. That is why this guide treats air-filled decor as the default and helium as the optional upgrade.
Essential Supplies Every Beginner Needs
Before you inflate a single balloon, gather your supplies. Running back to the store mid-project is the fastest way to turn a fun afternoon into a stressful rush.
Must-Have Tools
- Electric balloon pump. A hand pump works for tiny projects, but an electric pump saves your lungs and your schedule. Inflating 100 balloons by mouth takes 45–60 minutes; with an electric pump, it takes about 20.
- Balloon decorating strip. This plastic strip has holes spaced along its length. You push the balloon knot through the larger hole and slide it into the smaller slot to lock it in place. It is the easiest method for beginners.
- Fishing line or balloon ribbon. Use clear fishing line if you want an invisible hold, or ribbon if you prefer a decorative tail.
- Glue dots or a low-temp glue gun. These fill the gaps between balloons with smaller 5″ balloons. Glue dots are slower but safer; a low-temp glue gun is faster but requires care around latex.
- Command hooks or removable adhesive strips. These let you hang garlands and arches without damaging walls.
- Balloon weights. Fill small pouches with sand, use decorative boxes, or purchase ready-made weights to anchor bouquets and centerpieces.
- Scissors and a measuring tape. You will need these for trimming strip, ribbon, and fishing line.
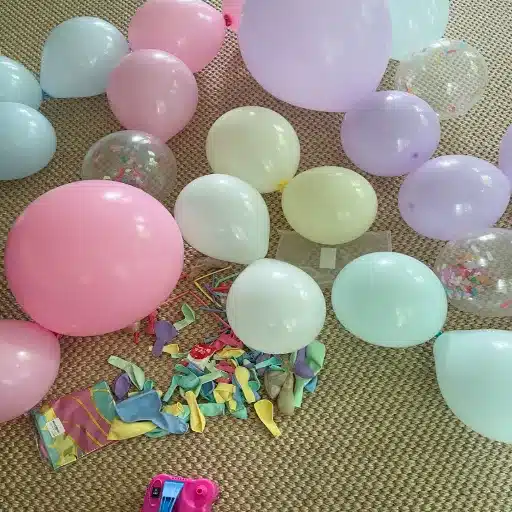
Must-Have Balloons
- 5″ latex balloons. Use these as filler balloons. They tuck into gaps and give garlands a full, organic shape.
- 11″ or 12″ latex balloons. These form the base volume of most arrangements.
- 16″ or 18″ balloons. Add a few of these for visual accents and depth.
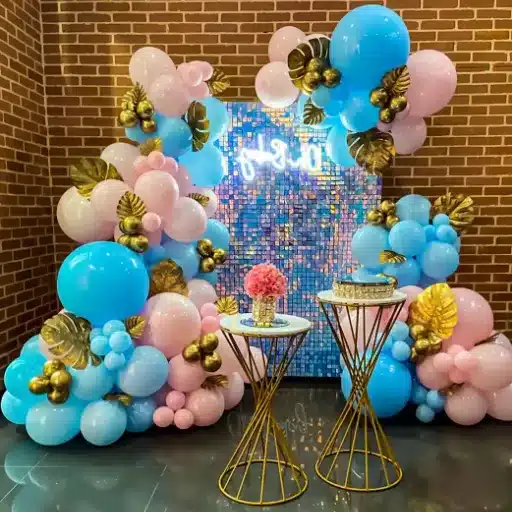
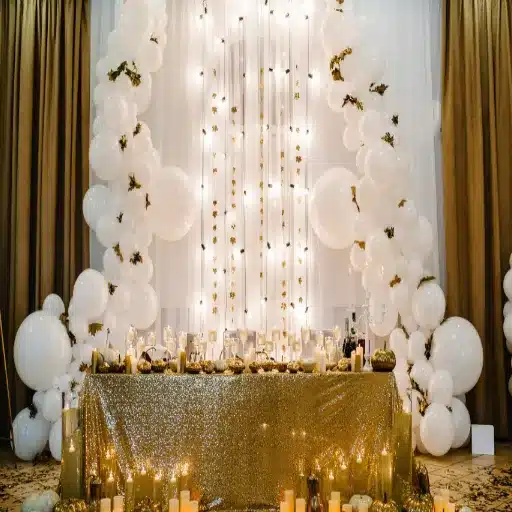
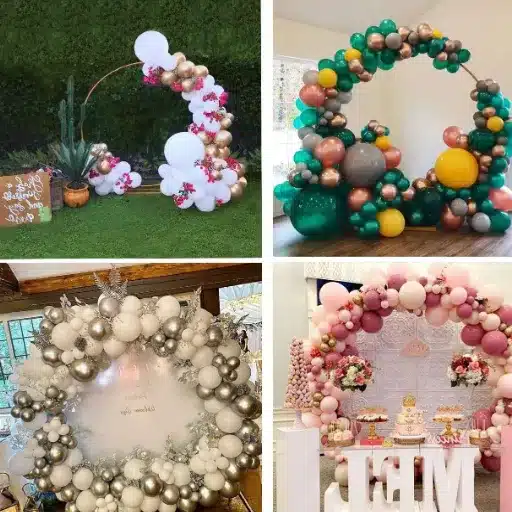
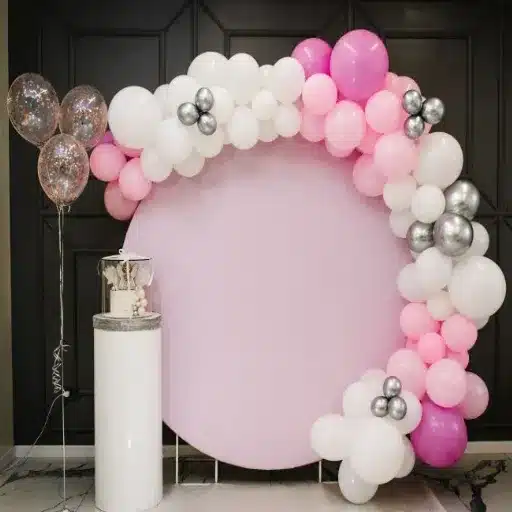
- Foil balloons. Foil balloons such as stars, hearts, numbers, or letters make great focal points. They last longer than latex and add a polished finish.
If you want to personalize the setup, letter balloons let you spell names, ages, or short messages. For corporate events, custom logo balloons turn a simple garland into branded decor.
Nice-to-Have Extras
- Balloon sizer. This plastic box helps you inflate every balloon to the same diameter for a uniform look.
- Tulle, greenery, or ribbon. These add texture and hide mechanics like tape or fishing line.
- LED string lights. Battery-powered lights woven through a garland create a magical evening effect.
Ready to stock up? Explore our foil balloons and letter balloons to find the perfect accents for your first project.
Your First DIY Balloon Decoration Project: Mini Garland + Table Centerpiece
The best way to learn DIY balloon decorations is to complete one full project from start to finish. This mini garland and matching centerpiece use air-filled balloons, a decorating strip, and basic supplies. Plan for 45–60 minutes.
Step 1: Plan Your Color Palette and Space
Choose three colors: a dominant color (60%), a secondary color (30%), and an accent color (10%). For a child’s birthday, that might be pastel pink, white, and gold. For a corporate event, navy, silver, and white work well.
Measure the space where the garland will hang. A 6 ft table or mantel looks best with a garland roughly 5–6 ft long. If you are unsure, cut the decorating strip longer than you need and trim it at the end.
Step 2: Inflate and Size Your Balloons
Inflate 30–40 balloons in your dominant color, 15–20 in your secondary color, and 5–8 in your accent color. Use a mix of 11″ and 5″ sizes. Leave the balloons slightly soft rather than fully tight; this prevents popping and gives a rounder shape.
James, a small-business owner, skipped the “slightly soft” advice for his product launch. Half of his balloons were pear-shaped, and three popped while he attached them. The next time, he underinflated by about 10% and the results looked noticeably more professional.
Step 3: Build the Mini Garland on a Decorating Strip
Start at one end of the strip. Push the knot of an 11″ balloon through a large hole, then slide it down into the smaller slot. Alternate colors and sizes as you go. Leave the last 6–8 inches of strip empty at each end so you have material to tie or hook.
Do not cut the strip until all balloons are attached. Once the balloons are in place, hold the garland against the wall or table to check the drape. Then trim.
Step 4: Create a Matching Weighted Centerpiece
For the centerpiece, inflate five 11″ balloons and one 18″ balloon. Tie the 11″ balloons into a cluster of five, then attach the 18″ balloon to the center with ribbon. Place the cluster on a balloon weight or a small decorative box filled with sand.
This gives you a focal point on the table that echoes the colors and shapes of your garland.
Step 5: Hang, Arrange, and Fill Gaps
Attach Command hooks to the wall or table edge. Loop the extra strip around the hooks. Step back and look for holes. Use glue dots to attach 5″ filler balloons wherever the garland looks sparse.
Aim for an organic, clustered shape rather than a perfectly straight line. Professional balloon decorators often say the best garlands look a little “imperfect” on purpose.
How to Make a Balloon Garland (Two Ways)
Once you are comfortable with the basics, you can choose between two main techniques. Our full balloon garland tutorial covers both methods in more detail.
Method 1: Balloon Decorating Strip (Easiest for Beginners)
The strip method is fast, forgiving, and requires no knotting skill. It works best for garlands that will hang against a wall or drape across a table.
- Inflate balloons in mixed sizes.
- Push knots through the strip holes, alternating sides and colors.
- Hang the strip first, then add filler balloons with glue dots.
This is the method most beginners should start with.
Method 2: Fishing Line (Best for Organic, Full Garlands)
The fishing-line method creates a denser, more organic look. You tie balloons into pairs, combine pairs into quads (groups of four), and then wind the quads tightly onto a long piece of fishing line.This method is harder to learn but produces the lush, cloud-like garlands popular on social media.
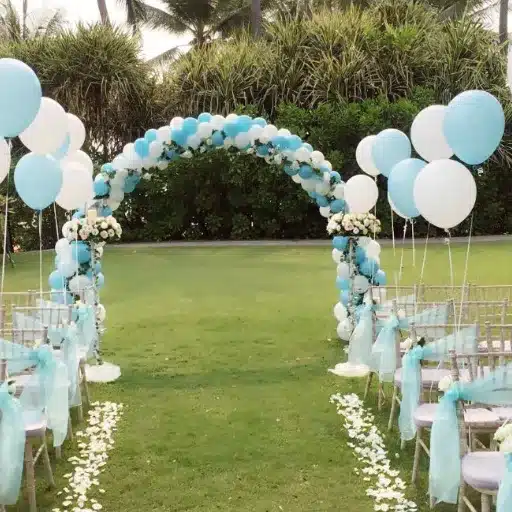
How to Make a Balloon Arch at Home
A balloon arch frames an entrance, dessert table, or photo backdrop. You can build one with or without a stand.
Frame vs. No-Frame Arches
A frame arch uses a metal or plastic stand shaped into an arch. It is stable and reusable, making it ideal for outdoor events or large venues. A no-frame arch hangs from Command hooks or fishing line attached to a wall or doorway. It is cheaper and easier for home use.
If you want to build a no-frame arch, our step-by-step guide on how to make a balloon arch without a stand walks you through the process.
Balloon Count Chart by Arch Size
| Arch Size | Length | Balloon Count | Best For |
|---|---|---|---|
| Small | 6 ft / 2 m | 50–70 | Doorways, dessert tables |
| Medium | 8–10 ft / 2.5–3 m | 80–120 | Backdrops, entryways |
| Large | 15+ ft / 4.5+ m | 150–200+ | Stages, outdoor events |
Party Delights recommends roughly 70 latex balloons for a standard-sized arch, mixing finishes like satin, metallic, and confetti for depth.
Easy Balloon Centerpieces Without Helium
Centerpieces anchor a table and draw the eye without the cost of helium. Here are four beginner-friendly styles.
- Cluster centerpiece. Tie five 11″ balloons together and place them on a weight. Use the 60-30-10 color rule.
- Weighted air-filled bouquet. Inflate balloons of different sizes and attach them to a weight with staggered ribbon lengths.
- Mason jar stick arrangement. Tape short balloon sticks into a mason jar filled with sand or decorative stones. Add small 5″ balloons on top.
- LED-lit centerpiece. Wrap fairy lights around a cluster of balloons for evening events.
Each of these designs uses air-filled balloons, so they last for days and can be assembled the day before the party.
Design Tips for a Professional Look
Small choices separate amateur balloon decor from professional-looking installations.
Mix Sizes for Depth
Use about 70% medium balloons (11″), 20% small balloons (5″), and 10% large or foil accents. This ratio creates layers and visual interest.
Use Odd Numbers in Clusters
Clusters of three, five, or seven balloons look more balanced than even-numbered groupings. This simple rule instantly elevates table centerpieces.
Layer Finishes
Combine matte latex, chrome balloons, confetti balloons, and foil balloons in the same color family. The mix of textures catches light differently and adds sophistication.
Add Greenery or Ribbon
Tuck faux greenery, eucalyptus, or trailing ribbon between balloons. This hides the strip or fishing line and gives the arrangement a finished look.
Step Back and Photograph
Your eye adjusts to the design while you work. Step back every few minutes, take a photo, and look at it on your phone screen. Gaps and color imbalances are easier to spot in a picture than in person.
Common Beginner Mistakes and How to Avoid Them
Even simple DIY balloon decorations can go wrong if you miss a few basics. Here are the most common pitfalls and how to fix them.
Overinflating Balloons
Tight balloons are more likely to pop and look pointed instead of round. Stop inflating when the balloon is firm but still has a slight give.
Skipping the Pump
Blowing up balloons by mouth is slow, inconsistent, and exhausting. An electric pump is the single best investment for any beginner.
Using Weak Anchors
A garland full of balloons is heavy. Use sturdy Command hooks or weights rated for the load. Test the anchor before you add the full garland.
Ignoring the Color Theme
Random colors look messy. Stick to a defined palette and use the 60-30-10 rule to keep the design cohesive.
Building Everything the Day Of
Inflate balloons and build the garland the day before the event. Air-filled latex garlands last 3–5 days indoors, so you have plenty of buffer.
Safety, Sustainability, and Cleanup
Balloons are fun, but they come with real responsibilities. Plan for safety and disposal from the start.
Allergy and Choking Hazards
Latex balloons can trigger allergic reactions in sensitive individuals. Keep uninflated and popped balloons away from small children and pets, who can choke on balloon pieces.
Indoor vs. Outdoor Lifespan
Air-filled latex balloons last 3–5 days indoors. Outdoor displays last 8–24 hours depending on sun, heat, and wind. Long-lasting latex balloons and treatments like Hi-Float can extend float time if you do use helium.
Responsible Disposal
Never release balloons outdoors. Even balloons marketed as biodegradable can harm wildlife. A 2020 University of Tasmania study found that latex balloons showed no meaningful degradation after 16 weeks in freshwater, saltwater, or compost conditions. Pop balloons and place them in the bin after the event.
For more guidance, Clean Up Australia explains why responsible balloon disposal matters for the environment.
When to DIY vs. Hire a Professional
DIY balloon decorations are perfect for small parties, budget events, and anyone who enjoys hands-on projects. They are not always the right choice.
DIY is best for:
- Birthday parties at home
- Baby showers and small weddings
- Simple garlands, centerpieces, and bouquets
- Events where you have time to practice
Hire a professional for:
- Large corporate events or trade shows
- Complex framed arches or balloon walls
- Tight setup timelines
- Branded installs requiring custom logo balloons
If you are unsure, start with one small DIY project and evaluate the result. You can always hire a decorator for the next event if the scale grows.
FAQs About DIY Balloon Decorations
Can I create balloon decorations myself?
Yes. Most beginner projects require only balloons, a pump, a decorating strip, and hooks. Start with a simple garland or centerpiece and build from there.
How long do DIY balloon decorations last?
Air-filled latex arrangements last 3–5 days indoors. Helium-filled latex balloons float for 8–12 hours, while mylar balloons last much longer.
Do I need helium for balloon garlands?
No. Most garlands and arches use air-filled balloons attached to strips, frames, or walls. Helium is only needed for floating effects.
How many balloons do I need for a small party?
A small table garland uses 30–50 balloons. A standard arch uses 80–120. Always buy 10–20 extra to replace pops and mistakes.
Can I reuse balloon decorating supplies?
Yes. Balloon pumps, Command hooks, and fishing line can be reused. Decorating strips can sometimes be reused if they are not stretched or torn.
What can I add besides balloons?
Greenery, ribbon, tulle, LED lights, and letter balloons all add variety. For interactive fun, try balloon twisting basics to make simple animals for kids.
Conclusion
DIY balloon decorations turn an ordinary room into a celebration space without a professional budget. Start with air-filled latex balloons, follow a clear project plan, and focus on one complete design before moving on to arches, walls, or large installations.
You now have a supply checklist, a step-by-step mini garland project, design tips, and a realistic sense of when to hire help. The next step is simple: pick a color palette, order your balloons, and block out one hour to practice.
Ready to make your next event unforgettable? Browse our foil balloons, letter balloons, and custom logo balloons to find the perfect accents. If you need custom designs or large-scale decor, contact our team and we will help you bring your vision to life.