Twisting balloons into playful animals is a delightful skill that brings smiles to both young and old alike. Regardless of whether you are preparing for a kid’s party, starting a new hobby, or simply trying to impress your friends, there are endless creative possibilities in balloon twisting. This beginner’s step-by-step guide covers everything from picking balloons to learning the basic twists and shapes required to create a few popular balloon animals, such as dogs and swords. Enter the world of creativity and let simple balloons transform into whimsical creations that can dazzle any audience.
Getting Started with Balloon Animals
Starting with balloon animals means you begin with the right materials. Get some good-quality twisting balloons—generally a 260 model, as they are the ones most commonly used for sculpting shapes. There must also be a hand pump, so the balloons can be inflated easily and efficiently. Practice inflating the balloon, stopping when about an inch or two is left uninflated to allow for twisting. Work with simple designs, such as a basic balloon dog constructed by twisting the head, ears, body, and legs. Pay attention to perfecting your twisting so your balloons don’t pop and hold their shape well. From there, with plenty of practice, you will begin creating larger and more complex shapes and animals.
Essential Tools for Making Balloon Animals
The creation of balloon animals requires specific specifications to ensure that the process is easy, enjoyable, and efficient. The tools you might need, with some selection tips for the best choice:
Balloon Pump
The high-quality balloon pump is an absolute necessity for inflating and twisting balloons quickly and efficiently. Manual balloon pumps cost less and are portable, so consider them. But when it comes to saving time for huge events or a professional setup, the electric type is always the way to go, according to one recent review. An electric balloon pump, such as the IDAODAN Portable Electric Balloon Pump is deemed by many as one of the most reliable and user-friendly on the market.
Twisting Balloons (Qualatex Balloons)
Not all balloons fit the purpose of twisting. Seek balloons that are durable and are made for balloon animals. The industry-standard balloons are Qualatex 260Q balloons, appreciated for their stretchiness and resistance to bursting. They come in many colors, suitable for all sorts of vivid designs. A pack of 100 balloons typically costs between $9 and $15.
Additional Essential Tools
- Marker Pens: Fine-tip, water-resistant marker pens will be used for adding facial features and decorative patterns to your masterpieces. These will also give your permanent design a nice finish, with brands like Sharpie dominating the market.
- Scissors: Though scissors might not necessarily be the best to always have on hand on the road, it might help to have a tiny pair of sharp scissors for cutting excess balloon parts or a precise decorative adjustment.
- Lubricant or Balloon Powder: Oftentimes, a very light dusting of balloon powder is given by professionals to prevent balloons from sticking together, giving more ease to the twisting process. Silicon or Petroleum-based lubricants grease the whole process nicely as well.
- Repairing Patches: Sometimes an accident might occur; a balloon might pop or lose air. When patches for repair are at hand, you fix it in no time.
- Storage Bag or Case: Keep organized by investing in a sturdy storage bag or toolbox that can efficiently hold and segregate your balloons, pump, and tools. Look for an option that is portable with compartments.
Choosing the Right Balloons for Beginners
In beginner balloon twisting, balloons must be easy to handle and reliable for twisting. Not all balloons are the same, and the wrong ones will bring nothing but frustration and breakage. Below is a detailed and exhaustive list of some of the best balloons for beginners:
| Balloon Brand | Key Features | Best For |
|---|---|---|
| Qualatex 260Q Balloons | Industry standard, durable, easy to twist, available in many colors | Perfect for beginners, less likely to pop during practice |
| Betallatex 260 Balloons | Softer than Qualatex, excellent stretch and bounce | Easy manipulation for beginners |
| Sempertex Balloons | Consistent quality, smooth and easy to twist, heavier latex | Reduces risk of sudden popping, safe for complex designs |
| Tuf-Tex Balloons | Strong with good stretchability, various sizes and colors | Practice without constant breakages, budget-friendly |
| Unique Brand Balloons | Affordable and widely available | Great for beginners on a budget, ideal for practicing basic shapes |
Basic Techniques for Twisting Balloons
Fundamental Steps
- Inflate the Balloon Properly: The balloon should be left with at least an inch completely uninflated at the end for easy twisting without popping.
- Create a Secure Twist: Grasp the balloon firmly and twist it approximately three or four times in the same direction to prevent the twists from becoming undone.
- Lock Twists Together: When locking two or more twists together, interlock the twisted parts and twist once or twice to secure them.
- Use Gentle Pressure: Keep a constant and gentle pressure when twisting the balloon to avoid overstretching or popping.
- Practice Basic Shapes: Work on simple designs such as a dog or a sword first for confidence and familiarity with the process.
Learning the Fundamental Twists
Learning the art of balloon twisting is about learning some basic twists and practicing these. These key techniques are what will enable you to make a variety of balloon sculptures. Here are the 5 basic twists along with execution details:
1. The Basic Twist
- The most basic and common twist
- Pinch the balloon where you desire to make a twist and then begin turning it 3-4 times in the same direction
- Hold onto the twist for a few seconds until you can secure it by locking it against another twist
2. The Lock Twist
- After making two basic twists, bring the second twist back to meet the first
- Rotate the sections joined together 2-3 times to lock into place
- This method is used largely to create loops or join balloon segments
3. The Fold Twist
- Fold the balloon to make a loop and twist it at the base of the fold
- It is used to make ears, petals, or other loop features in designs
- Try to fold evenly so that it will look well-balanced
4. The Tulip Twist
- Push one end of the balloon slightly inward with one finger, then pinch and twist at the base
- Creates a rounded or bulb-like feature, commonly used in decoration or flower design
- Very useful for getting that professional finish
5. The Pinch Twist
- Isolate a small bubble on the balloon at the desired point then twist it several times, holding the rest of the balloon still
- Pull that small bubble away from the main balloon slightly and twist it to lock it into position
- This is very useful for forming shapes for noses, eyes, or other decorative features
How to Handle and Inflate Balloons
Inflation and handling of the balloons should ideally be undertaken to ensure the durability, safety, and intended application of the balloon art. Follow these five basics for insulation:
- Select the Right Type of Balloon: Always use good-quality latex or foil balloons that are suitable for your design and event. Bad-quality balloons have a greater propensity to pop or lose air suddenly.
- Inflate to the Appropriate Size: Avoid overinflating your balloons to prevent blowouts. Most balloons have a recommended size, which is usually indicated on the packet, for example 12-inch or 18-inch. Use a balloon sizer or a ruler for measurement.
- Using a Balloon Pump: Hand pump or electric inflator should always be used for inflating balloons, especially the latex ones. This protects a person from feeling dizzy and reduces the chances of transfer of saliva into the balloon.
- Avoid Sharp-edged Surfaces: Never handle your balloon around sharp-edged stuff, making it the sponsor of puncture points. Tie the balloon with smooth movements to stop the creation of weak points.
- Balloon Storage: Before use, balloons should be stored away from direct sunlight, extreme temperatures, dampness, and heat, as these conditions can weaken the material.
Common Mistakes and How to Avoid Them
| Common Mistake | How to Avoid It |
|---|---|
| Not leaving enough nozzle space | Leave a longer nozzle for tying and adjustments |
| Inflating balloons too slowly | Inflate quickly to prevent air leakage or popping |
| Uneven bubble sizes | Measure and twist consistently for proportional designs |
| Loose twists and knots | Twist tightly and secure knots firmly |
| Over-inflating balloons | Leave some uninflated space to prevent bursting |
| Using old or brittle balloons | Use fresh, high-quality balloons for durability |
| Twisting too slowly | Twist quickly to reduce the risk of popping |
| Incorrect pinch twist size | Make medium-sized twists for better functionality |
| Lack of practice | Practice regularly to improve speed and precision |
Creating Easy Balloon Animals
Making animals with balloons can be fun and straightforward if you learn a few tricks. High-quality balloon twisting balloons, such as 260Q balloons, are used because they are specifically designed for creating shapes. Inflate the balloon, securing around 3 inches of the tip uninflated so that it can be twisted without popping. Begin with simple things such as a dog or a sword, for which only a few twists are needed. Always grip the balloon gently but firmly, and ensure that you twist in the same direction for every fold to lock the form. Practicing frequently leads to speed and precision.
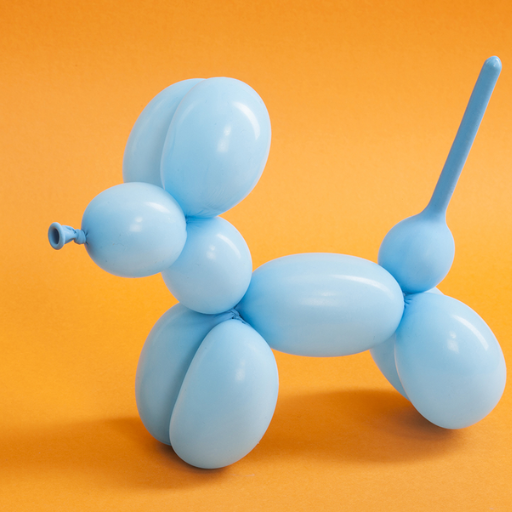
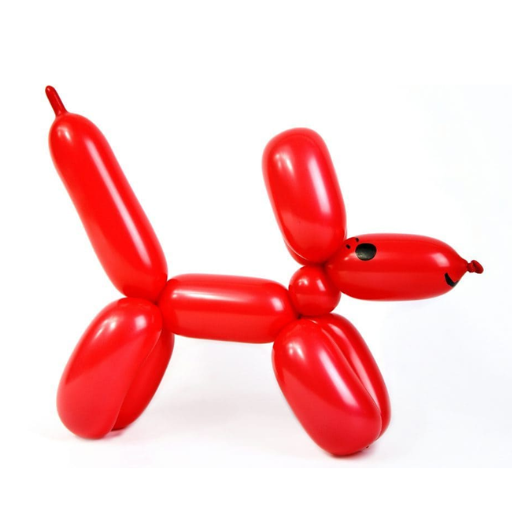
Step-by-Step Guide to Making a Balloon Dog
| Step | Instruction |
|---|---|
| 1. Inflate Balloon | Leave 2-3 inches uninflated at the end |
| 2. Create Snout | Twist a 2-inch segment near the knot |
| 3. Make Ears | Twist two 1-inch segments after the snout |
| 4. Lock Ears | Twist the two ear segments together |
| 5. Form Neck | Twist a 3-inch segment below the head |
| 6. Create Front Legs | Twist two equal 3-inch segments after the neck |
| 7. Lock Front Legs | Twist the two leg segments together |
| 8. Form Body | Twist a 4-inch segment below the front legs |
| 9. Create Back Legs | Twist two equal 3-inch segments after the body |
| 10. Lock Back Legs | Twist the two back leg segments together |
| 11. Adjust Tail | Leave the remaining segment as the tail |
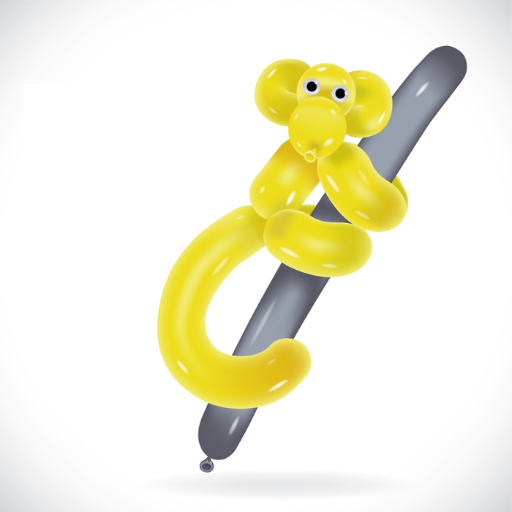
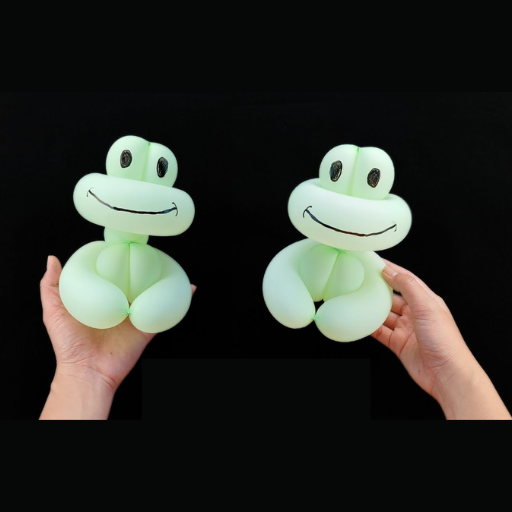
How to Make a Simple Balloon Monkey
Another instructive fun activity is making a balloon animal. Here is an easy, step-by-step guide to making a balloon monkey with some tips on the way.
Materials:
- One long twisting balloon (a 260 balloon is recommended), brown or whichever color you want for the monkey
- A balloon pump makes inflation easy
- A permanent marker to add details (optional)
Step-by-Step Instructions:
Step 1: Inflate the Balloon
Inflate your balloon, but do not fill it to the brim; the last 3 to 4 inches should be left uninflated. This allows room for twists, preventing it from popping. Tie the knot firmly to seal the balloon.
Step 2: The Head and Ears
Twist a 2-inch bubble that will serve as the monkey’s head. Then twist two smaller bubbles of about 1-inch in size for the ears. Fold two ear bubbles together and twist them around the base of the head bubble to lock them in place.
Step 3: The Body
Make a bubble about 4 inches big; this will form the neck. Make two equal-sized bubbles about 3 inches for the front legs. Twist the two leg bubbles together under the neck bubble.
Step 4: The Back and Legs
Make a longer bubble, about 5-6 inches, for the monkey’s body. Make the back legs just like the front ones with two 3-inch bubbles and twist them at the end of the body part.
Step 5: The Tail
Use the uninflated portion of the balloon to create a long, curved tail. Give the tail some personality by gently curving it tighter or looser with your hand.
Step 6: Add Final Touches
With your permanent marker, have fun drawing your monkey’s face – eyes, nose, and a happy smile – that really add to its charm.
Tips for Success:
- Be in an environment where it’s calm and quiet to give full attention to the twisting techniques while avoiding distractions
- Have a gentle twisting technique that doesn’t risk popping the balloon
- When making several monkeys, maintain the same consistency of inflating so that your shapes will all be uniform
Did You Know?
- 260 is the size of a balloon in inches, representing the diameter of 2 and the length of 60 when fully inflated, which is perfect for detailed balloon twisting
- Balloon sculpture is a very ancient form of entertainment that goes back since the 1930s and remains one of the favorite entertainments at parties everywhere
Crafting Other Easy Balloon Animals
| Balloon Animal | Key Steps |
|---|---|
| Balloon Swan | • Inflate balloon, leave 4-inch tail • Bend into spiral, twist middle for loops • Tuck one loop into the other for body • Pinch neck to shape head and beak |
| Balloon Monkey | • Inflate balloon, leave 6-inch tail • Twist for face, fold twist for ears • Add twists for arms, legs, and tail |
| Balloon Giraffe | • Inflate balloon, leave 3-inch tail • Make long neck, twist for head and ears • Add twists for legs and body |
Advanced Balloon Animal Techniques
Balloon animal advanced techniques involve mastering specialized twists and incorporating more than one balloon into a single design. Some of the basic procedures include:
- Double Layering: Put a balloon inside another to produce striking textures or patterns. This technique, unlike any other, will make one wary of their creations from durability and appearance standpoint.
- Weaving: Interlace many balloons to assemble large sculptures, much in detail, such as baskets, hats, or abstract shapes.
- Combination Twists: Combine one or more twists of the basic ones: lock twist, pinch twist, and tulip twist. These more complex designs require precise measurements and skilled handling.
- Adding Accents: Smaller balloons or accessories, such as stickers and ribbons, will be added to emphasize certain features and make the sculpture more visually appealing.
Once you become proficient in these techniques, you will be able to create professional balloon art for special events, shows, or personal occasions.
Tips for Adding Decorative Elements to Balloon Animals
- Use of Markers or Paint: Application of eyes, patterns, or textures using non-toxic markers or balloon paint would add life to the characters and provide a personalized touch to the sculptures.
- Attach Small Accessories: Add small, lightweight accessories such as stickers, ribbons, or pompoms to embellish the design; these items can be fixed using double-sided tape or adhesive dots.
- Application of Glitter or Shimmer: Sprinkle glitter or shimmer sprays that are balloon-friendly on the sculpture to create an enchanting effect that does not destroy the balloon.
- Embedding LED Lights: To illuminate your balloon animals, place small LED lights or glow sticks inside your transparent or translucent balloons, enhancing their beauty in dim light.
- Layering Balloons: Using balloons of various colors, sizes, and even textures adds depth and dimension to the sculpture. Smaller balloons could serve as accessories that adorn the larger ones, such as hats or flowers.
Fun Ideas for Balloon Animal Decorations
- Themed Parties: The balloon animals created should relate in some way to the party’s theme: pirates, jungle animals, princess crowns, and the like. Furthermore, they can be used as decorations or party favors.
- Centerpieces: These large, colorful balloon animals can make an exquisite centrepiece, adding heaps of charm and whimsy to any event.
- Photo Booth Props: Guests will appreciate finishing balloon animals to adorn themselves in the fun photos being taken, producing playful memories.
- Cake Toppers: The smaller and more delicate balloon animals would be ideal as non-traditional and creative cake toppers for special occasions.
- Room Decor: Arrange balloon animals on shelves, hanging from ceilings, or around furniture to bring lively and festive ambience to the space.
Creating Balloon Hats for Parties
Balloon hats are one of the creative ways to provide fun to a party for children and adults alike. They are colorful, customizable, and can be matched with most themes-for example, from pirates to princesses, animals, and even abstract designs! The balloon hats are their kind of wearable art and a great source of interaction and laughter; hence, I think they are excellent icebreakers for a social event.
For making balloon hats, quality latex balloons for twisting must be used. For design purposes, 260Q is preferred. It will last long and allow for easy manipulation of other intricate designs. To make a basic one-balloon hat, inflate the balloon but leave an inch at the end un-inflated. Then, twist the balloon to form a circle that will fit nicely on the guest’s head. Thereafter, further decorations can be added, such as spirals, flowers, or funny extensions with other balloons.
Event Planning Tips:
- Multi-color and bright balloon hats are very popular lately, with Pinterest and Instagram lending attention to designs like crowns, unicorn horns, and funny animal shapes
- Event planners recommend setting up stations with pre-made hats and allow attendees to create their own with guidance adding that extra personal flare to the party
- With bigger events, it is best to hire a professional balloon artist or purchase an electric balloon pump to save time and provide quality
- Balloon hats make an inexpensive entertainment option with a material cost of a couple of dollars a piece
Incorporating Balloon Animals into Celebrations
Balloon animals can be used for almost anything relating to a celebration, really giving an interactive and festive feel to an event. Five detailed ideas are now listed to show how balloon animals can act as an enhancement to your celebrations:
| Celebration Use | Description | Benefits |
|---|---|---|
| Party Favors | Give balloon animals as party favors for guests to take home | Guests will have a cheerful memory of your event |
| Interactive Entertainment | During birthdays, balloon artists create animals on the spot | Keeps children entertained and satisfies their curiosity |
| Theme Decor | Balloon animals customized according to event theme | Jungle-theme: monkeys or giraffes; Underwater-theme: dolphins or fishes |
| Photo Booth Props | Balloon animals as creative photo booth props | Inspires guests to take whimsical pictures that become cherished keepsakes |
| Centerpieces | Incorporate balloon animals into table decorations | Creates playful and visually attractive setup with complementary colors |
References
-
“Notes on the Appearance of Balloon Animals”
- This essay explores the cultural and artistic significance of balloon animals and their impact.
- Read more on ACSA Proceedings
-
“Balloon twisting 101”
- A guide on balloon twisting techniques and creative ideas for making balloon animals.
- Access the PDF on Scouting Web
-
“History of the use of balloons in scientific experiments”
- Discusses the historical use of balloons, including experiments involving animals.
- Available on Harvard ADS
Frequently Asked Questions (FAQ)
What are the best balloon brands for beginners learning to twist balloons?
When starting with balloon twisting, good quality balloons are essential. Brands like Qualatex and Betallatex are highly recommended for their durability and ease of use. These brands offer 260 balloons, which are ideal for making a variety of balloon animals, including the popular dog and giraffe designs.
Can I learn how to make balloon animals using a tutorial on YouTube?
Yes, YouTube is a fantastic resource for beginners wanting to learn how to make balloon animals. Many entertainers share step-by-step tutorials that guide you through the process of creating different balloon shapes and designs. Simply search for “balloon animals for beginners” and you’ll find plenty of instructional videos.
How do I hold the balloon while twisting?
When making balloon animals, it’s essential to hold the balloon securely. Grip the inflated part of the balloon with one hand while using your other hand to twist and shape it. This will give you better control and allow you to create more intricate designs without the balloon popping.
What is the best way to inflate a long balloon?
Using a hand pump is the most efficient method to inflate long balloons, like those used for making balloon animals. It allows for controlled inflation and reduces the risk of popping the balloon. If you don’t have a pump, you can also blow into the end of the balloon, but be careful not to over-inflate it.
What techniques should I know for making a balloon hat?
Making a balloon hat involves a few key techniques, such as folding, twisting, and tying. Start by creating a base that fits comfortably on your head, then twist and pinch sections to form the desired shape. Practice is key, and with time, you can easily make colorful and fun balloon hats.
How can I make lots of different balloon animals with just one balloon?
With some creativity and practice, you can make various balloon animals using just one long balloon. Techniques such as twisting sections and making smaller components can help you create unique designs. Focus on mastering the basics, and then experiment with different shapes to expand your repertoire.
What should I do if my balloon pops while I’m sculpting?
If your balloon pops while you’re sculpting, don’t be discouraged! It happens to everyone, especially when starting out. Simply take a deep breath, grab a new balloon, and try again. Use the experience as a learning opportunity to adjust your technique and improve your dexterity.
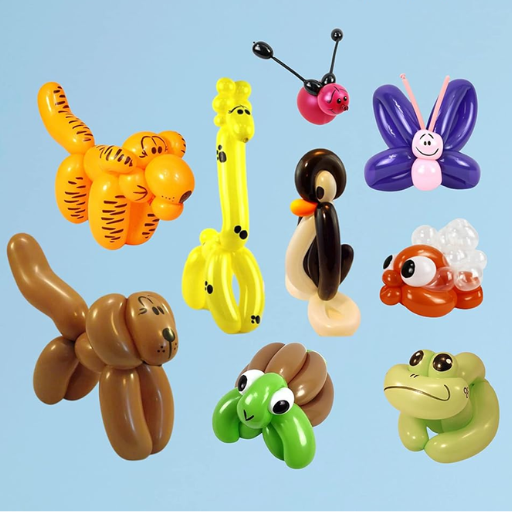
What are some popular balloon animals that kids and adults enjoy making?
Some popular balloon animals include dogs, giraffes, swords, and hats. Both kids and adults enjoy these designs and are great for parties and events. By learning to make these simple shapes, you can entertain guests and bring a smile to their faces.
Follow through with these simple directions, and a lovely balloon creation that will impress every child or adult awaits you. Keep practicing to sharpen your skills and try out different designs. With patience and practice, you’ll be creating amazing balloon animals in no time!