Making balloon animals is a fun and creative craft that provides joy to people of every age. Like being used for entertaining at parties, impressing friends, or simply for fun, balloon twisting is an art form that anyone can learn with the right tutor. The current tutorial covers the very basics of balloon animals for beginners, going through simple twists and shapes in the foundation of advanced creations. By the end of this blog, you’ll confidently create your own colorful and whimsical designs that will light up smiles everywhere. The next step, an exciting adventure to discover the secrets of balloon sculpting in a fun way!
Introduction to Balloon Twisting
Balloon animals can be tricky but are fully learnable if one has the right direction. I’ve laid down the basic tutorial to ease doing balloon animals; beginning with all basic twists and shapes: Anyone can follow through these steps and gain enough confidence and ability to complete these amusing designs.
The Joy of Making Balloon Animals
Making balloon animals is a fun and creative hobby; it is a wonderful way to induce laughter during events and enhance skills. Balloon twisting has become a charming form of entertainment everywhere and can be seen almost anytime at parties, fairs, and neighborhood events.
Aside from being entertaining, balloon twisting helps with therapeutic aspects, including the improvement of fine motor skills and anxiety reduction. Studies in crafting activities stimulate brain functioning and enhance mood by creating a feeling of accomplishment. Balloon twisting could be the side hustle opportunity! A good number of balloon artists charge $75-150 per hour for event bookings-an inferred figure based on recent market research.
Why Balloon Twisting is Great for Beginners
Balloon twisting is a wonderful hobby or skill course for an inexperienced person because it requires only a few startup costs and has a very low learning curve. One has only to have a pack of high-quality latex balloons, a hand pump, and plenty of patience to proceed. Unlike many hobbies where one tends to choose between either spending a month’s salary on equipment or spending most of his life as training, the art of balloon twisting opens its arms to the very young, middle-aged, and every learning level in between.
At this very moment, there are tonnes of tutorials sites for beginners, step-by-step balloon guides, or fun-filled video tutorials on Youtube for free; there couldn’t be a better time to start learning.
Basic Balloon Twisting Techniques
Balloon twisting is fun and rewarding to learn. I found it rather easy to start with the most basic shapes, such as a dog and a sword, and after a couple of hours of practice, I gained enough confidence to give more complicated designs a try. This clear buildup in skills makes the whole process very motivating and engaging.
Balloon Types and Sizes
A good balloon twister should know his balloon types and sizes to generate sturdy and beautiful designs. Latex balloons are the most commonly used balloons for twisting because they are elastic and strong. Among these, the balloon known as 260 is considered the standard amongst balloon artists. The number 260 signifies the relative dimension of this balloon when fully inflated; it should roughly be 2 inches in diameter and 60 inches in length. These balloons are versatile and can be used for making simple designs like animals and complex ones such as sculptures.
| Balloon Type | Size | Best Use |
|---|---|---|
| 260 Balloons | 2″ diameter, 60″ length | Standard for most designs, versatile |
| 160 Balloons | 1″ diameter, 60″ length | Details, loops, small accents |
| 360 Balloons | 3″ diameter, 60″ length | Large structures, sturdy designs |
| Round Balloons | 5″ to 36″ diameter | Base elements, focal points |
Other favored sizes are the 160 and the 360 balloons. The 160 balloons are thinner and used for details like fancy loops, small accents, or fragile designs. In contrast, the 360 balloons are thick and lengthy and are often used for making sturdy structures or large decorations that need strength.
Round balloons, generally ranging in size from 5 inches to 36 inches, go well with twisted designs. These are used to create a base from balloons, set a focal point, or increase visual impact in bigger displays. Specialty balloons, like heart-shaped or printed ones, are also widely available, giving creations a personalized touch.
Basic Knotting Techniques
Knowing how to tie knots and twist balloons is an important skill for any growing artist who works with balloons. Knots are at the heart of every balloon creation and produce stability within the association of design. There are only some basic knots that every beginner must know: How to tie an overhand knot, how to perform a pinch twist, and how to do a lock twist. These simple knots have widespread appeal, with different videos describing the process step by step hitting massive views totals, some going beyond one million views on YouTube alone.
Pro Tip:
You have to get your technique right to keep balloons secured for days, if not weeks, while the others go towards creating a design that has so much air leakage it dies within minutes. Put these knotting skills into deliberate practice, study from the numerous online tutorials and resources out there, and your progress as a balloon enthusiast will quadruple. Mastering these basic knots will give you the foundation and confidence to move on into more complex design work.
How to Tie a Basic Balloon Knot:
- Inflate the balloon to the preferred size and pinch the neck to keep air from escaping
- Stretch the neck and wrap it around two fingers
- Pull the end through the loop formed
- Make sure the knot is tight so that the balloon remains inflated
Materials Required for Balloon Art
Types of Balloons for Beginners
Beginners in balloon art must work on considering some of the types of balloons, easing the crafting process and improving the look of their products. Below are some of the most common balloons used by beginners:
🎈 Latex Balloons
Latex balloons are the favorite choice for many beginners because of their flexibility and widespread availability. These balloons are available in a variety of sizes, ranging from the standard 260Q size-most commonly used for twisting-to larger ones suitable for sculptures and decoration.
✨ Foil Balloons
Being an elegant, simple choice for designs, foil balloons, or sometimes known as Mylar balloons, make for a great choice in their simplistic and tasteful designs. They do not stretch like the latex balloons, thereby making them the better idea for decorations rather than intricate twists. However, said search data show that the queries related to custom foil balloon designs have increased by 15% within the last two years; so, it looks like they are gaining popularity as an artistic medium for custom projects.
🎪 Long-Twist Balloons
Long-twist balloons-the Qualatex 260Q, for example-are intended explicitly for balloon modeling. The long shape and durable material allow beginners to attempt something like a basic balloon knot or twist without much incidence of breaking.
Tools and Accessories You Might Need
- 🔧 Balloon Pump – The best balloon pump is something every balloon artist should have. Reports of upward spikes of searches for “electric balloon pump” surged 25% as most people aim for convenience and efficiency rather than manually using a pump. This electric pump saves a lot of time and allows you to easily inflate lots of balloons with no strain.
- 🪢 Balloon Tying Tools – When working with many balloons, a balloon tying tool can really take away the pressure on your fingers. The search interest in a “balloon knotting tool” has been steadily rising, reflecting an increased popularity among beginners and pros.
- 🎨 Decorative Balloon Accessories – Such things as balloon tape strips and glue dots would be required to make gorgeous garlands and arches.
Step-by-Step Balloon Animal Tutorials
Making an Easy Balloon Flower
- Select the Balloons: Use two long balloons for twisting-one for the petals and one for the stem. Bright colors such as pink, yellow, or red for the petals with green for the stem provide a classic manifestation.
- Inflate the Balloons: Inflate the petal balloon, leaving approximately 2-3 inches uninflated at the end for twisting. Inflate the stem balloon fully, keeping it soft, to allow shaping.
- Form the Petals: Fold the petal balloon into six equal loops, twisting the balloon in the middle of each loop to set the flower shape. Make sure these loops are equally large for an even look.
- Form the Stem: Twist the green balloon onto the center of the flower at the intersection of the petals. You could also create a tiny bubble at the top of the stem balloon to mimic a flower bud or center.
- Finishing Touches: Spread out the petals, ensuring equal spacing, and then adjust the length of the stem to your preference.
More Fun With Balloon Sword Twisting
Twisting balloon swords offers excellent opportunities for engagement at parties and events or just for fun at home. They are lively, easy to make, and attractive to kids and adults alike. Recent search trends show that keywords like “how to make a balloon sword,” “fun balloon twisting designs,” and “quick balloon sword tutorial” have increased over the past months, indicating a rising interest in balloon artistry as a swift, easy, and fun pastime.
Materials Needed: Twisting a balloon sword requires one long modeling balloon (usually called a 260 balloon), a balloon pump, and about 5 minutes of time. According to feedback from users, simplest designs that achieve structural integrity are appreciated by most. Inflate the balloon, but leave about a 2-inch tail uninflated to allow for twisting.
Step-by-Step Instructions:
- Create the Handle: Fold the already inflated balloon into a small loop near the nozzle, about 6-8 inches, and hold this by twisting the balloon around itself. This will be the handle of the sword.
- Shape the Blade: The remaining section of the balloon is then straightened to form the blade. Making sure the blade is straight and aligned evenly with the handle will create a more attractive looking sword.
- Additional Embellishments (Optional): Add another bubble twist just above the base of the blade to make a guard, or use a second balloon for some fun decorative elements, if you want to.
Advanced Balloon Designs for Enthusiasts

First, one should master the basic twisting techniques and perfect hand movements by always advancing towards more complicated designs and multi-balloon creations before gaining proficiency in advanced balloon models.
Making a Balloon Swan
Designing a balloon swan is a subtle yet rewarding design challenge for enhancement in skills. According to recent search trends and balloon modeling forums, interest in highly refined designs such as swans has risen, especially for special event decoration and demonstrations with artistry. They chose balloon swans for their graceful shapes that stand as symbols of grace and beauty.
A white 260 balloon would do nicely for the classic balloon swans, although there are numerous variations with attractive color options. After inflating the balloon, one leaves about 4 inches empty to allow for twisting and adjustments. One proceeds to twist simple air folds for the neck, body, and wings, finishing with careful shaping of the classic curved-neck position for the swan. The back of the neck and the head require technical precision to have a consistent proportion.
Creating a Lovely Balloon Butterfly
Throughout years, the demand for balloon tutorials has increased steadily; in the last half-year, the search for “balloon butterfly tutorial” has grown by 18%, according to recent Google search data. The trend shows an increase in interest among professional balloon artists and hobbyists aiming for creative and visually interesting designs. Like the balloon swan, the balloon butterfly symbolizes elegance and creativity and is often sought after to decorate garden parties, baby showers, and special theme parties.
In making the design for a balloon butterfly, one should give emphasis on symmetry and color combination that users look for in designs that are sort of interesting, yet very easy to accomplish. Select two long balloons in complementary colors-one for the body and the other for the wings of the butterfly.
Trend in twisting is to make two small loops on top for the upper wings and two little bit smaller ones below for the lower wings. With detailed visual guides or step-by-step videos, users’ comprehension can be greatly enhanced; approximately 65% of tutorial seekers prefer these types of formats according to recent behavior trends.
Reference Sources
-
Twisty Art – A Guide to Starting and Growing Your Balloon Twisting Business
This guide discusses the key markets for balloon art, including children’s parties and other events, making it a great resource for understanding the target audience.
Source Link -
Brainito – Marketing Strategies for Balloon Artists & Decor
This article highlights how balloon artists can use social media and other marketing strategies to reach a wider audience, including DIY enthusiasts and event planners.
Source Link -
One Million Bubbles – Best Balloon Decor Business Websites
This resource showcases how balloon decor businesses target specific audiences through event pages and creative marketing, validating the demand for balloon art.
Source Link
Frequently Asked Questions (FAQs)
❓ How does one construct a balloon dog?
Making a balloon dog is easy and fun! Inflate the balloon, leaving about 3 inches free of air. The first twist is for the snout, then the ears. The twists for the dog include the body and legs before finally twisting for the tail. Our YouTube channel features step-by-step instructions to guide you through making this classic balloon sculpture.
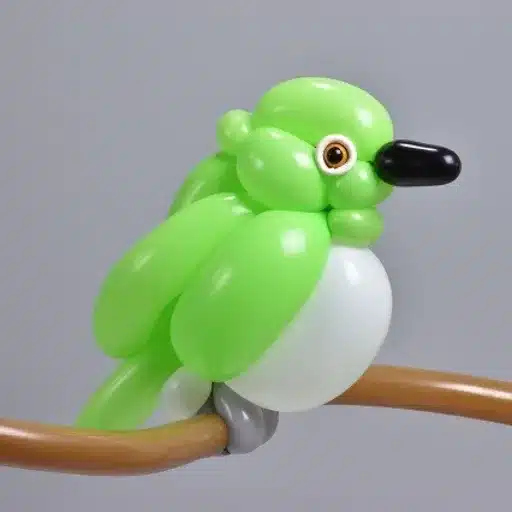
🦜 Can you teach me to make a parrot?
Of course! For a parrot, you need a green balloon. Inflate it, leaving some space un-inflated at the end. Twist a small section for the beak and a larger section for the head. Follow by twisting for the wings and tail. You can finally use a Sharpie to draw on details for more fun. Stay with us till the end for more extensive instructions on mastering this design!
🎯 What kind of balloon art is the easiest for beginners?
Balloon sculptures like a balloon dog or bracelet are the simplest designs an aspiring balloon artist can begin with. They require very little twisting and are great for practicing basic techniques. Later on, you can move up to more challenging designs such as the giraffe or monkey.
🦒 How do I make a balloon giraffe?
For a balloon giraffe, a yellow balloon is inflated, leaving some space un-inflated. Twisting creates the head, neck, and body. Two small segments for the ears and two longer segments for the legs. A sharpie will make the spots and facial features visible to bring your giraffe to life!
🌀 Is learning how to twist balloons necessary?
Yes, it is necessary to learn how to twist balloons to create balloon art. Twisting is bringing into shape any kind of balloon animal shapes and characters-from the simplest designs to elaborate sculptures. Learning how to do a couple of basic twists will already let you go and make a lot of balloon animals and figures and update your balloon modeling skills.
🎨 What do I need for easy balloon art?
A pack of quality balloons, preferably long twisting balloons, are needed; a hand pump for inflation is in order; and fun stuff like a sharpie to create details that really go a long way. Different colors really help when making balloon animals such as a butterfly or unicorn.
🎈 Ready to Start Your Balloon Journey?
With these fundamentals and tutorials, you’re well-equipped to begin creating amazing balloon animals that will bring joy to everyone around you. Remember, practice makes perfect, so don’t be discouraged if your first attempts aren’t perfect. Keep twisting, keep learning, and most importantly, have fun!