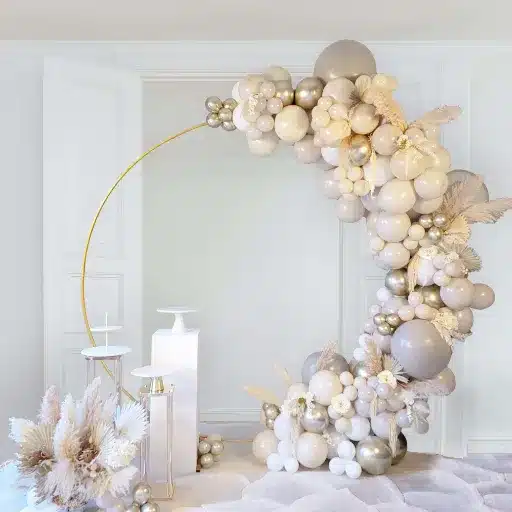
Balloons have always been associated with fun and play, but balloon animals are not that easy to make. They are often wrongfully regarded as professional, magic trick-like fancy. Still, it is a hassle-free and fun way of creating! If you are going to be the new cool kid, create your own animal and let your imagination run wild, then this guide is for you. We are going to start off by talking about the selection of the right balloons taking you step-by-step through the processes of creation. You will gain confidence to step into the new world of balloon art starting from very basic simple shapes which you will be able to work into lovely animals. What a wonderful way to bring fun and color to any event!
Introduction to Balloon Art
What Are Balloon Animals?
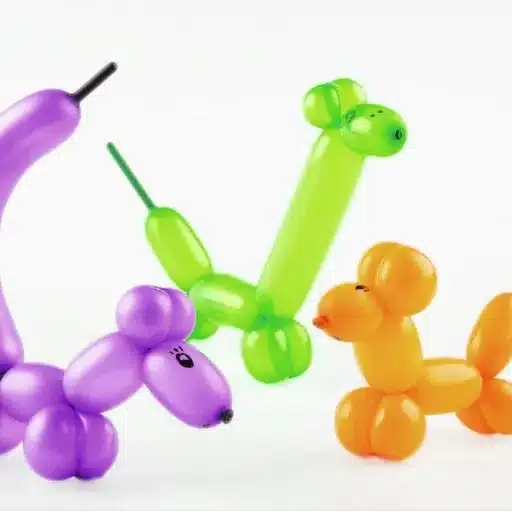
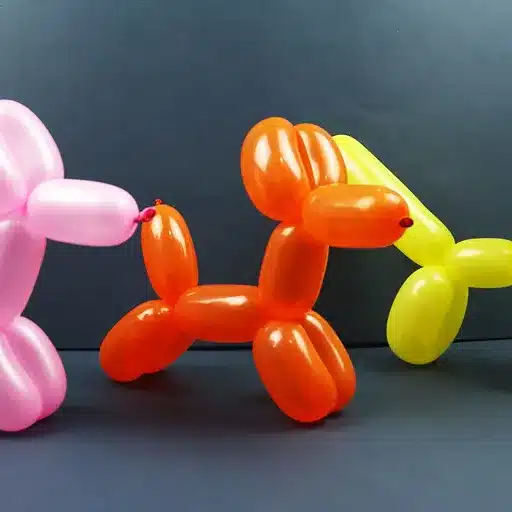
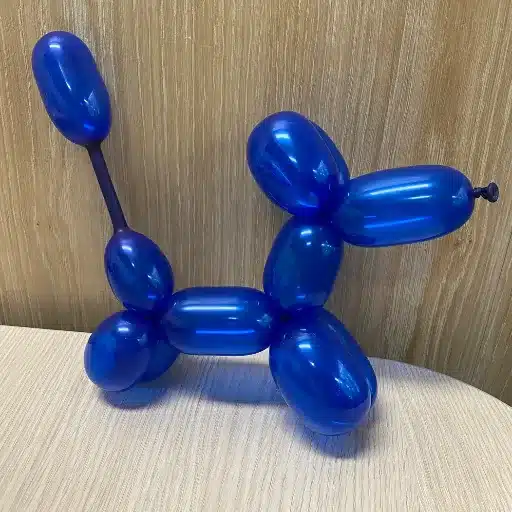
Balloon animals are wonderful and imaginative figures created by bending and molding special balloons into the forms of animals and other fantasy figures. This kind of balloon art is not just a hobby but also a highly interactive and entertaining activity for both young and old. The long and slim balloons are the ones used, and they are made to tolerate the twisting and turning that are done to them without popping.
There are some fun facts that reveal the constant fascination with balloon animals. For instance, balloon art tutorials and videos on sites like YouTube have attracted millions of viewers as a result of recent trends, and there are dozens of creators who post their know-how online. At the same time, balloon twisting is still one of the most in-demand attributes of professional entertainers, with many kids’ acts using it as part of their performance. Particularly, the worldwide balloon industry which includes the specialty twisting balloons is predicted to witness slow but sure growth which is another indicator of the massive popularity of this art.
History of Balloon Twisting
Molding balloons, also termed making balloon animals, has an interesting and mesmerizing past tracing back to the early 1900’s. One of the first references goes back to 1939 when a magician called Herman Bonnert was the lucky one to present the audience the concept of twisting the balloons into simple animal forms. There is a lot of controversy around the exact person who began the process of balloon twisting, however, it is quite universally accepted that the craft really blossomed in the mid-20th century being one of the main attractions at carnivals, birthday celebrations, and clown acts.
The elements that are used for balloon twisting have changed significantly with time. The first balloons were made from the intestines or bladders of animals, just like the initial kinds of air-filled ornaments that were formed. In contrast to this, modern-day balloon twisting makes use of non-toxic and recyclable latex balloons that are at the same time strong and soft. A recent trend considered the future of the global latex balloon market to be one of continued growth with a compound annual growth rate (CAGR) of around 5.2% during the years 2023-2028 period. The latter indicates the ever-increasing need for balloon twisting in various areas like entertainment, event decor, and professional artistry.
Required Materials for Making Balloon Animals
Types of Balloons for Making Balloon Animals
260 Balloons
These are the signature balloons for making balloon animals and shapes. Their name, “260”, denotes the size they assume when inflated—about 2 inches in diameter and 60 inches in length, respectively. The brands like Qualatex and Betallatex have earned a reputation for facilitating the production of top-notch 260 balloons, famed for their flexibility and durability, these qualities ultimately help to avoid the popping of the balloons during elaborate twisting.
160 Balloons
Slightly less hefty than their 260-size peers, these balloons are the best option for providing finer touches or for making smaller, fragile shapes. Their 1-inch diameter and 60-inch length enable the implementation of highly precise designs such as flowers and accessories for big sculptures.
350 Balloons
These are the most hefty and robust kind of balloons you could ever want, if you like big-sized animals. They are measured to be 3 inches wide and 50 inches long when inflated. They are predominantly utilized in forming the basic frameworks of larger works, as their size is more visually dashing.
Double-Stuffed Balloons
The method that consists of inserting a balloon inside another one. So the outcome is a new custom color or a certain aesthetic effect. The artist Very often the use of this technique for matching event themes or bringing striking visual depth to their works is through this case.
Essential Tools for Balloon Artistry: Balloon Pumps
Definitely, the balloon pump is the most important and necessary equippment for the balloon artist, as it considerably decreases the effort and time taken when inflating many balloons, especially if the balloons are for a large decoration or intricate design. These pumps are available in two main types—manual and electronic—each with its own unique benefits. Electric balloon pumps have recently been trending with popularity, the global market has been growing at an approximate rate of 18% in the past year. The main reasons for this trend are their speed and the proficiency in managing large quantities of balloons which makes them suitable for professional events.
Airflow capacity, build quality, and ease of use are some key factors to consider when choosing a balloon pump. High-quality electric pumps such as the IDAODAN Portable Dual Nozzle Electric Inflator have earned user consideration as reliable and capable of blowing a balloon in just 2-3 seconds. On the other hand, pumps from TOTA and Qualatex, which are praised for their ergonomic design and long-lasting durability, are the ones producing strong manual pumps.
Balloon Animal Steps: Step-by-Step Instructions

How to Make a Balloon Giraffe
Collect the Materials
The materials you will require are a twisting long balloon, ideally a 260 balloon, a balloon pump, and a marker for possible facial features.
Balloons to be Inflated
Fill up the balloon with a pump, keeping the tail part about 4 inches uninflated. Because of this extra balloon space to twist it up and down the pump without bursting.
Make the Giraffe with Head and Ears
Make a small bubble for the snout at first and then create two more small bubbles of the same size for the ears. Now twist the two bubbles together and keep them locked so that they will form the giraffe’s head.
Neckmaking
Once you are done making the head part, make a long section to represent the neck. The long neck of giraffes is their identity so this part should be proportionately longer than the neck of a normal balloon animal.
Legs in Front
Make two bubbles of equal size and twist them into the front legs, then keep them secure at the neck base by tying them together.
Creating the Body
Twist a small bubble for the giraffe’s body which will be based on the size of the previous bubble that will be left for the hind legs and tail.
Tail and Hind Legs Shaping
Make two bubbles of equal size for the hind legs just like the front ones. The giraffe’s tail will then be the part of the balloon that has been left uninflated.
How to Make a Balloon Swan
Balloons to be Inflated
Inflate the twisting balloon, leaving about 2-3 inches of uninflated space at the tail. This ensures there’s enough room for twisting without popping the balloon.
The Swan’s Neck to be Created
Starting at the knotted end, make a long twist around 8-10 inches for the swan’s neck. Adjust the length of the neck based on your preference for the final design.
Form the Body
Fold the balloon back on itself to create a loop about 8 inches long. Twist where the neck meets the loop to secure the body in place.
Shape the Head and Beak
At the top of the neck, make a small bubble about an inch long. This bubble will represent the swan’s head. Twist a slightly smaller bubble (around half an inch) to create the beak. Roll the beak bubble through the head to lock it into position securely.
Adjust the Wings and Neck
Gently pull back the loop (the body) to form an oval shape, representing the wings. Carefully bend the neck backward to create the iconic swan curve.
Add Final Details
Use your hands to adjust the overall shape for symmetry. If desired, use a marker to draw eyes on the swan’s head for a personal touch. You can even add color or other decorations to make your swan unique!
Troubleshooting Common Issues
Fixing Twists and Knots
Securing Knots Properly
Inadequate tightening is one of the leading causes of knots getting loose. Hence, to prevent it from happening, be sure to pull the ends of the balloon tightly after tying, thus making a neat and secure knot. If you use the two-finger technique for greater control, you may find it advantageous when making small and intricate designs. A recent research posted on Google finds that double-knotting can increase knot durability by as much as 25%, especially when balloons are used in large installations.
Making Stable Twists
It is essential to apply equal pressure on both sides while twisting the balloon for twists. The professionals suggest making at least three consecutive twists to “lock” the shape in place, thus helping to prevent slippage. Also, if one section seems unstable, gently reinflate or change the pressure to balance the overall tension of the balloon.
Repairing Mishaps
In case of a slip, you can refasten the twist or knot by delicately moving through the adjacent areas instead of redoing the whole structure. Clamps and clips can be considered as tools that will temporarily hold the sections of the balloon during readjustments.
Environmental Considerations
Temperature is an important factor that can either enhance or deteriorate the holding power of twists and knots over time. To be on the safe side, use a continuously mild temperature zone (around 70°F or 21°C) to avoid balloons being either too rigid or too stretchy. The data released by the industry professionals reveals that appropriate environmental conditions can lead to a 15%-20% increase in the life span of the design.
When to Replace Balloons
Balloons are not only durable concerning their usage but also have a limited lifespan and their replacement should occur under specific conditions to ensure the quality and safety of your designs. The degradation of latex balloons is a natural process which, by the way, happens very quickly; elasticity and rigidity are lost when the balloons are subjected to factors like sunlight, heat, and humidity. Experts recommend that latex balloons which are more than 24-48 hours old should be replaced, for they may already be close to losing their lively look and strength up to this point.
On the contrary, foil (or Mylar) balloons may last for days to weeks if they are not exposed to extreme temperatures; however, you should replace them if you observe that they are getting less inflated, have developed deep folds or along with other defects that affect their appearance or utility. Different studies report that the average float time of helium-filled latex balloons is 12-24 hours, while foil balloons typically float for 5-7 days if they are properly sealed during filling.
Reference Sources
-
Twisty Art – A Guide to Starting and Growing Your Balloon Twisting Business
This guide discusses the target audience for balloon twisting, including children’s parties and event organizers, and provides insights into the practicality of learning and teaching balloon animal steps.
Source Link -
Certitude – Balloon Animal Instructions
This resource provides detailed instructions for making balloon animals, emphasizing its fun and engaging nature for both children and adults.
Source Link
Frequently Asked Questions (FAQs)
Which balloon animals are the easiest to make for beginners?
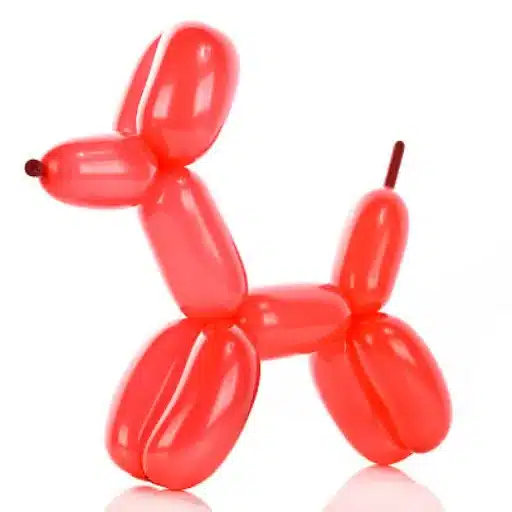
For beginners the easiest balloon animals are those that can be made from simple shapes like a balloon dog and balloon giraffe. Due to the fact that these shapes normally demand just a few basic twists, they are very suitable for the absolute beginner. Most how-to-guides for balloon techniques for beginners carefully go through each step, thus making it possible for you to get the hang of it and become confident in your twisting skills.
Can I use the same techniques to create a balloon giraffe?
The answer is yes, because the same twisting techniques for a balloon dog can be applied to making a balloon giraffe. Start with inflating a long balloon and leaving a tiny tail. Make the giraffe’s legs by using basic twists and a fold twist for the neck. Loop twist for the giraffe’s head and ears then done. Each part should be twisted and secured for the shape to be stable.
What equipment should I use to create balloon animals?
If you want to make animals out of balloons the basic necessity for this activity is long balloons, a balloon pump to inflate it, and instead of scissors for trimming unnecessary balloon may be used. A hand pump is usually suggested as the best for not bursting and also for making the process of inflation easier. If you have an assortment of colored balloons, you can create different animal shapes and designs.
What is the best way to stop balloons from bursting when twisting?
To stop balloon popping during twisting, make sure to blow the balloon up to the correct length and not too much. Grasp the balloon firmly at the twist to avoid applying too much tension to one area. Be gentle with your twisting and do not make any sharp bends. On the other hand, consider using high-quality balloons made for twisting to minimize the chance of popping.
Describe how to make a balloon dinosaur?
The first step to making a balloon dinosaur would be to use a long balloon and start inflating it, leaving a few inches for the tail at the end. The next step is the body which consists of a basic twist, then the legs and neck made with further twists. For the dinosaur’s head, create a fold twist and secure that. You can make the tail at the end by twisting a segment to add more detail to your balloon dinosaur.